openHAB 3.0 - how to create a switch that publishes its state via MQTT messages
I am not an openHAB expert, far from it. At the end of 2020, for the needs of a project, I wanted to use openHAB to (easily) collect the data reported by conventional sensors and “export” them through MQTT messages. Why a platform like openHAB ? To free myself from the communication part (and all the protocols) with the sensors/actuators, and thus be able to use the wide variety of equipment available on the market. I just had to connect openHAB to an MQTT broker and trigger the sending of message via rules…
At that time it was openHAB 2.x with MQTT modules in version 1 or 2 (!) and I admit I got lost in the various tutorials… As I said at the beginning, I am not an openHAB expert and I was also discovering the architecture with all its bindings, things, items, channels, etc. and its Basic UI, Paper UI, HABmin, HABPanel, etc. Some tutorials using GUIs, others using text files … And to top it off, my Raspberry SD card crashed at the end of December !
Fortunately, in the meantime Santa Claus passed by and brought us openHAB 3.0 ! A good reason to start from scratch with the new architecture. In this tutorial I will explain how to create a switch which, each time it is activated, publish an MQTT message with its on/off state.
For information, here is my configuration for this tutorial. Using Docker doesn’t change anything; it just allows you to start from zero quickly… just in case…
- laptop running Ubuntu 18.04 LTS
- openHAB 3.0 installed in Docker via le tutorial openHAB - Installation through Docker
- Portainer to manage Docker containers (cf. tuto How to Install Portainer Docker UI Manager on Ubuntu 18.04)
- Eclipse Mosquitto 1.6.12 in a Docker container also (cf. tuto Running the eclipse-mosquitto MQTT Broker in a docker container)
- MQTT Explorer to view MQTT messages
All steps were carried out via the openHAB3 graphical interface.
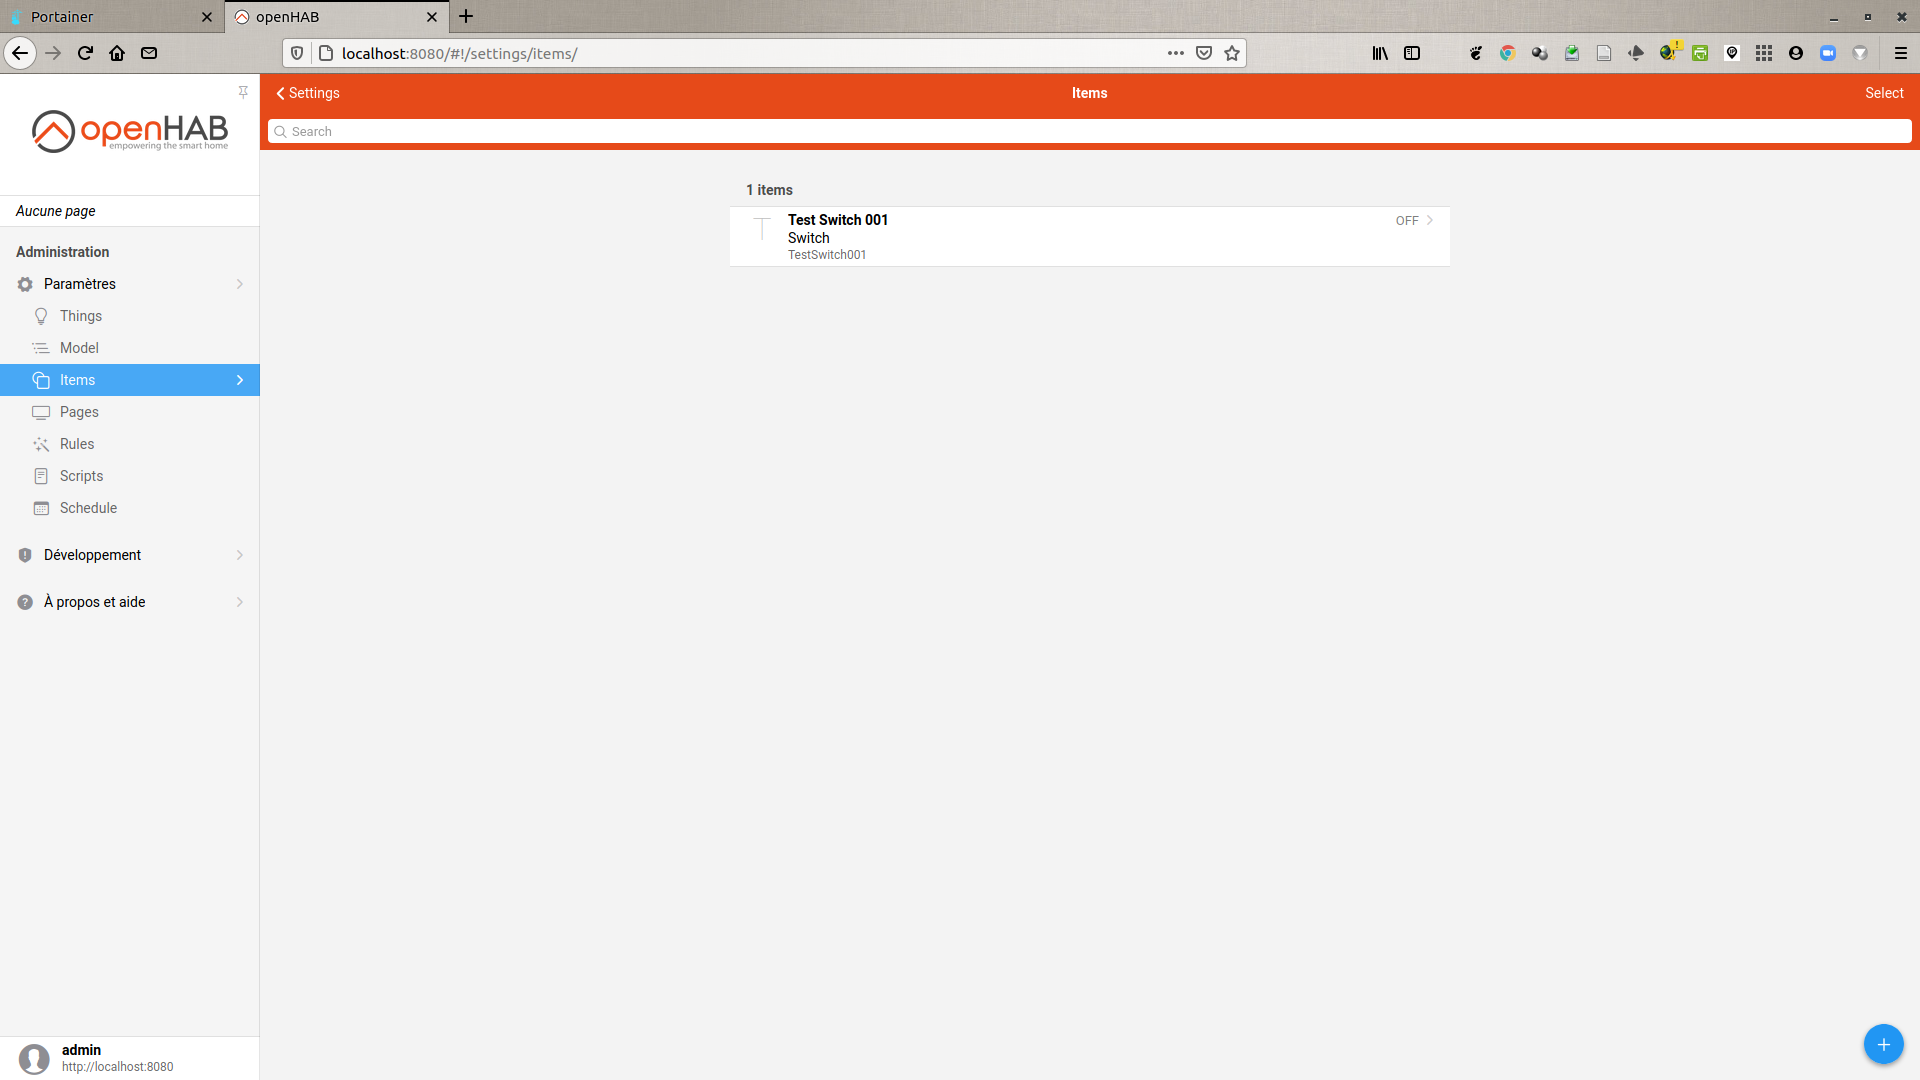
Switch creation
We are going to create an on/off switch in openHAB. This object is “virtual”, that is to say that it is not connected to any physical device.
- Items → Blue « + » → Add Item → Name =
TestSwitch001, Label = « Test Switch 001 », Type =Switch→ Create - the new on/off switch is available in the interface under the Items tab

MQTT setup and configuration in openHAB 3.0
This part is based on the tutorial [OH3] MQTT Setup and Configuration.
- install the MQTT binding in openHAB3: Settings → Bindings → Blue « + » → MQTT → Install
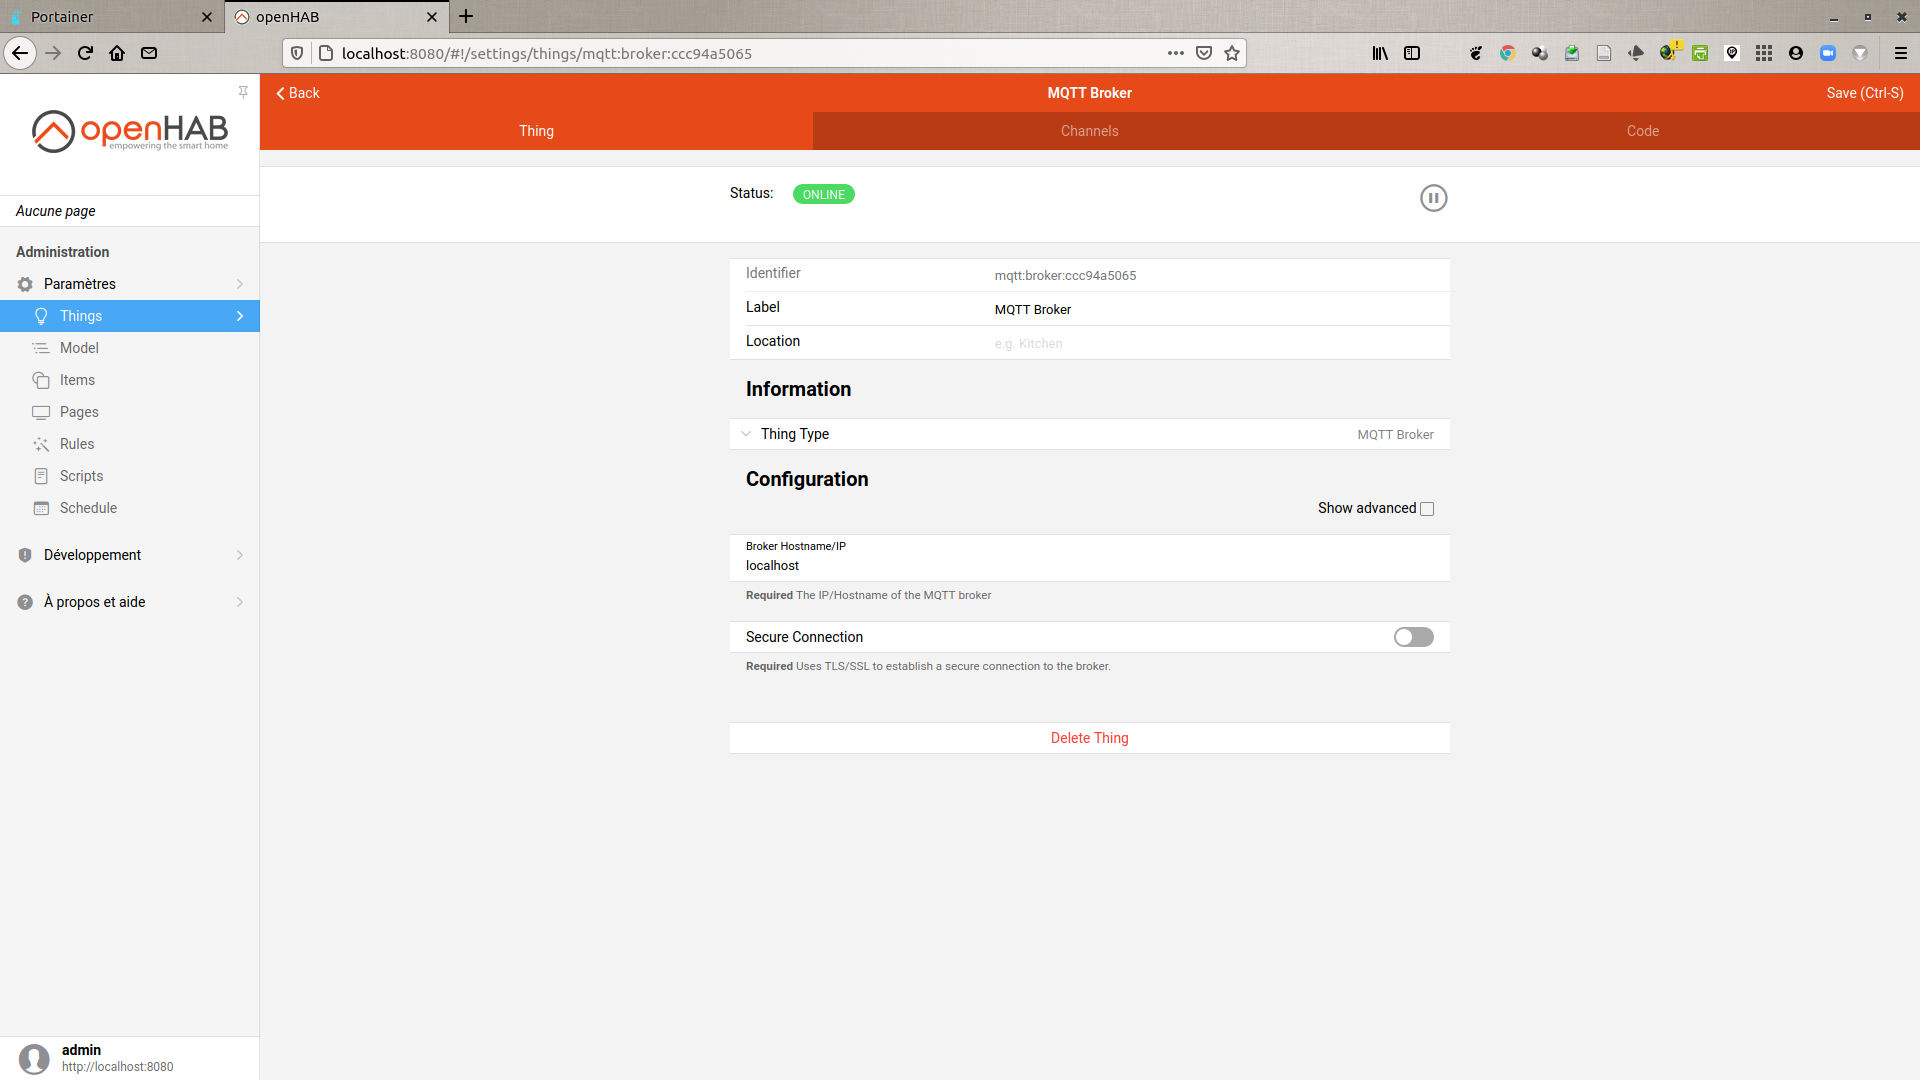
- connect openHAB3 to the MQTT broker: Settings → Things → Blue « + » → MQTT Binding → MQTT Broker
- Broker Hostname/IP =
localhost→ Create Thing - the Bridge Thing will appear in your list of Things; after a couple of seconds, it will appear as ONLINE.
- NB: the MQTT Broker’s id is
mqtt:broker:ccc94a5065
- Broker Hostname/IP =
Creation of rules to publish MQTT messages when activating the switch
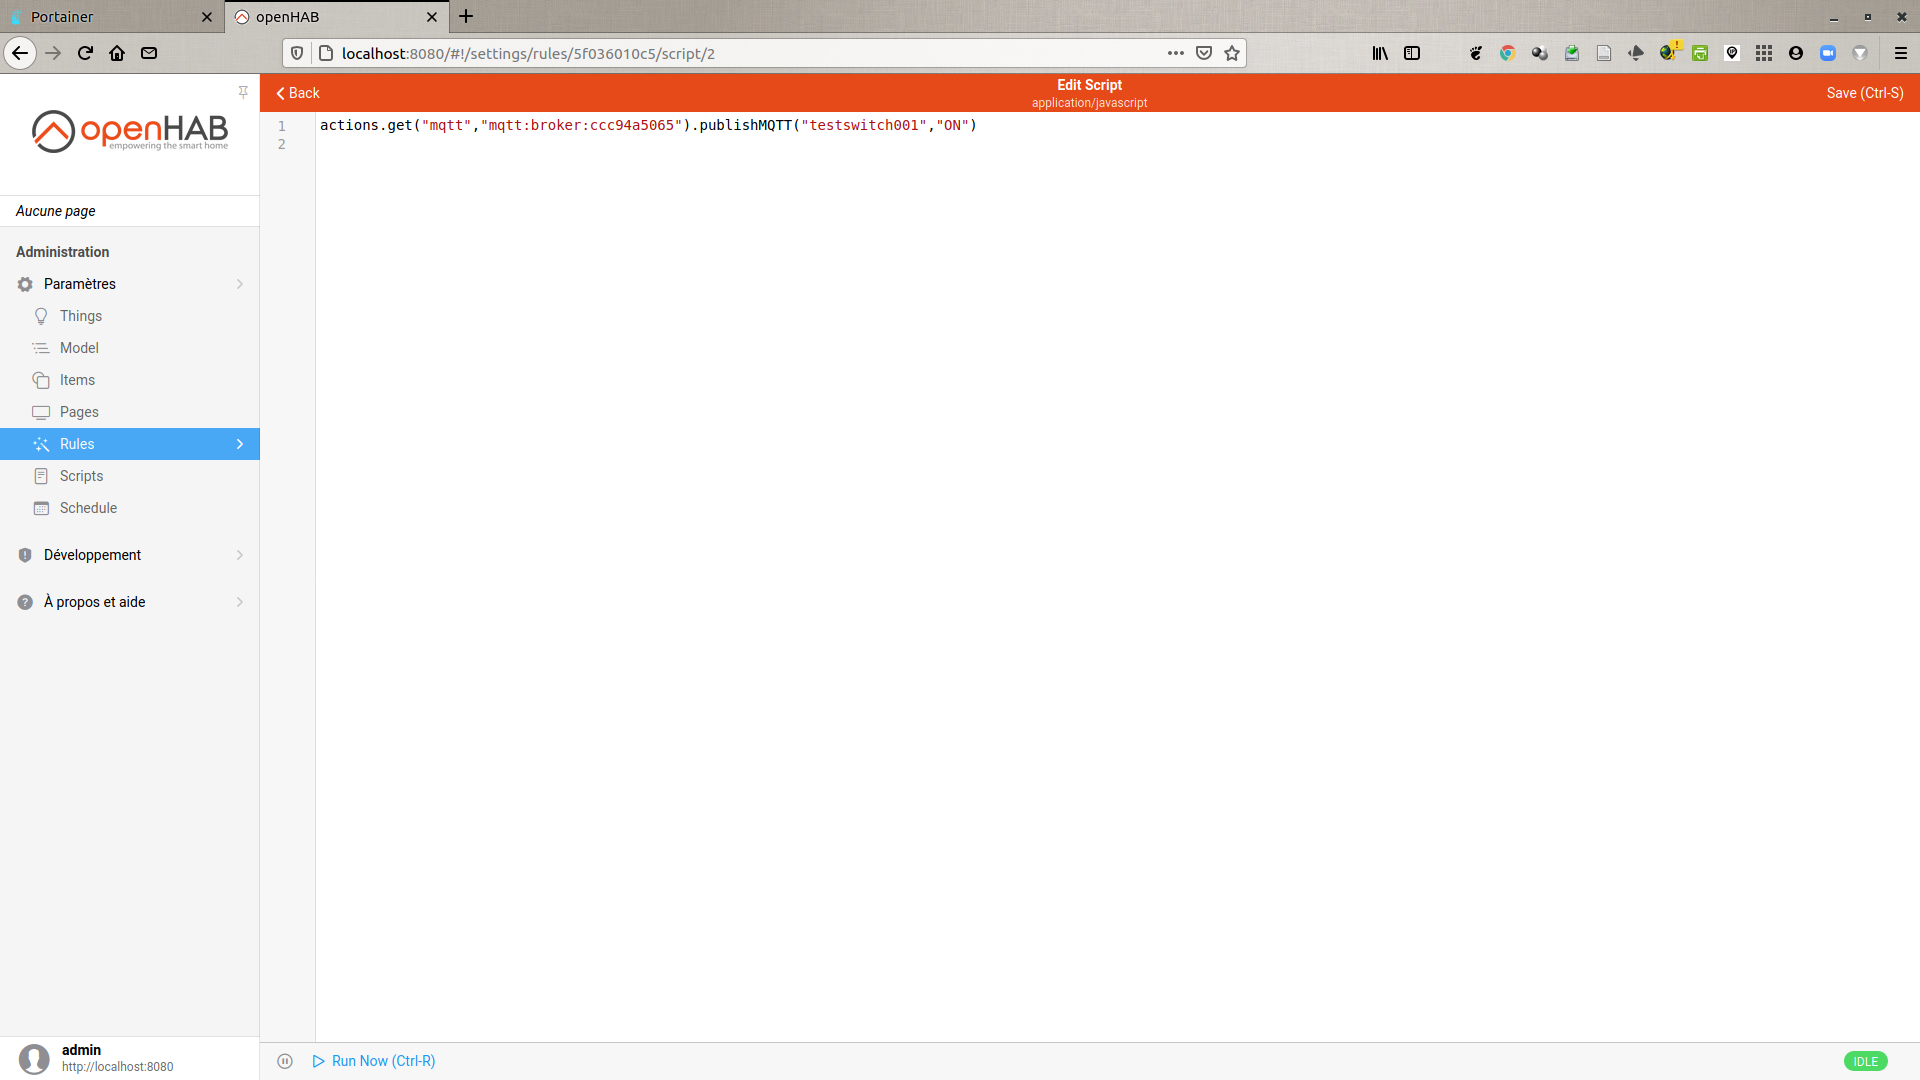
To understand the general operation of the rules in openHAB I was inspired by the tutorial Linking a switch to an MQTT publish. Among the options offered, I chose to use a JavaScript script. However, when testing my script via Run Now (Ctrl-R) the messages were not sent. After checking that my MQTT broker was working well, I was led to use the syntax presented in the post mqttAction in js in OH3.
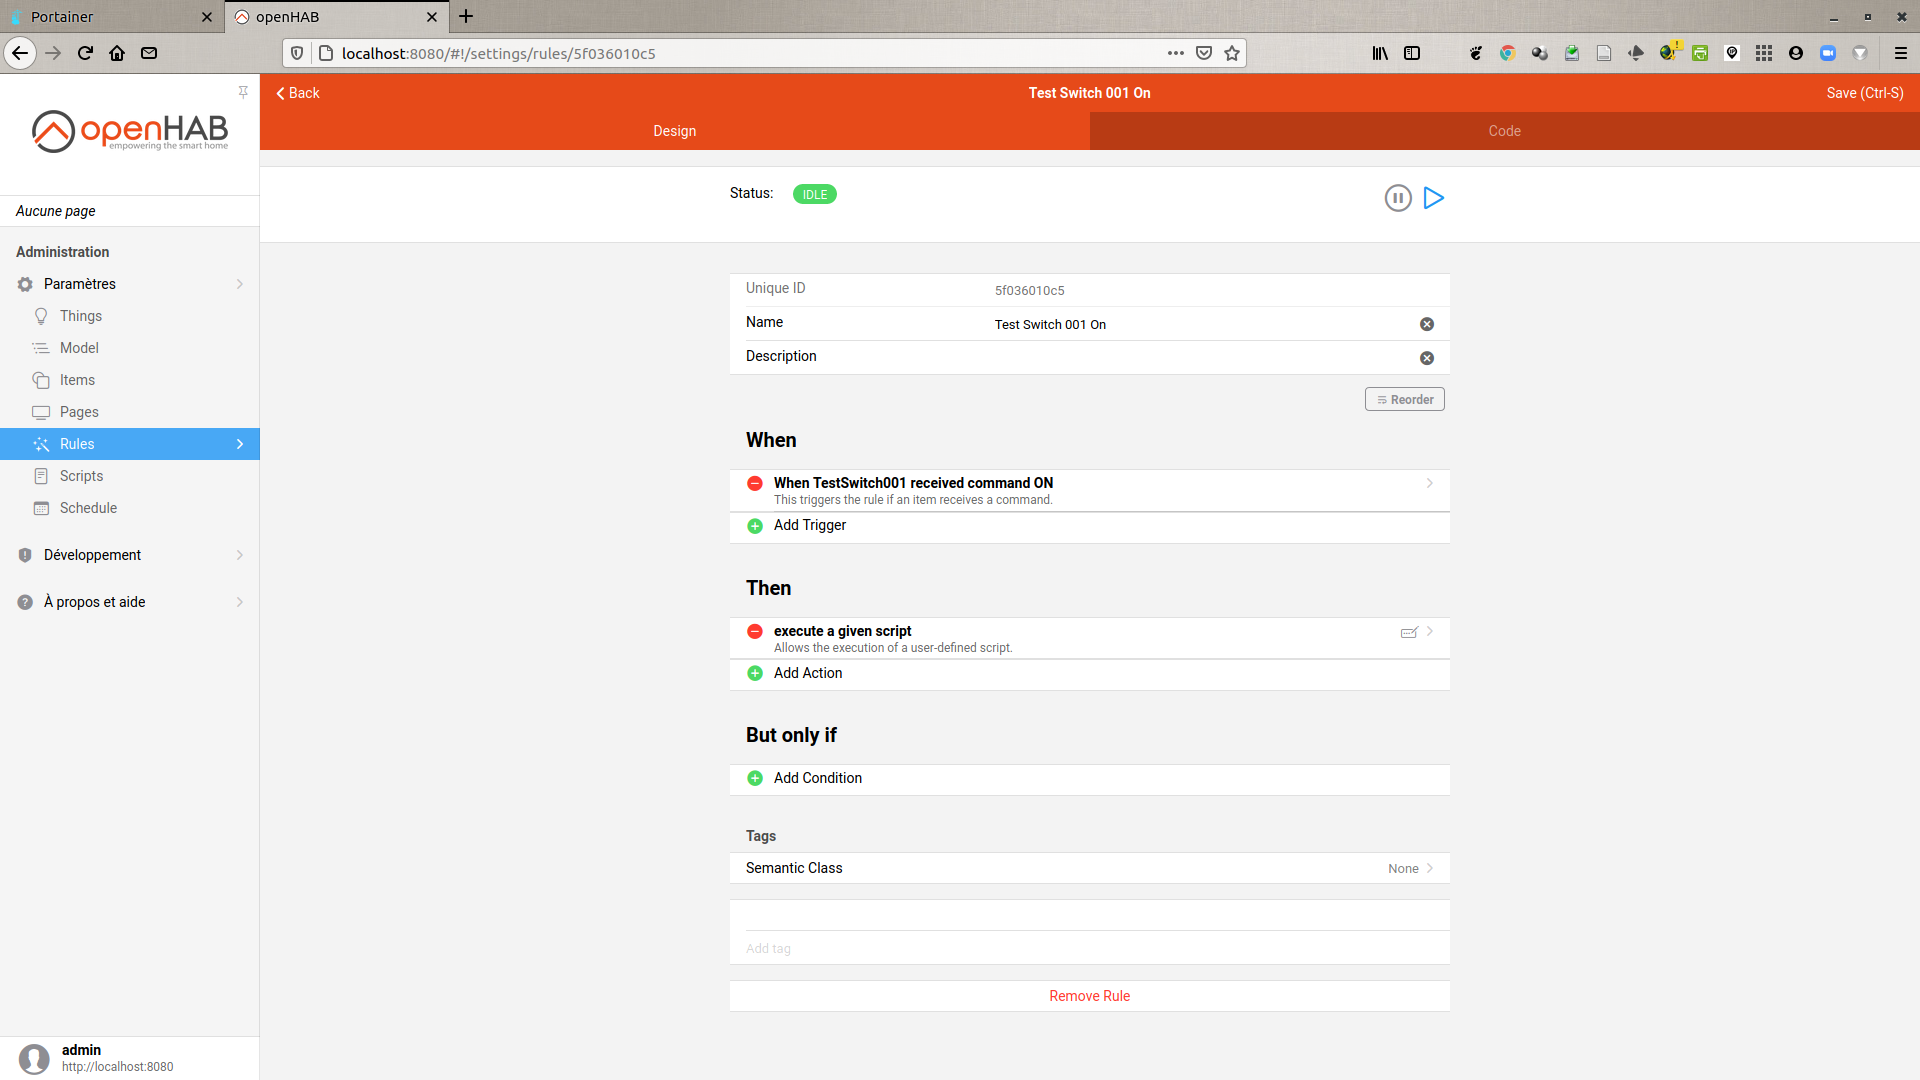
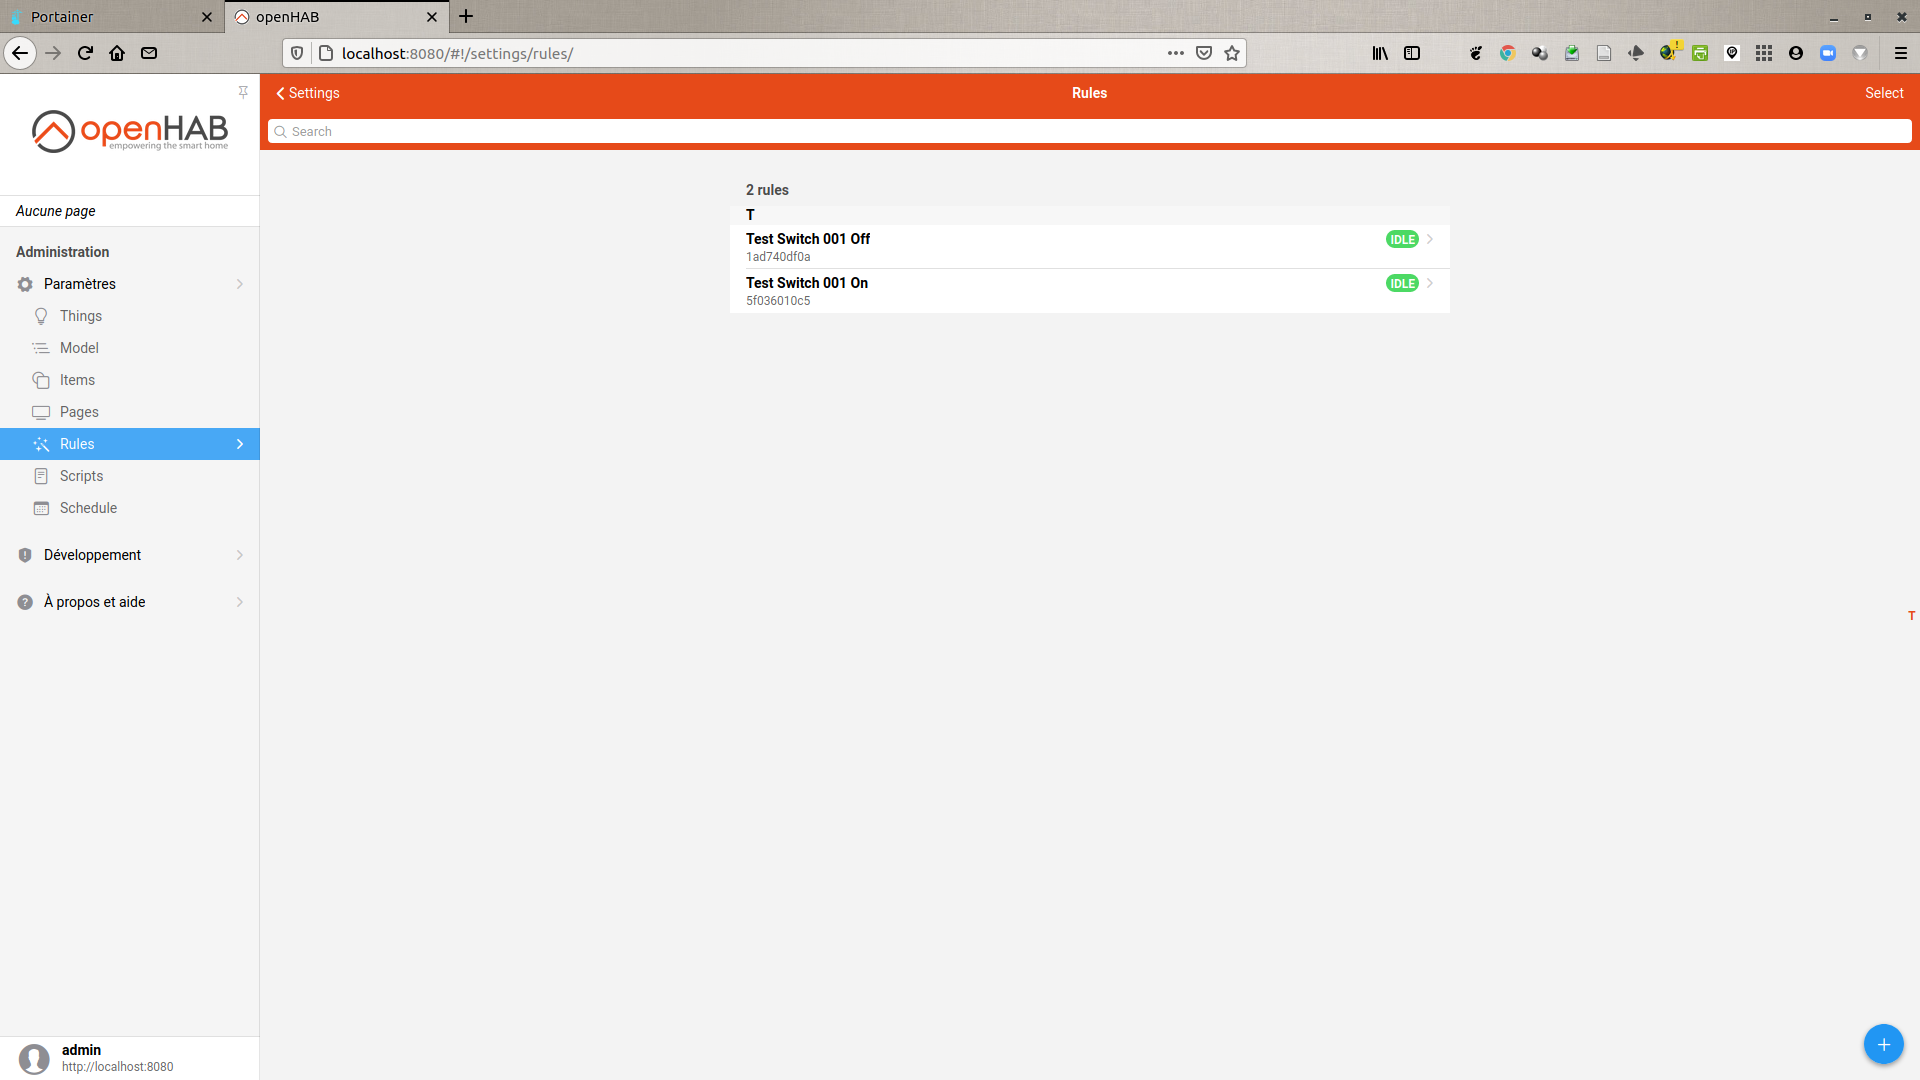
To summarize, here’s how to create the rule that will send an MQTT ON message to the testswitch001 topic when the Test Switch 001 receives the ON command:
-
Rules → Blue « + » → Name = « Test Switch 001 On »
-
When → Add Trigger → Item Event → Show non-semantic →
Test Switch 001→ Pick → received a command ON → Done -
Then → Add Action → Run Script →
ECMAScriptactions.get("mqtt","mqtt:broker:ccc94a5065").publishMQTT("testswitch001","ON") -
Save…
Ditto for creating the rule that will send an MQTT OFF message on the testswitch001 topic when the Test Switch 001 will receive the OFF command.
Tests…
We then use MQTT Explorer (for example) connected to our broker to see the messages. In Items → Test Switch 001 we can activate the switch which triggers the sending of MQTT messages !
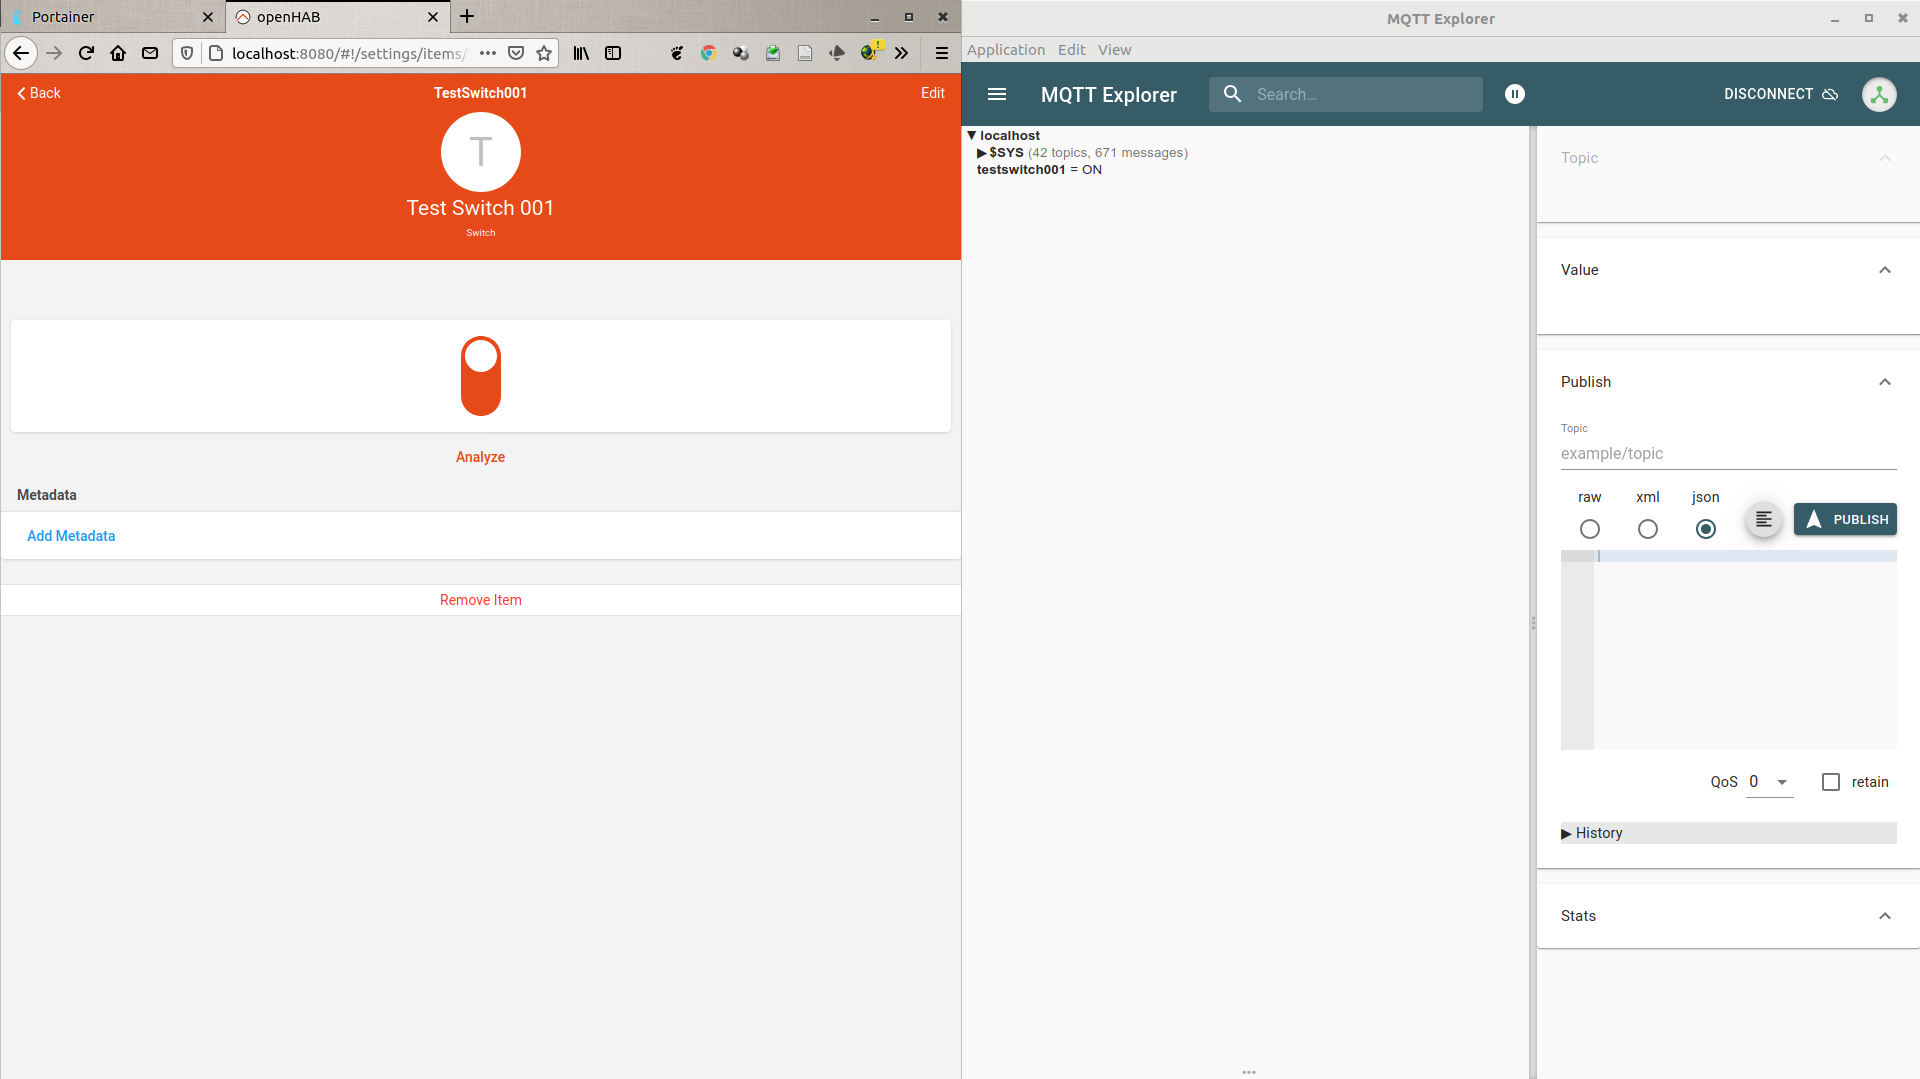
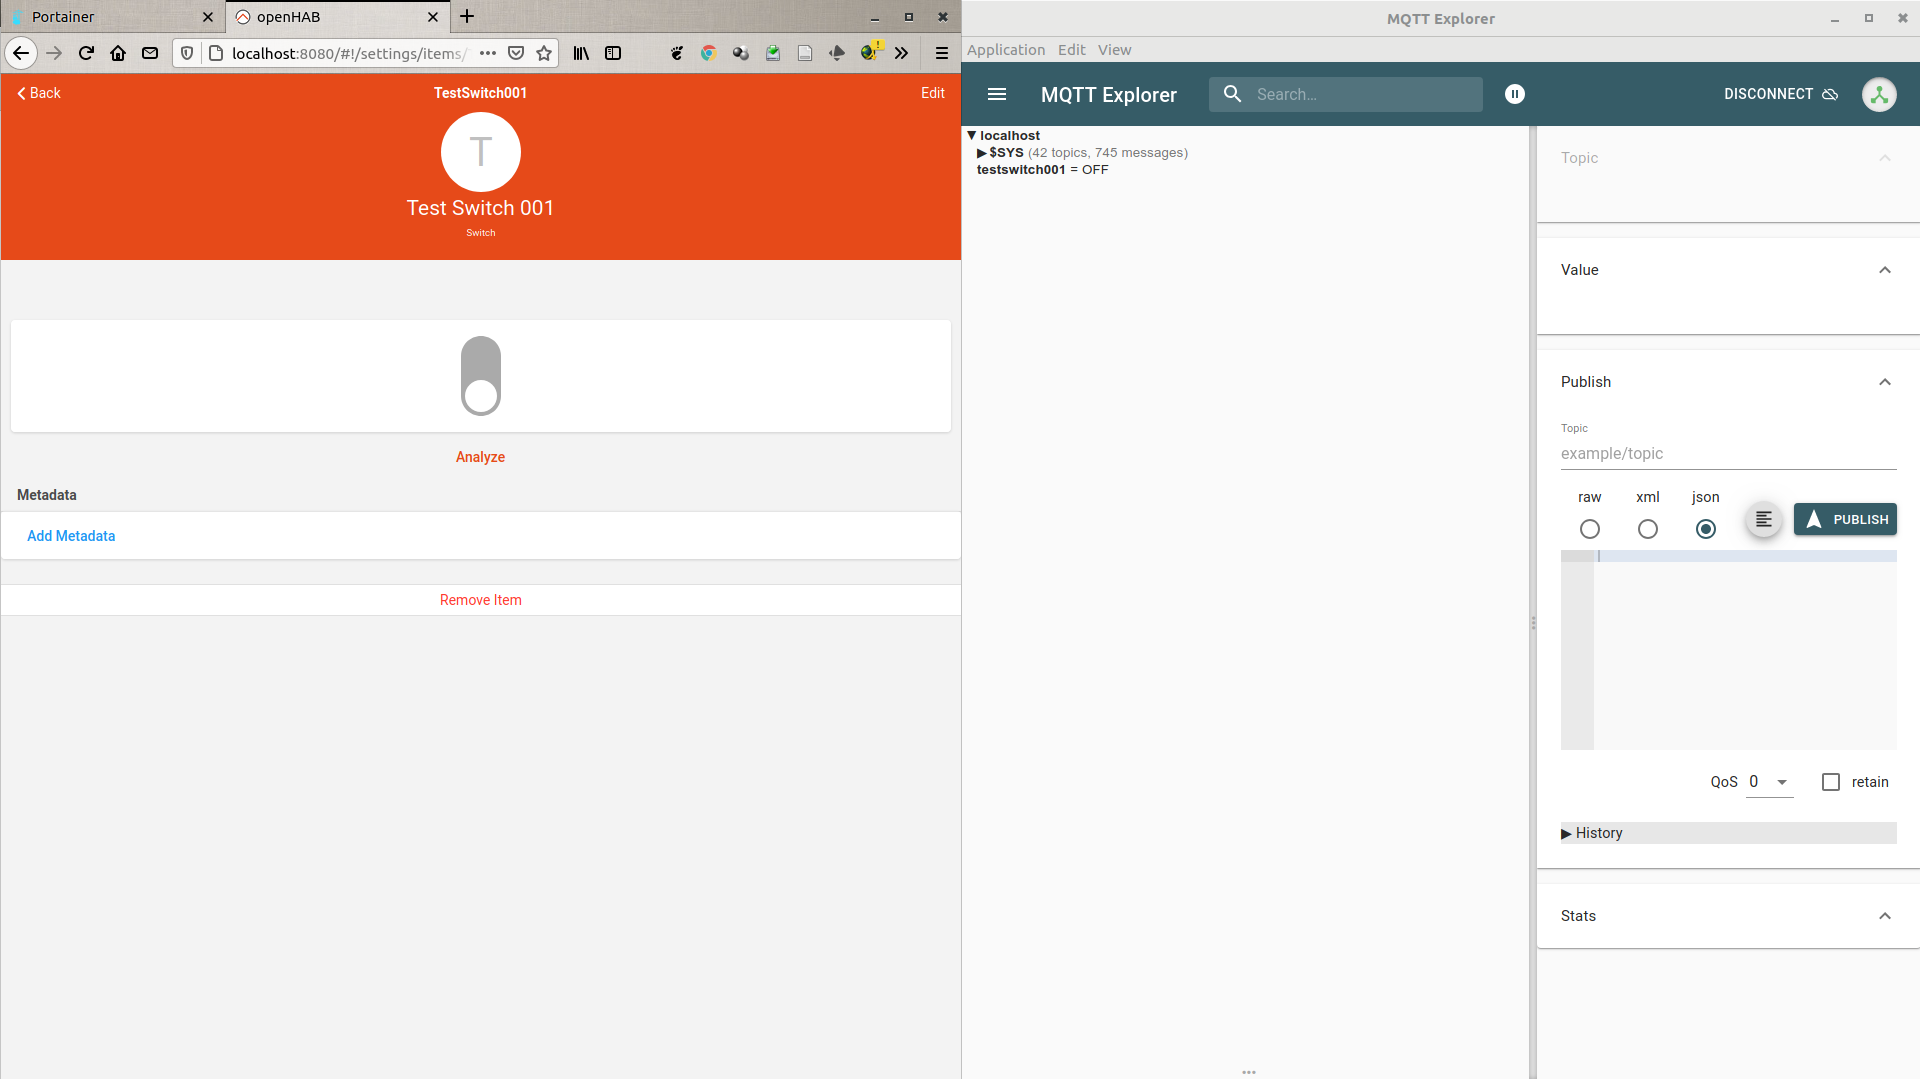
And There you go !
Conclusion
Here is the summary of my first experiments with openHAB 3.0. If it can be of use to other people, it will be with pleasure. I’m not an openHAB expert, but this new version 3.0 seems more intuitive to me and … I managed to get MQTT to work ;-) If you have any comments or suggestions, don’t hesitate to contact me on manuel.munier@univ-pau.fr.
Next step:
- reproduction of the installation on the Raspberry (without Docker)
- connection and configuration of Z-Wave devices (temperature, brightness, etc.)
- definition of rules/scripts to publish in MQTT the data reported by the sensors