openHAB 3.0 - install and setup of Z-Wave devices
I am not an openHAB expert, far from it; the objective of this tutorial is to share with you my experiments. If it can be of use to other people, so much the better!
A few months ago I had already carried out several tests to integrate Z-Wave devices into openHAB. At that time it was openHAB 2.x. With the arrival of openHAB 3.0, rather than doing a migration, I decided to start from scratch and take the opportunity to write a step-by-step configuration procedure.
For information, here is my configuration for this tutorial. Using BerryBoot doesn’t change anything; it just allows me to have multiple OS on my Raspberry.
- Raspberry Pi 3 B+ running openHABian 1.6.1
- BerryBoot 2.0 to boot different OS installed on an external USB hard drive
- openHAB 3.0 installed via openhabian-config
- USB Z-Wave controller → Aeotec Z-Wave Z-Stick, Gen5 Z-Wave Plus - ZW090
- Z-Wave sensor → FIBARO System FGMS001-ZW5 Motion Sensor+
All steps were carried out via the openHAB3 graphical interface.
Z-Wave controller setup
We must first connect under openHAB as administrator to have access to the configuration menus.
- install the Z-Wave binding in openHAB3: Settings → Bindings → Blue « + » → Z-Wave Binding → Install
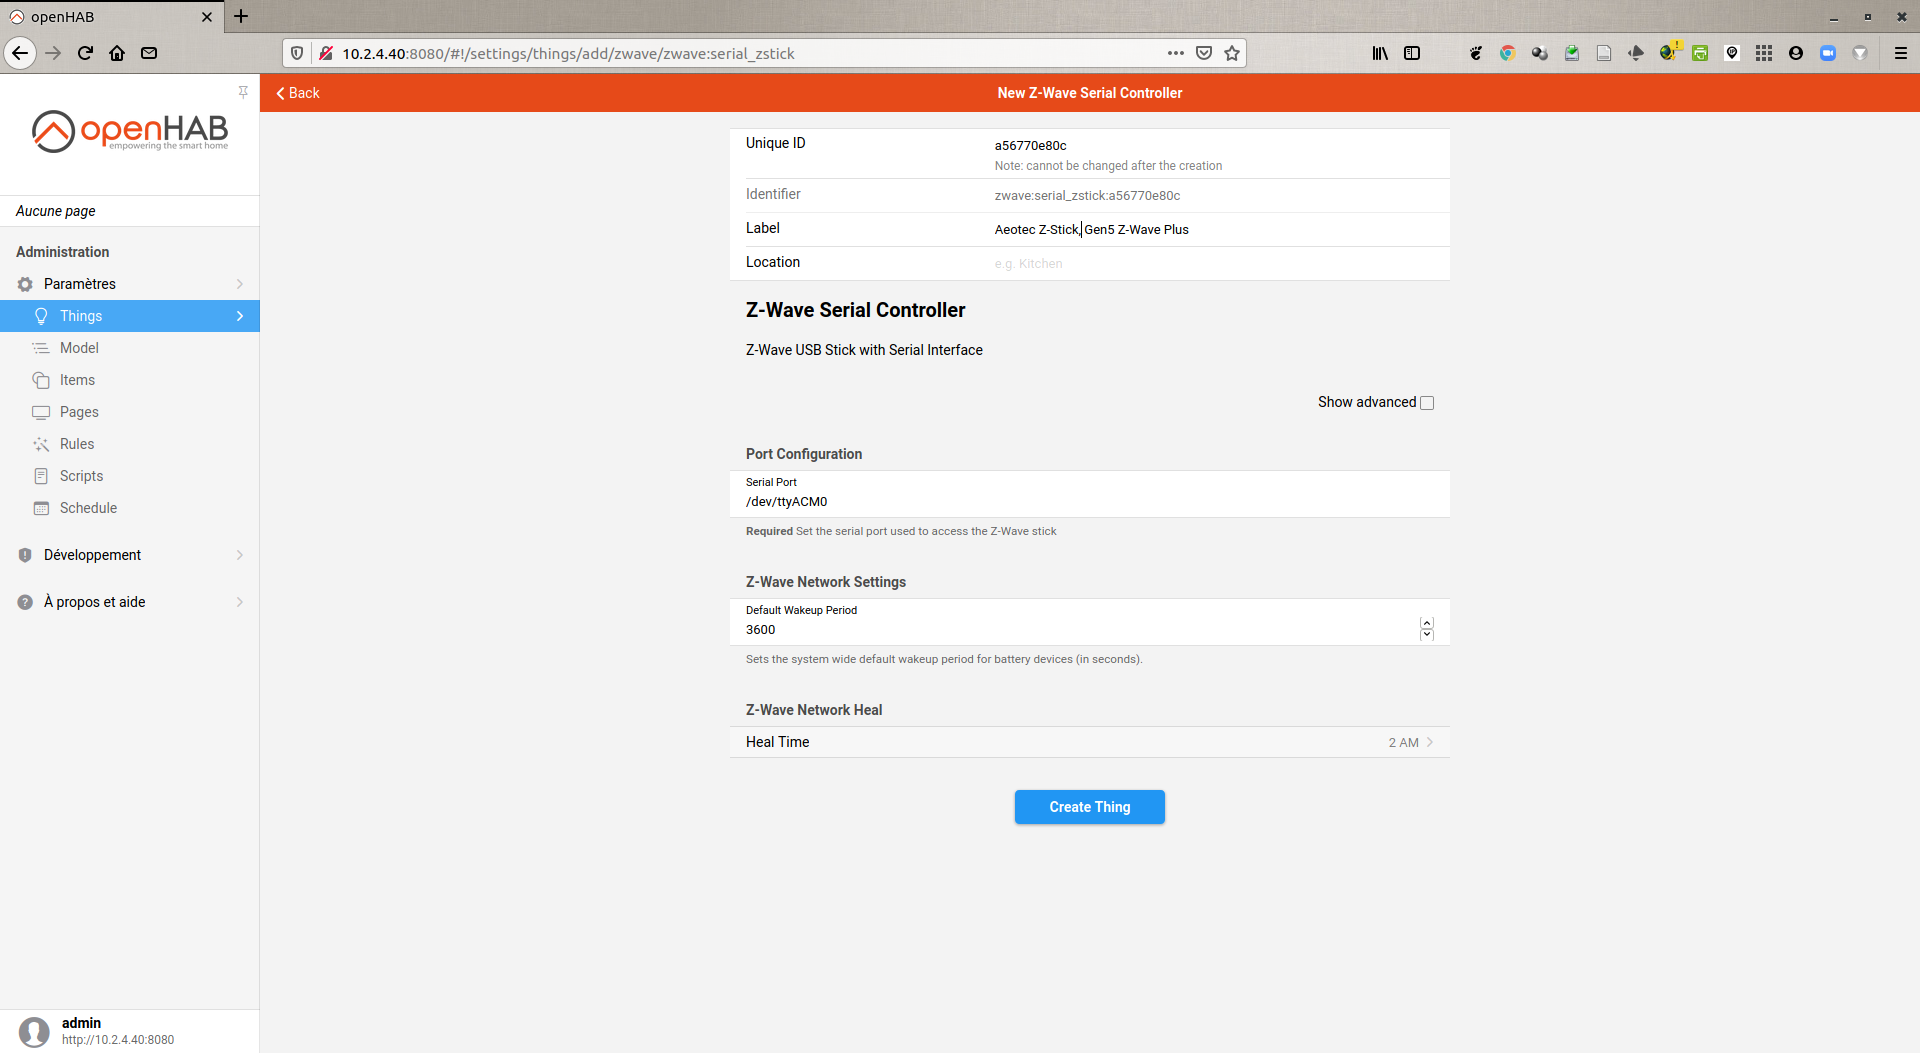
- create a thing representing the Z-Wave controller: Settings → Bindings → Blue « + » → Z-Wave Binding → Z-Wave Serial Controller
- Label =
Aeotec Z-Stick, Gen5 Z-Wave - Port Configuration → Serial Port
/dev/ttyACM0 - click Create Thing to commit
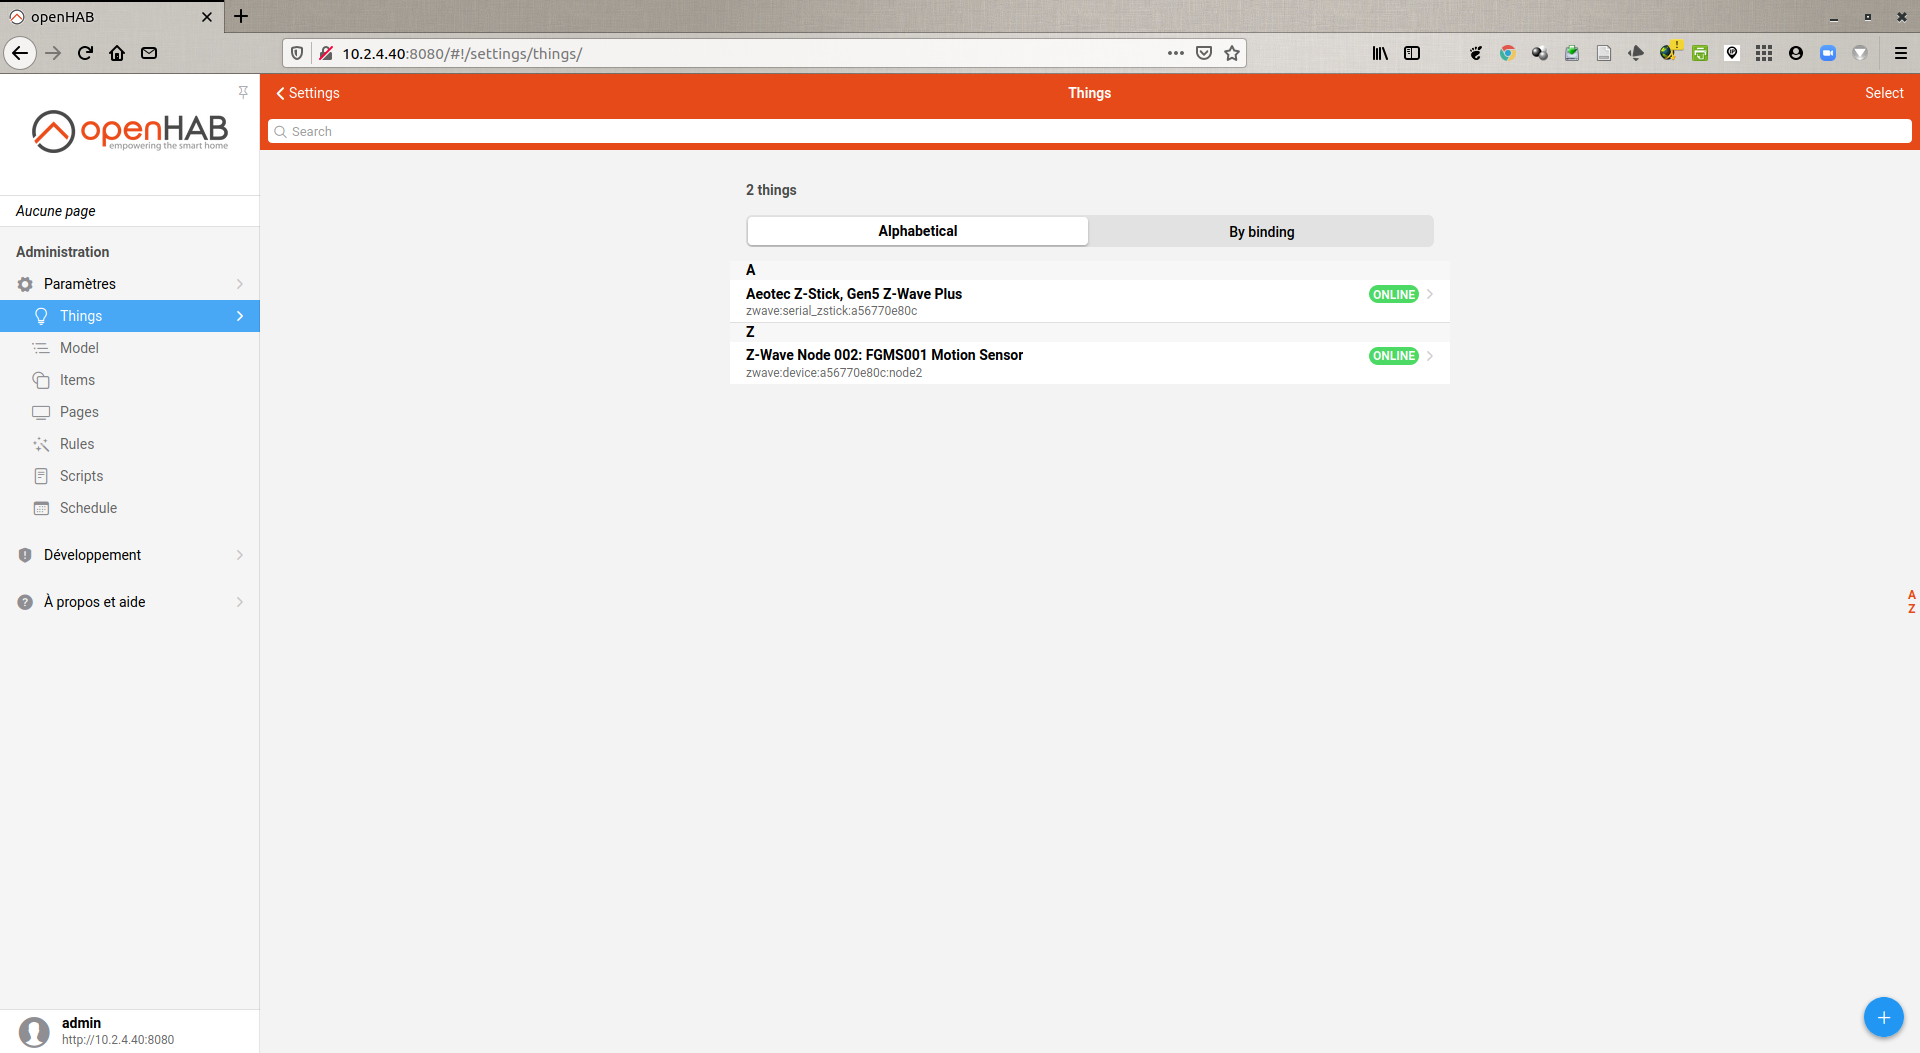
- the Bridge Thing will appear in your list of Things; after a couple of seconds, it will appear as ONLINE.
- Label =

Z-Wave sensor setup
After waking up the Fibaro Motion Sensor, there is a notification (red button) in the Inbox of the Thing that we have just created for the controller. Click on it to see the Motion Sensor appear. Click on it and add it as Thing.
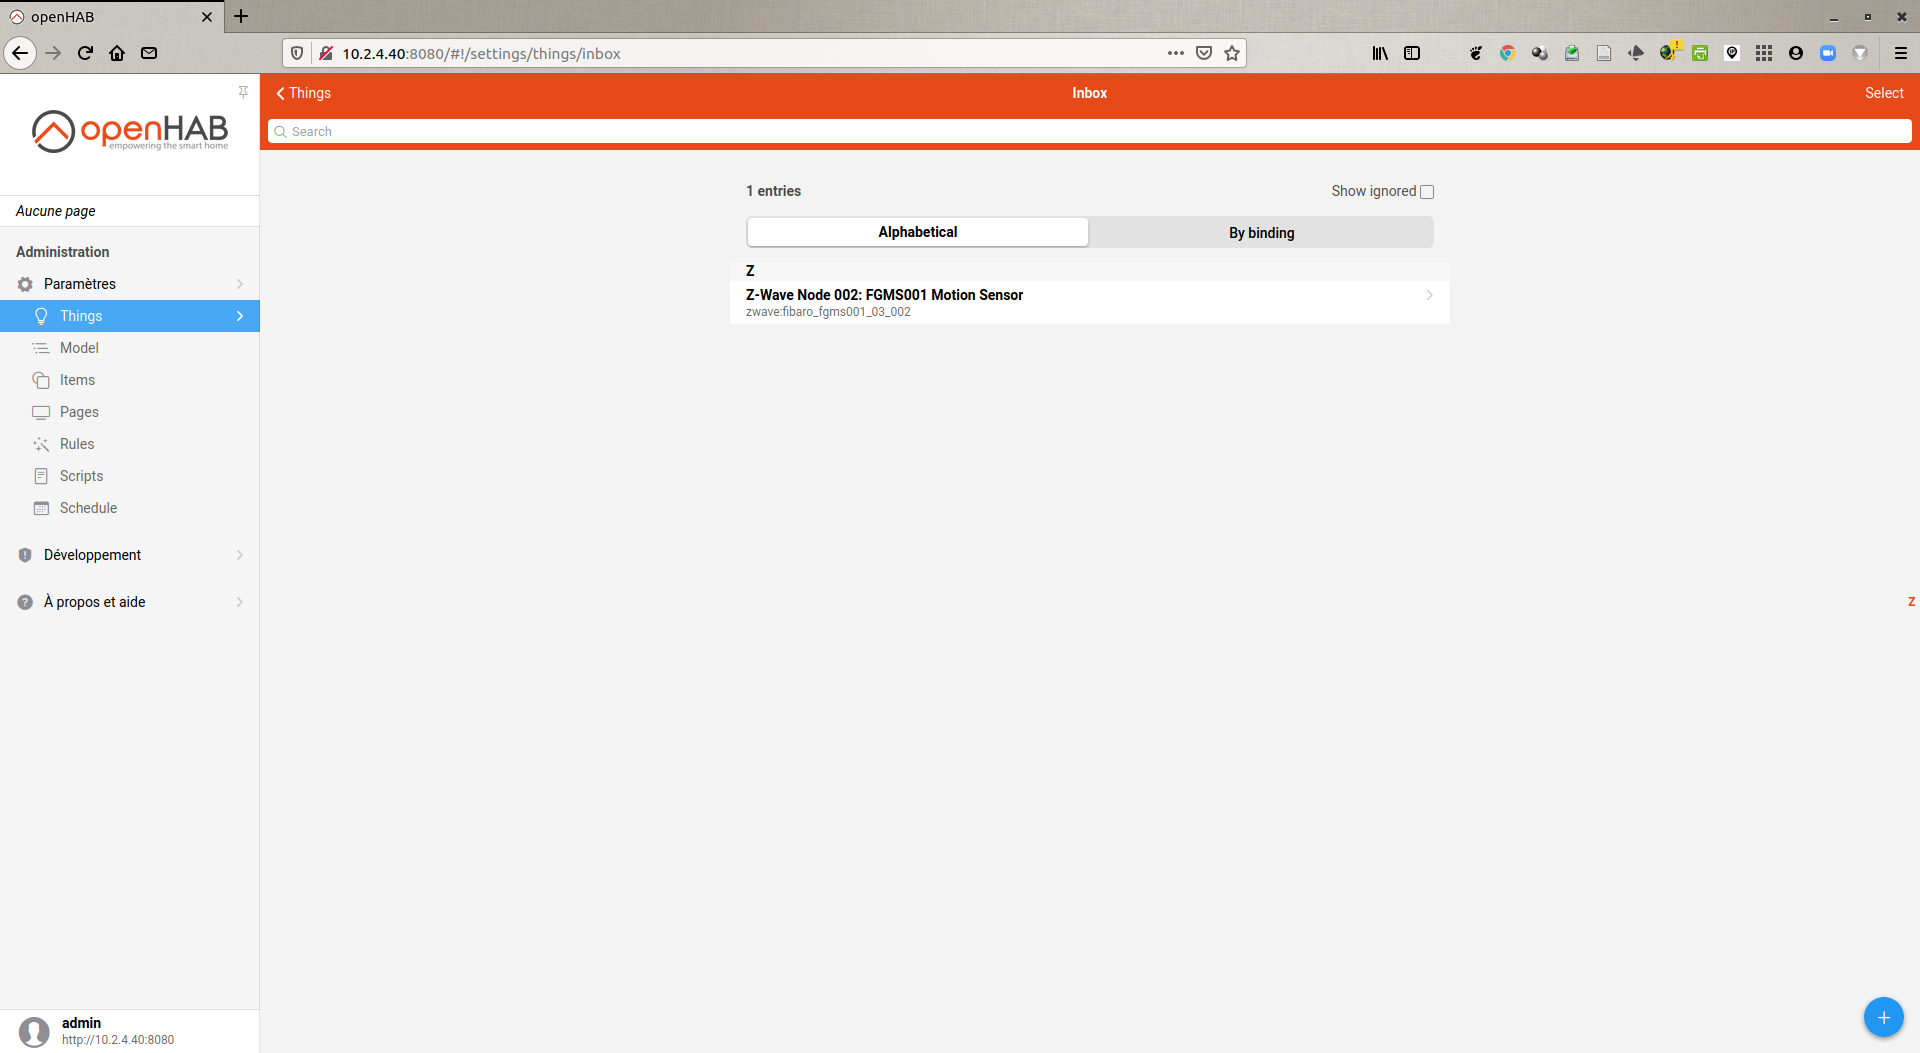
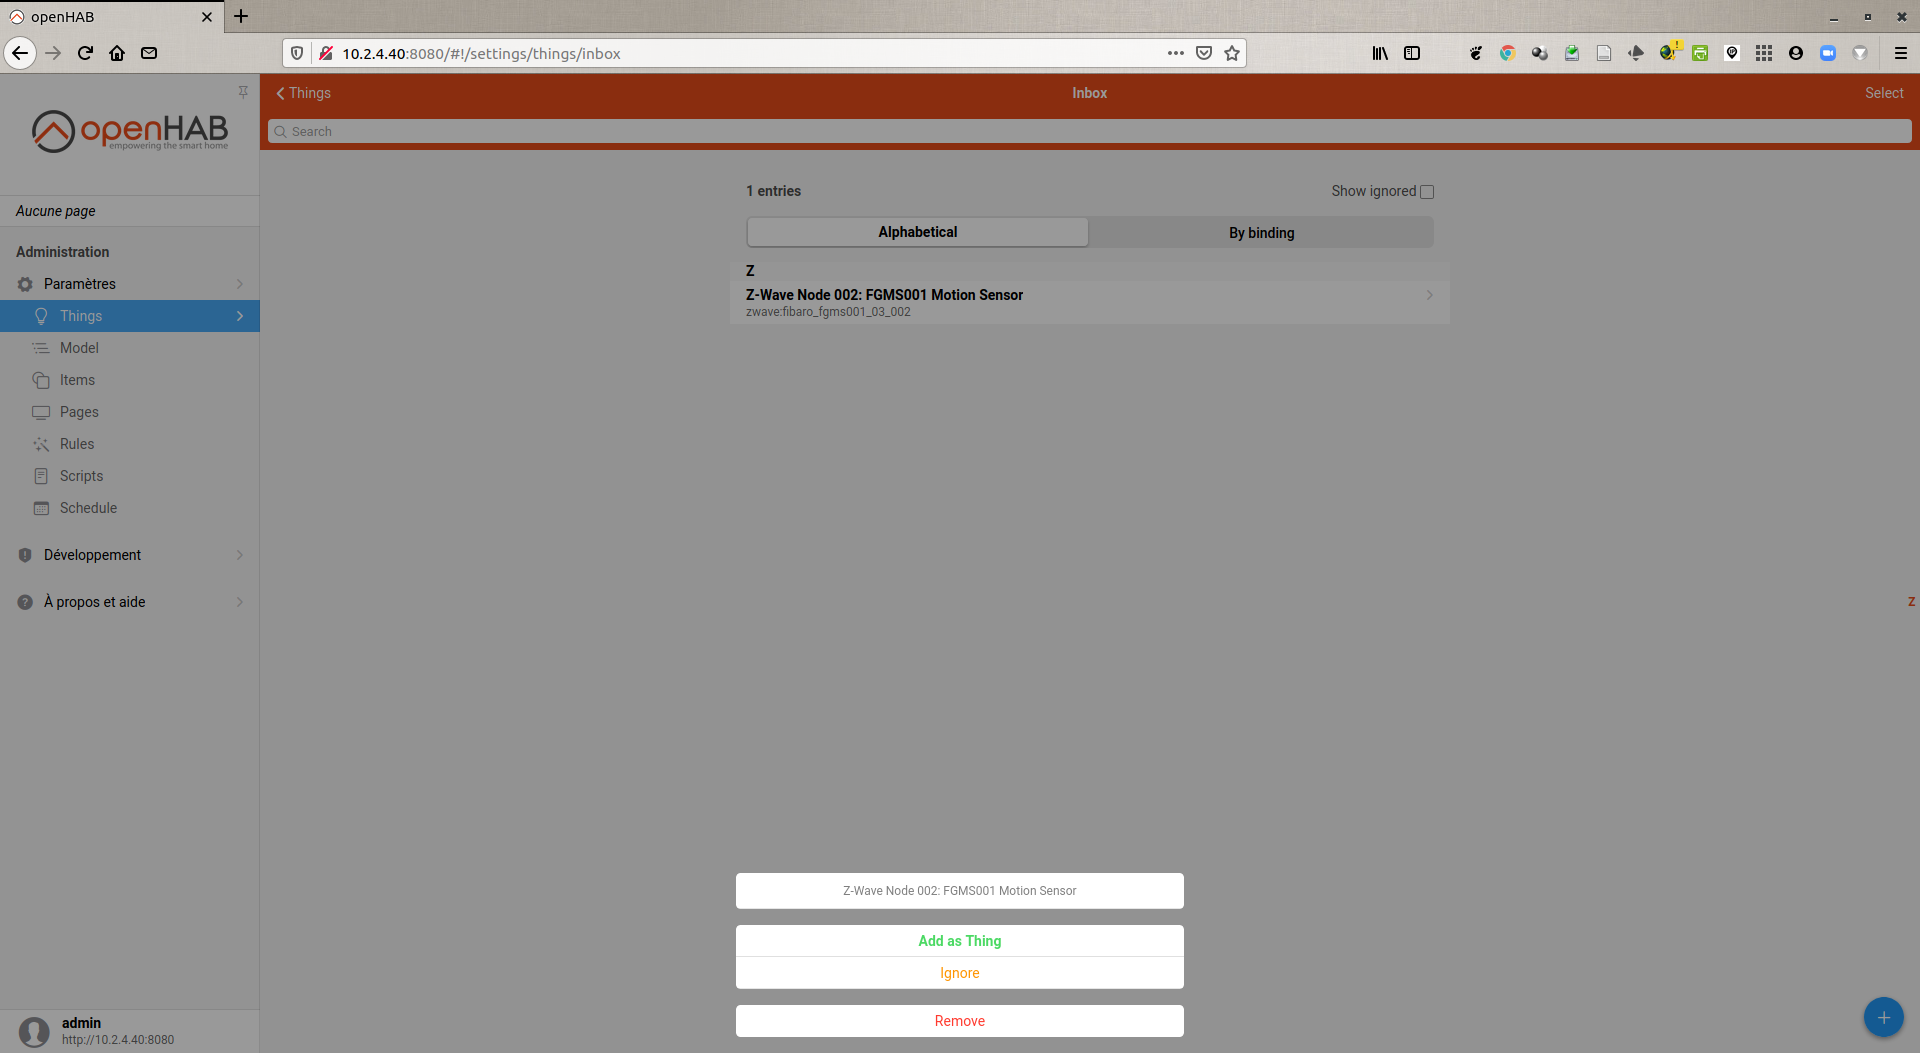
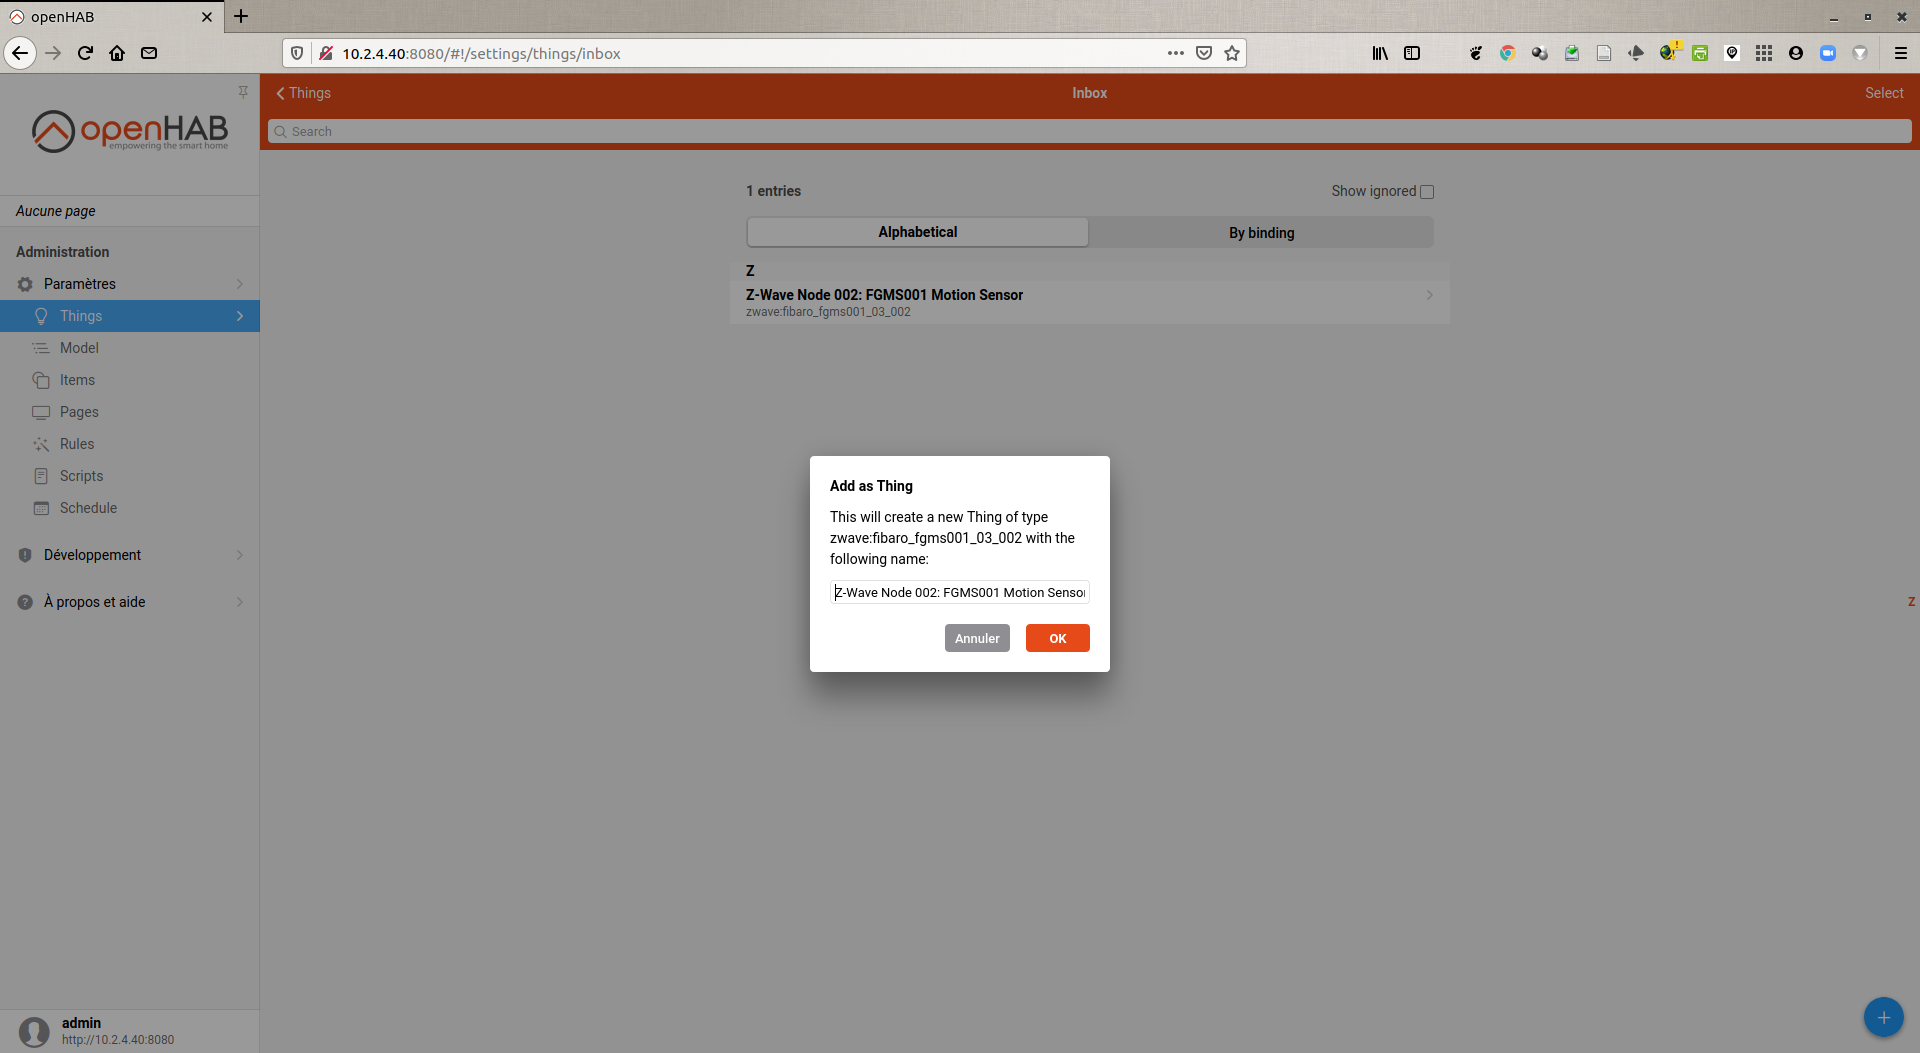
The Motion Sensor appears in your list of Things.
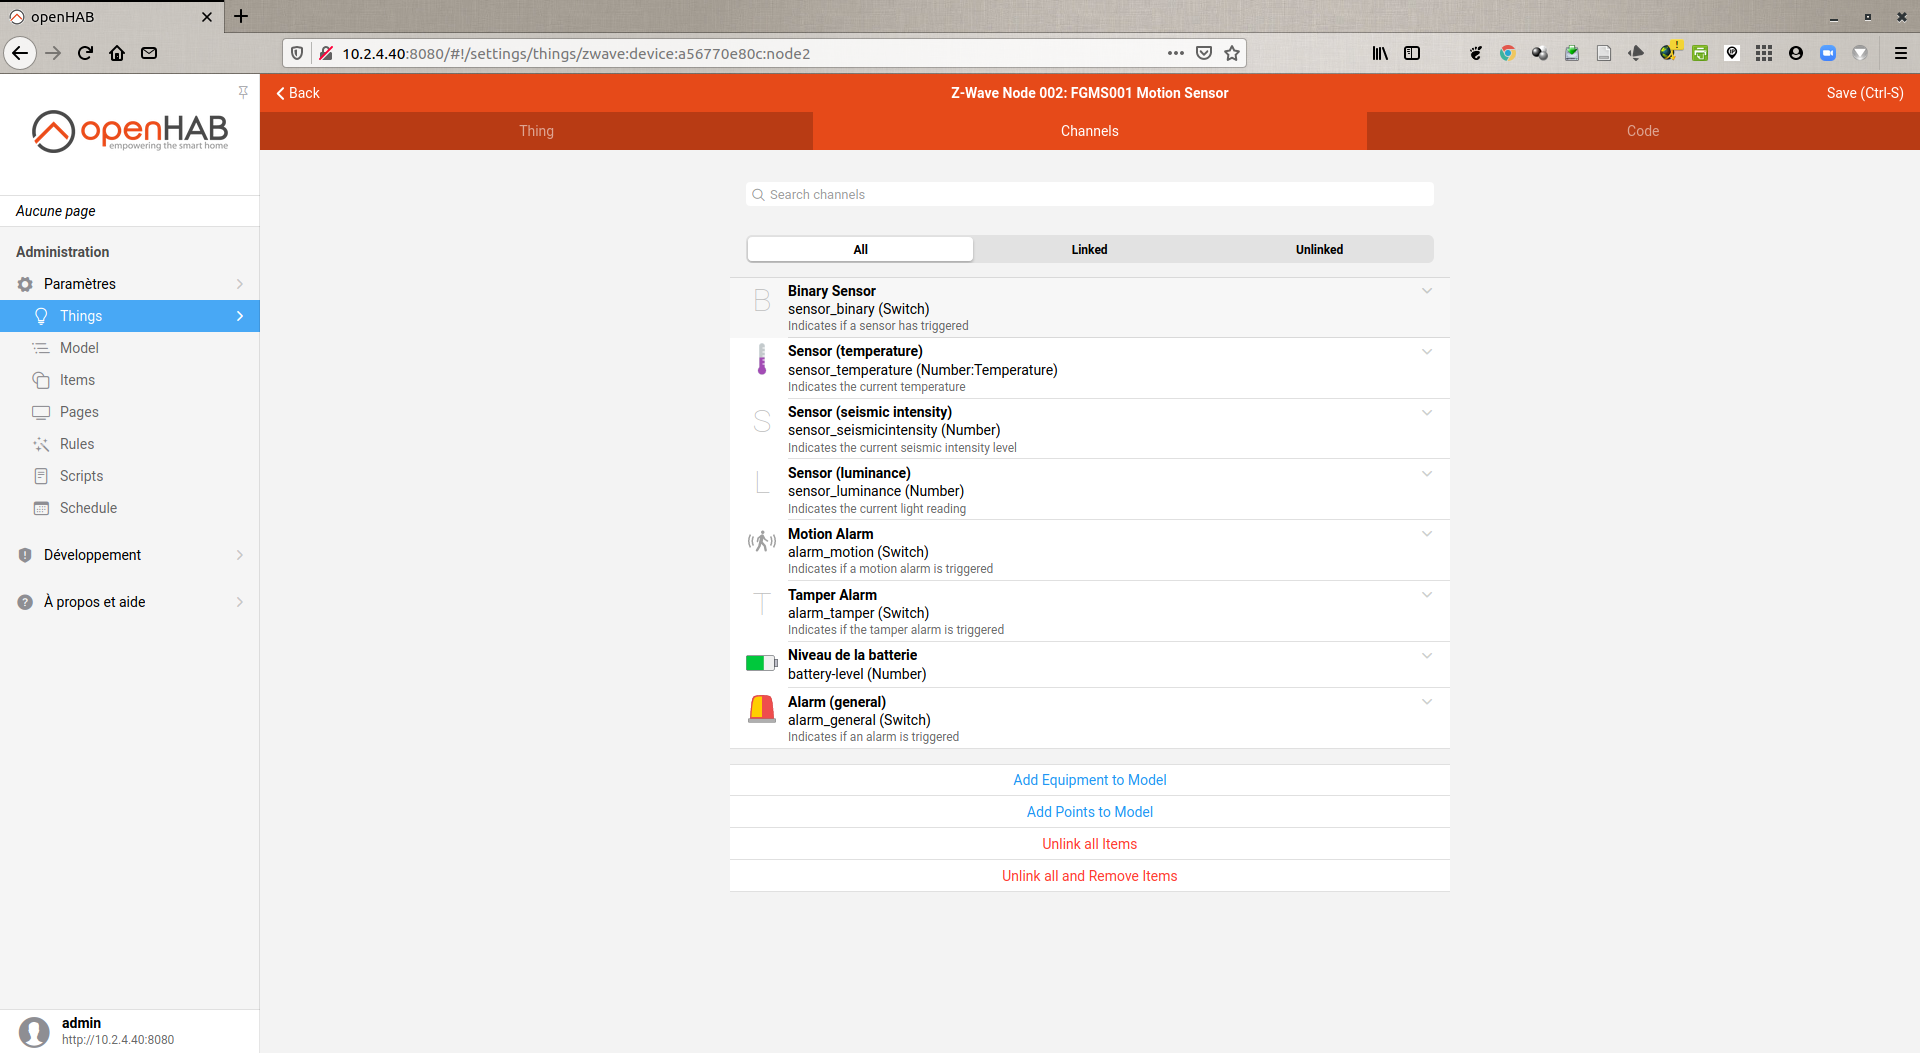
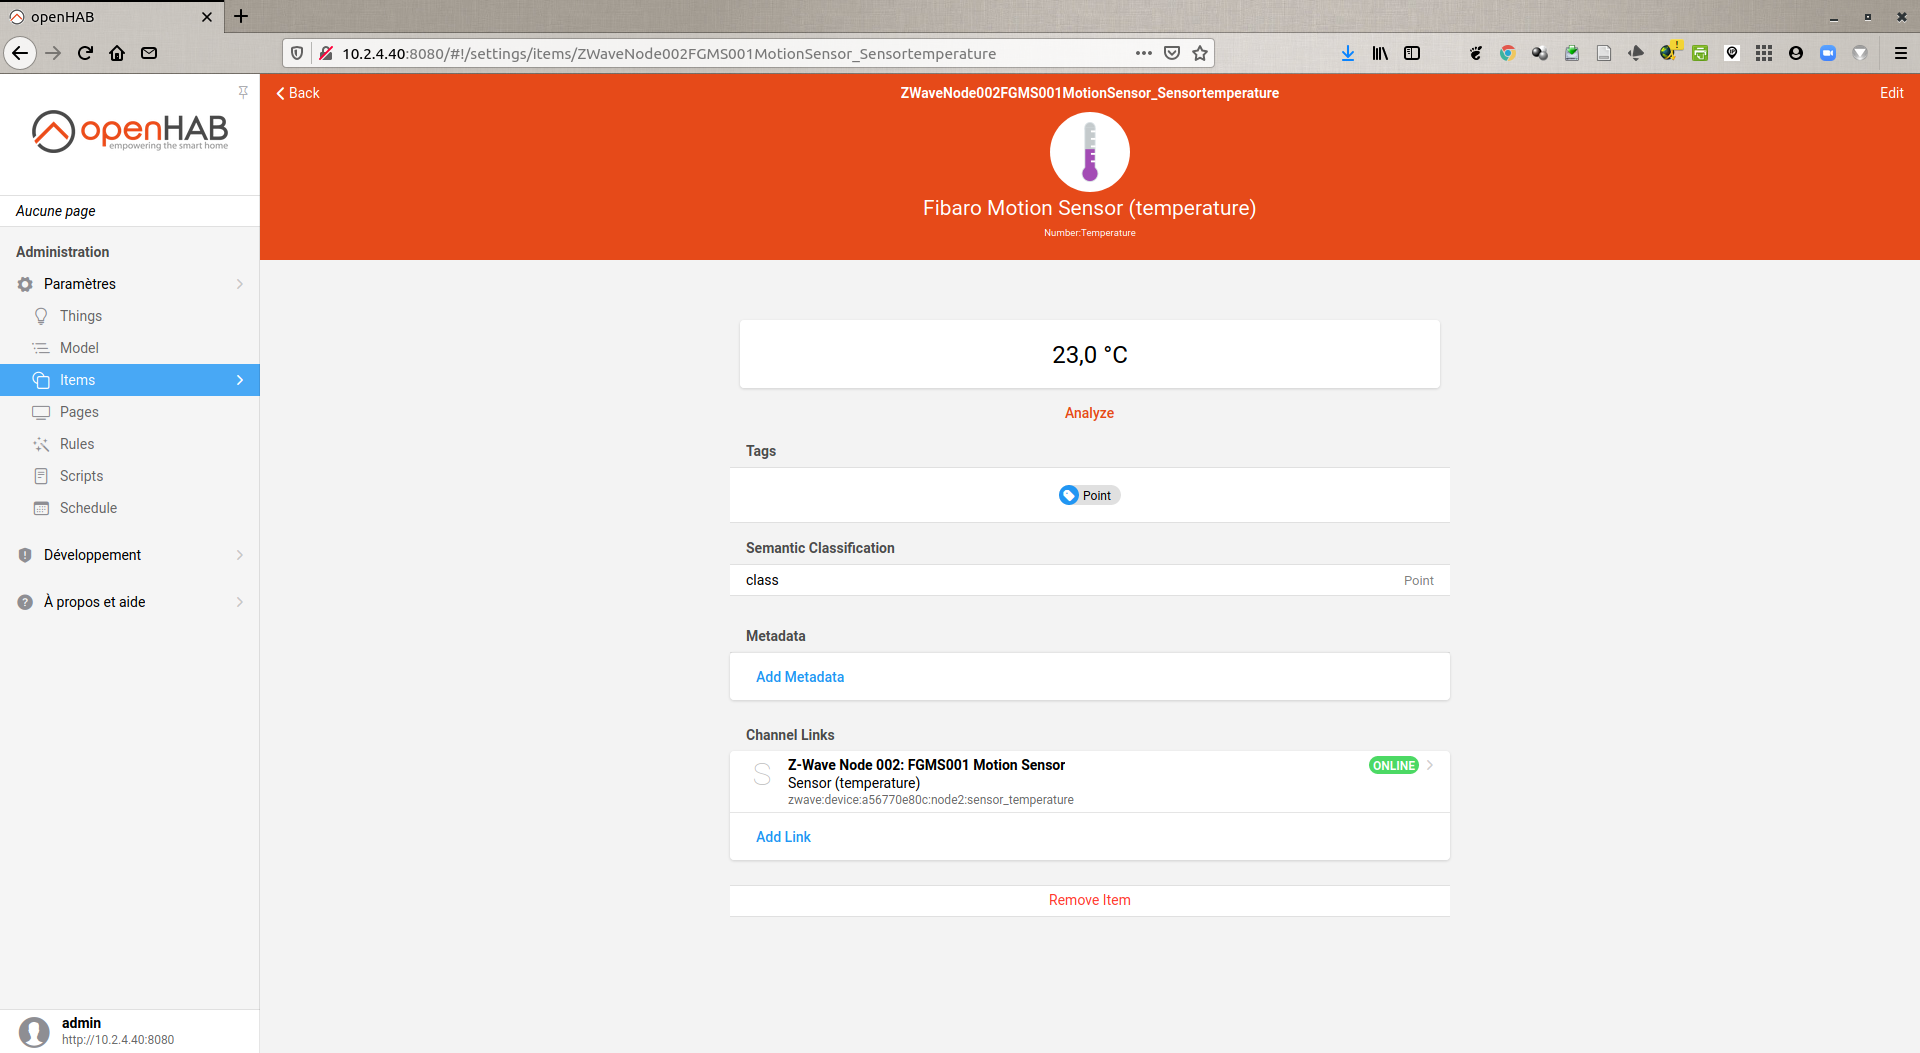
You can then access all of its configuration parameters as well as its Channels.

Create an item for a specific channel
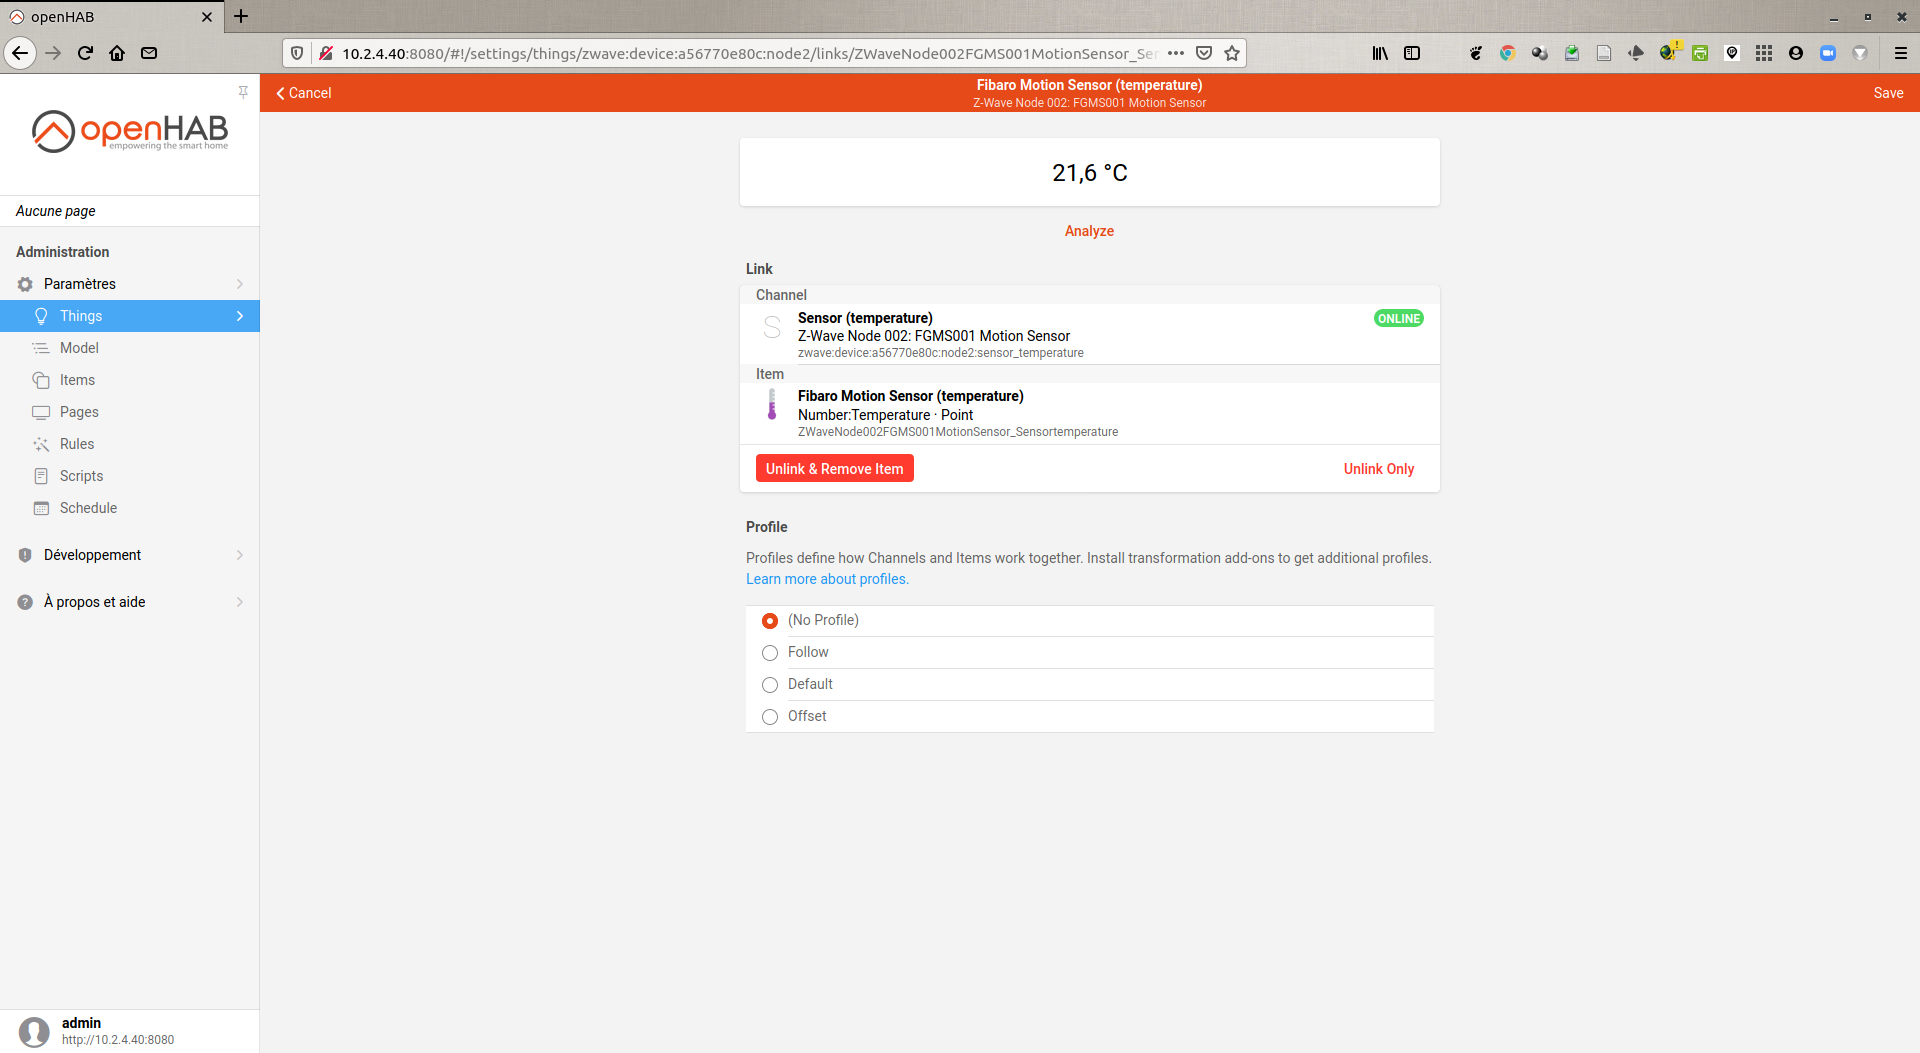
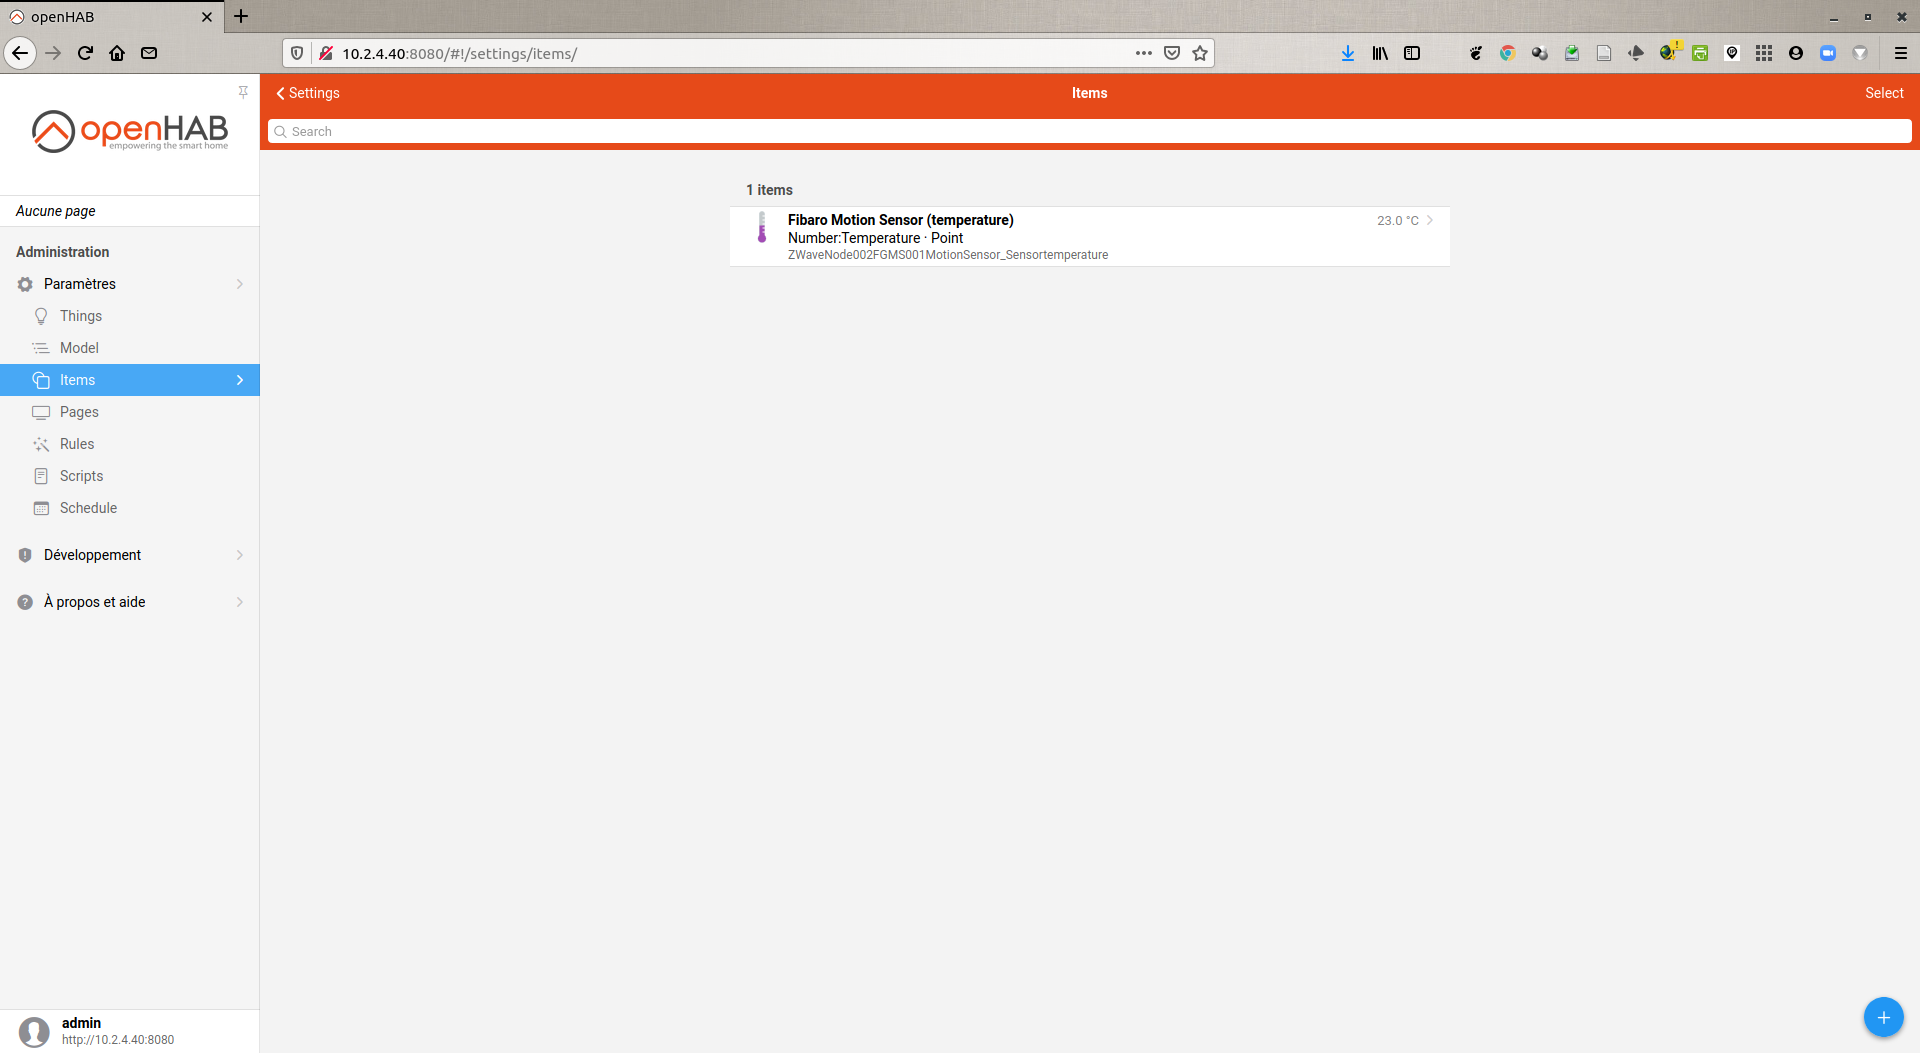
Select a Channel, for example Sensor (temperature), then Add Link to Item. We choose to create a new Item (Create a new Item) that we will call Fibaro Motion Sensor (temperature). We validate by clicking on Link.
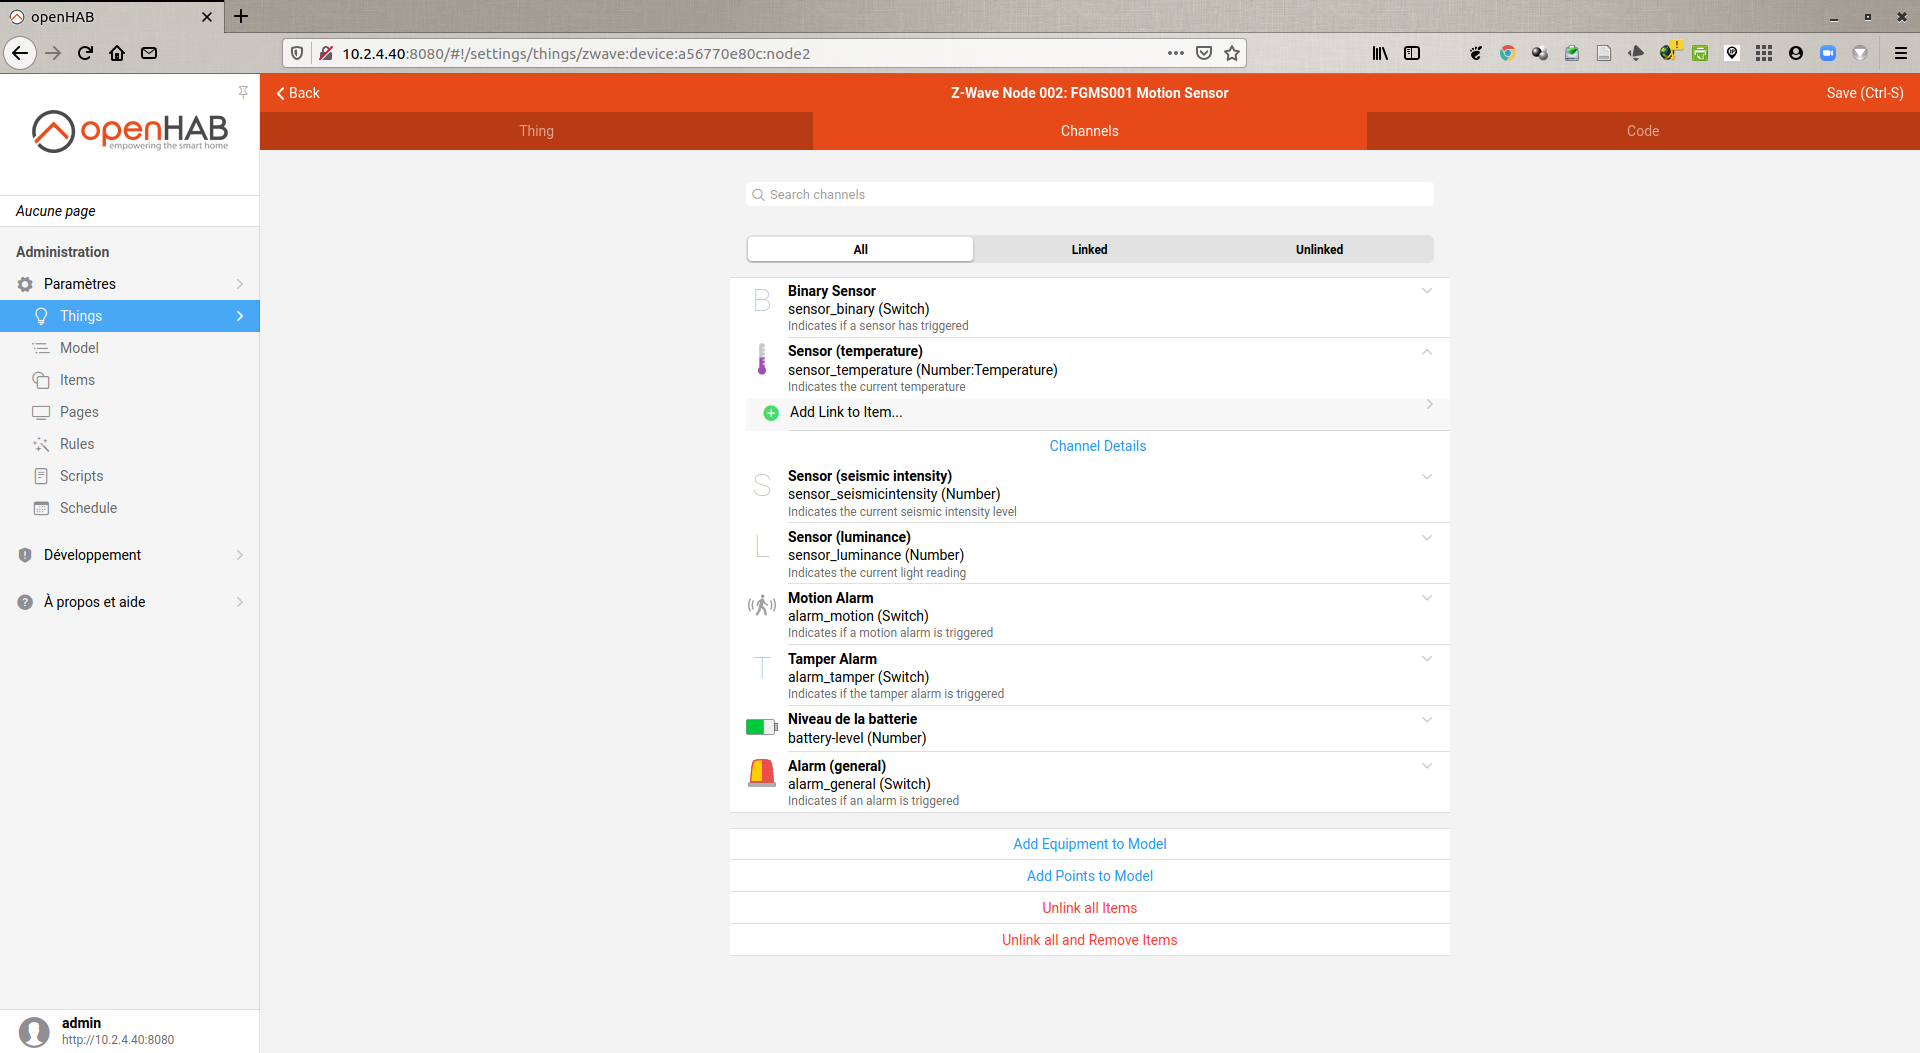
This new Item appears in the list of Channels of the Thing corresponding to the Motion Sensor.

After a few moments the value of this Item is updated.

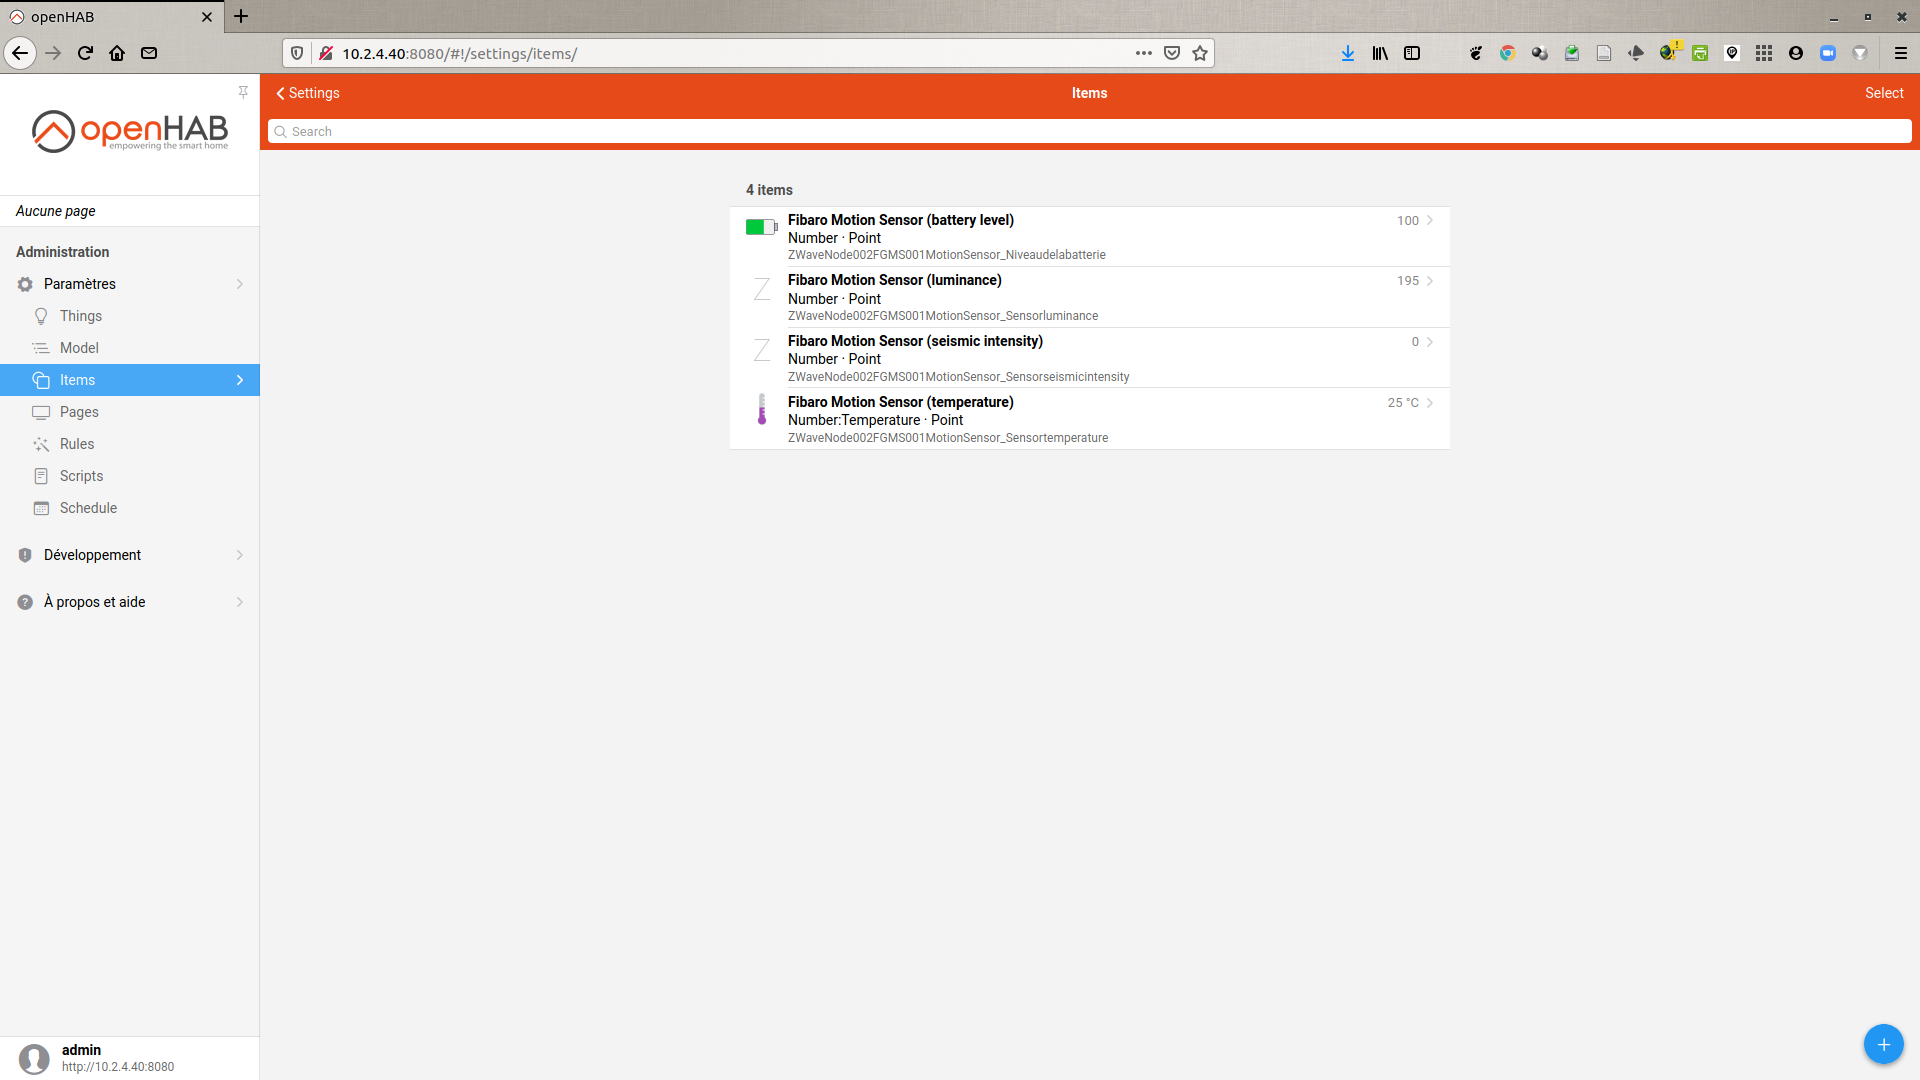
The Motion Sensor temperature item then appears in the Items list.
We can do the same for the other Channels.
And There you go !
Conclusion
Here is the summary of my first experiments with openHAB 3.0 and Z-Wave devices. If it can be of use to other people, it will be with pleasure. I’m not an openHAB expert, but this new version 3.0 seems more intuitive to me and … I managed to get MQTT to work ;-) If you have any comments or suggestions, don’t hesitate to contact me on manuel.munier@univ-pau.fr.
Next step:
- based on my previous tutorial (openHAB 3.0 - how to create a switch that publishes its state via MQTT messages), create rules and scripts to publish in MQTT the data reported by Z-Wave sensors