openHAB 3.0 - RFLink 433MHz gateway (RFXCom alternative)
This tutorial concerns the use of devices communicating in 433MHz under openHAB 3.0 via an RFLink gateway. RFLink is an open source project that allows to realize a gateway between a home automation software and home automation modules that communicate by radio waves. It is a very economical alternative to the well known commercial RFXCom gateway. RFLink is developed by the Dutch company Nodo (project blog).
Here is the material used for this tutorial.
- for the RFLink part
- Arduino Mega 2560
- 433MHz receiver Aurel RX-4M50RR30SF
- breadboard + cables + one 1KΩ resistor
- PC running Ubuntu with the Arduino IDE and the
avrdudepackage - InoValley, wireless outdoor sensor for weather station FWS-310
- for the openHAB part
- Raspberry Pi 4 8Go running openHABian 1.6.3
Building the RFLink gateway
This section is based on the tutorial How to build a RFLink 433MHz radio smarthome gateway for €10.50. Test with Domoticz.
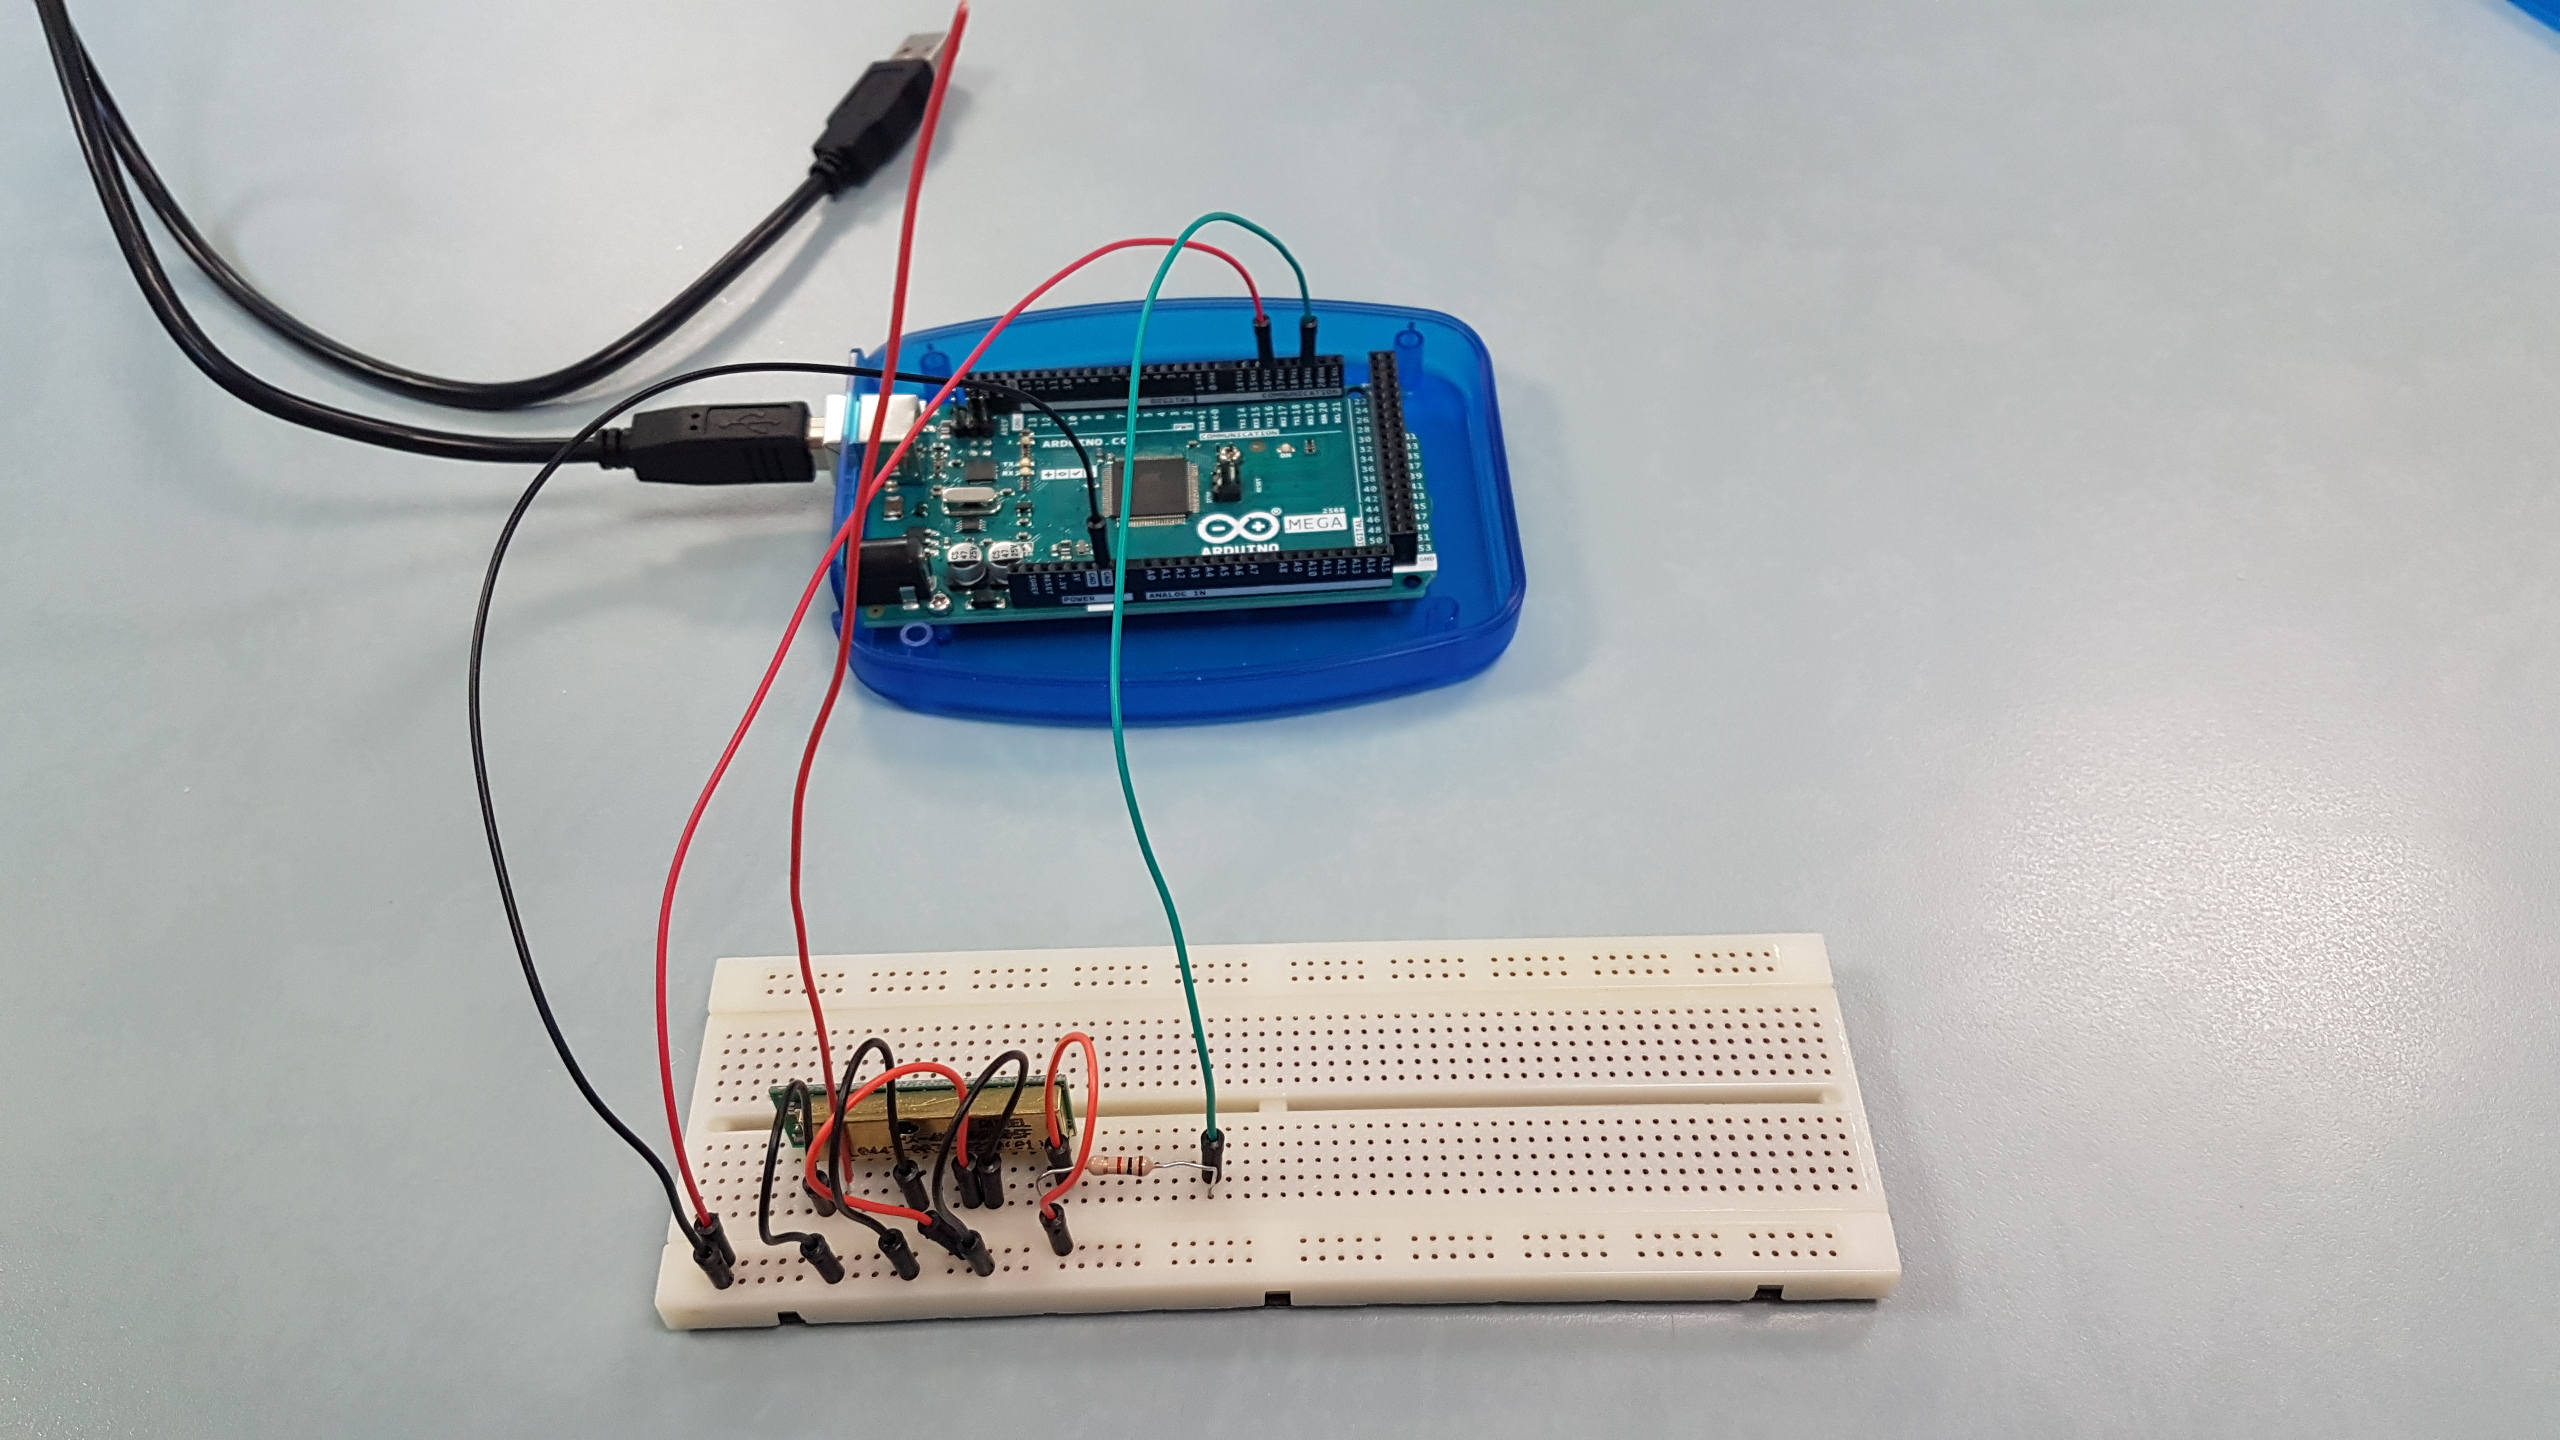
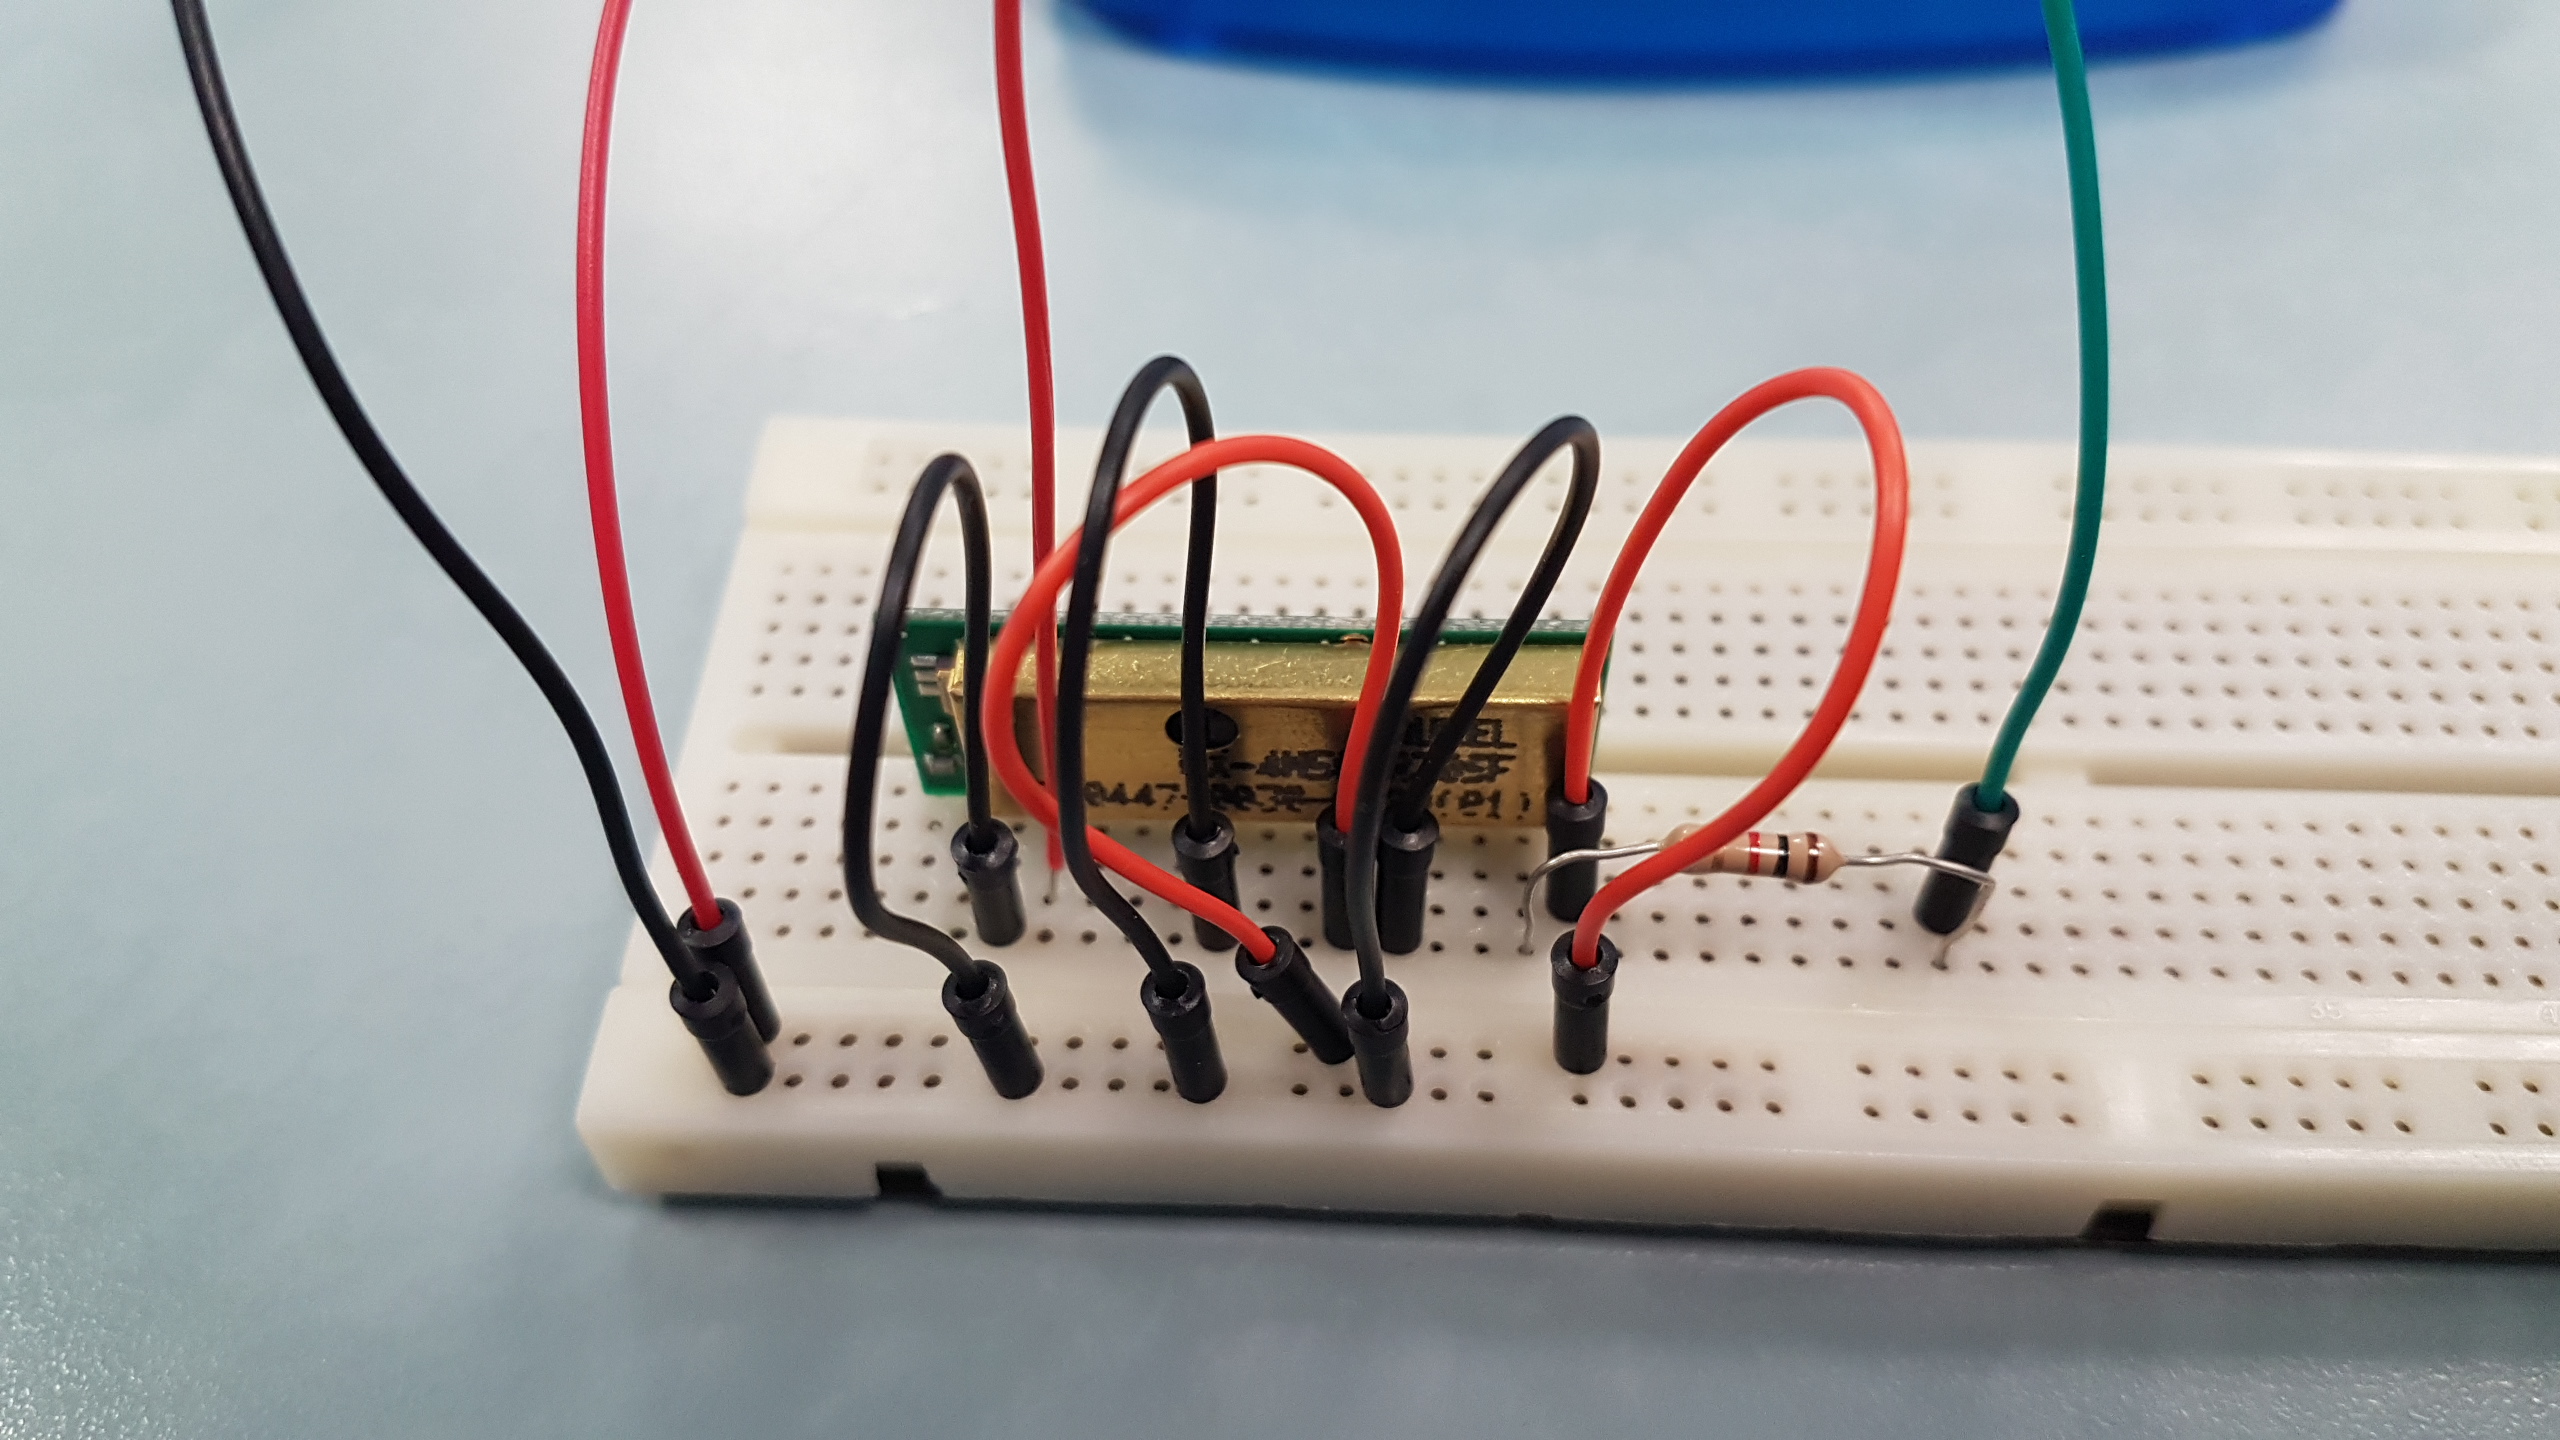
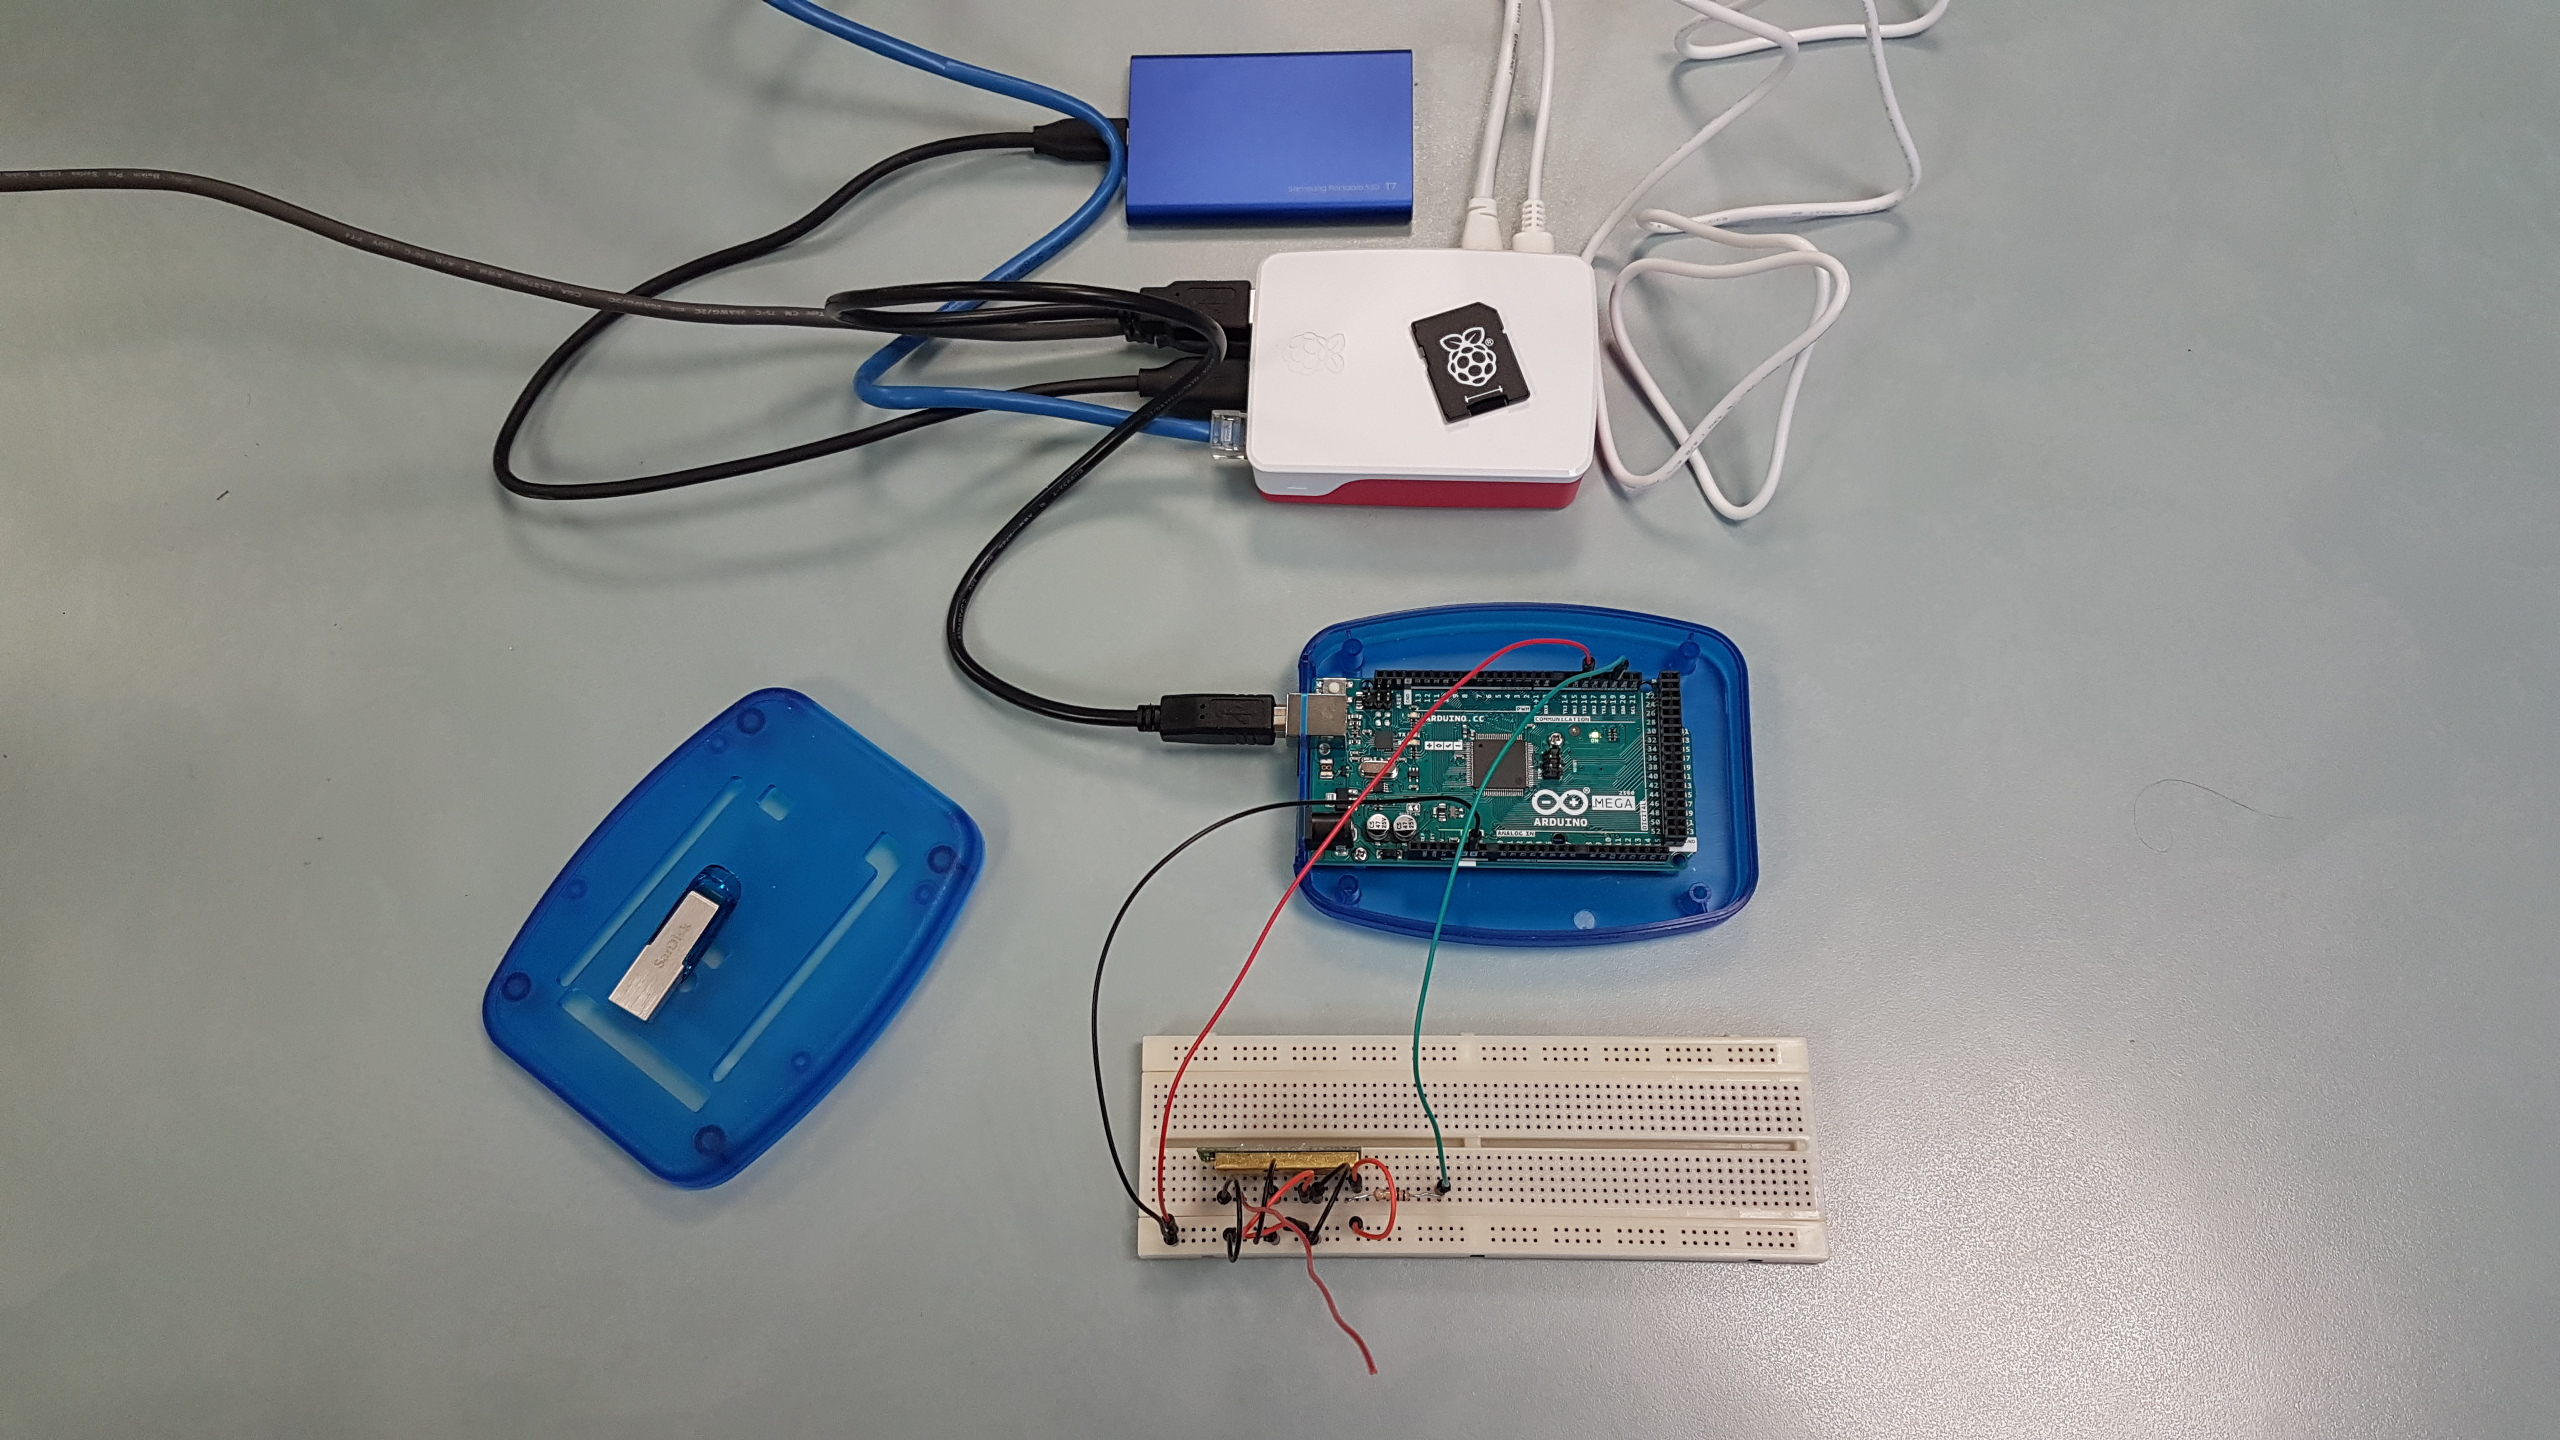
Wiring of radio modules
I chose to use a 433MHz receiver from Aurel (ref. RX-4M50RR30SF, instruction manual). For this module, the wiring plan is as follows:
| RX-4M50RR30SF | connection |
|---|---|
| 2-7-11 | ground (GND on Arduino) |
| 3 | antenna |
| 10-15 | D16 on Arduino |
| 13 | not connected |
| 14 | D19 on Arduino |
To start, as an antenna I used a piece of copper recovery 17cm long. As recommended in the documentation of the RX-4M50RR30SF receiver, I connected it with a 1KΩ resistor.

Uploading the firmware
You must first download the RFLink firmware, here version v1.1_r48, and extract the file RFLink.cpp.hex.
Unlike the tutorial I was inspired by, I didn’t use the ** RFLinkLoader ** utility as it is only available for Windows. However, my laptop works exclusively under Ubuntu. After some research on the Internet I found that we could also flash the firmware on the Arduino directly from the command line using the utility avrdude, which is also the program used by the Arduino IDE (cf. tuto Programming Arduino Mega using avrdude).
The command used in Ubuntu is: avrdude -p atmega2560 -c stk500v2 -P /dev/ttyACM0 -b 115200 -D -F -U flash:w:RFLink.cpp.hex
NB: Note the -D option (cf. post atmega2560 won’t erase when programming).
Tests
Since the Arduino is still connected by USB to the Ubuntu PC, we can test the good communication with the serial monitor of the Arduino IDE. To do this, the serial port speed must be configured at 57600 baud. It is thus possible to visualize the data transmitted by the 433MHz peripherals within range. For this tutorial I used an InoValley temperature sensor from Pearl Diffusion (wireless outdoor sensor for weather station FWS-310).
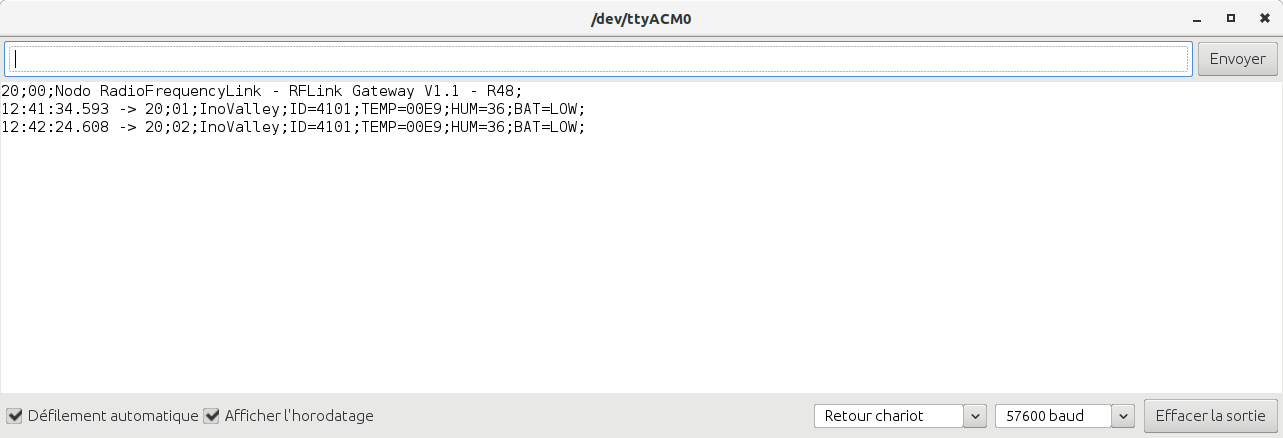
The line 20;01;InoValley;ID=4101;TEMP=00E9;HUM=36;BAT=LOW; tells us about the sensor id (4101), temperature (00E9 in hexa, or 23,3°C) and humidity (36%).
Configuring the RFLink gateway under openHAB
The second part of this tutorial concerns the configuration of this RFLink gateway under openHAB 3.0. For this I used a Raspberry Pi 4 8GB on which I installed openHABian 1.6.3 (via BerryBoot to be able to install the OS on an external SSD).
Install the RFLink Binding
There is currently no Binding for RFLink supplied with OH3. So I looked at the information found on this post to manually download and install a Binding for RFLink. I downloaded the archive located here.
On the RasPi4 you must first copy this file into the /usr/share/openhab/addons directory, making sure that the owner is openhab:
cd /usr/share/openhab/addons
wget <your_web_server>/openhab.openhab org.openhab.binding.rflink-3.0.0-SNAPSHOT.jar
sudo chown openhab.openhab org.openhab.binding.rflink-3.0.0-SNAPSHOT.jar
This Binding depends on the plugin org.openhab.io.transport.serial that we need to install via the openHAB console (cf. doc):
ssh -p 8101 openhab@localhost
feature:install openhab-transport-serial
logout
All that remains is to restart OH3 to take this new Binding into account:
sudo /bin/systemctl stop openhab.service
systemctl daemon-reload
sudo /bin/systemctl start openhab.service
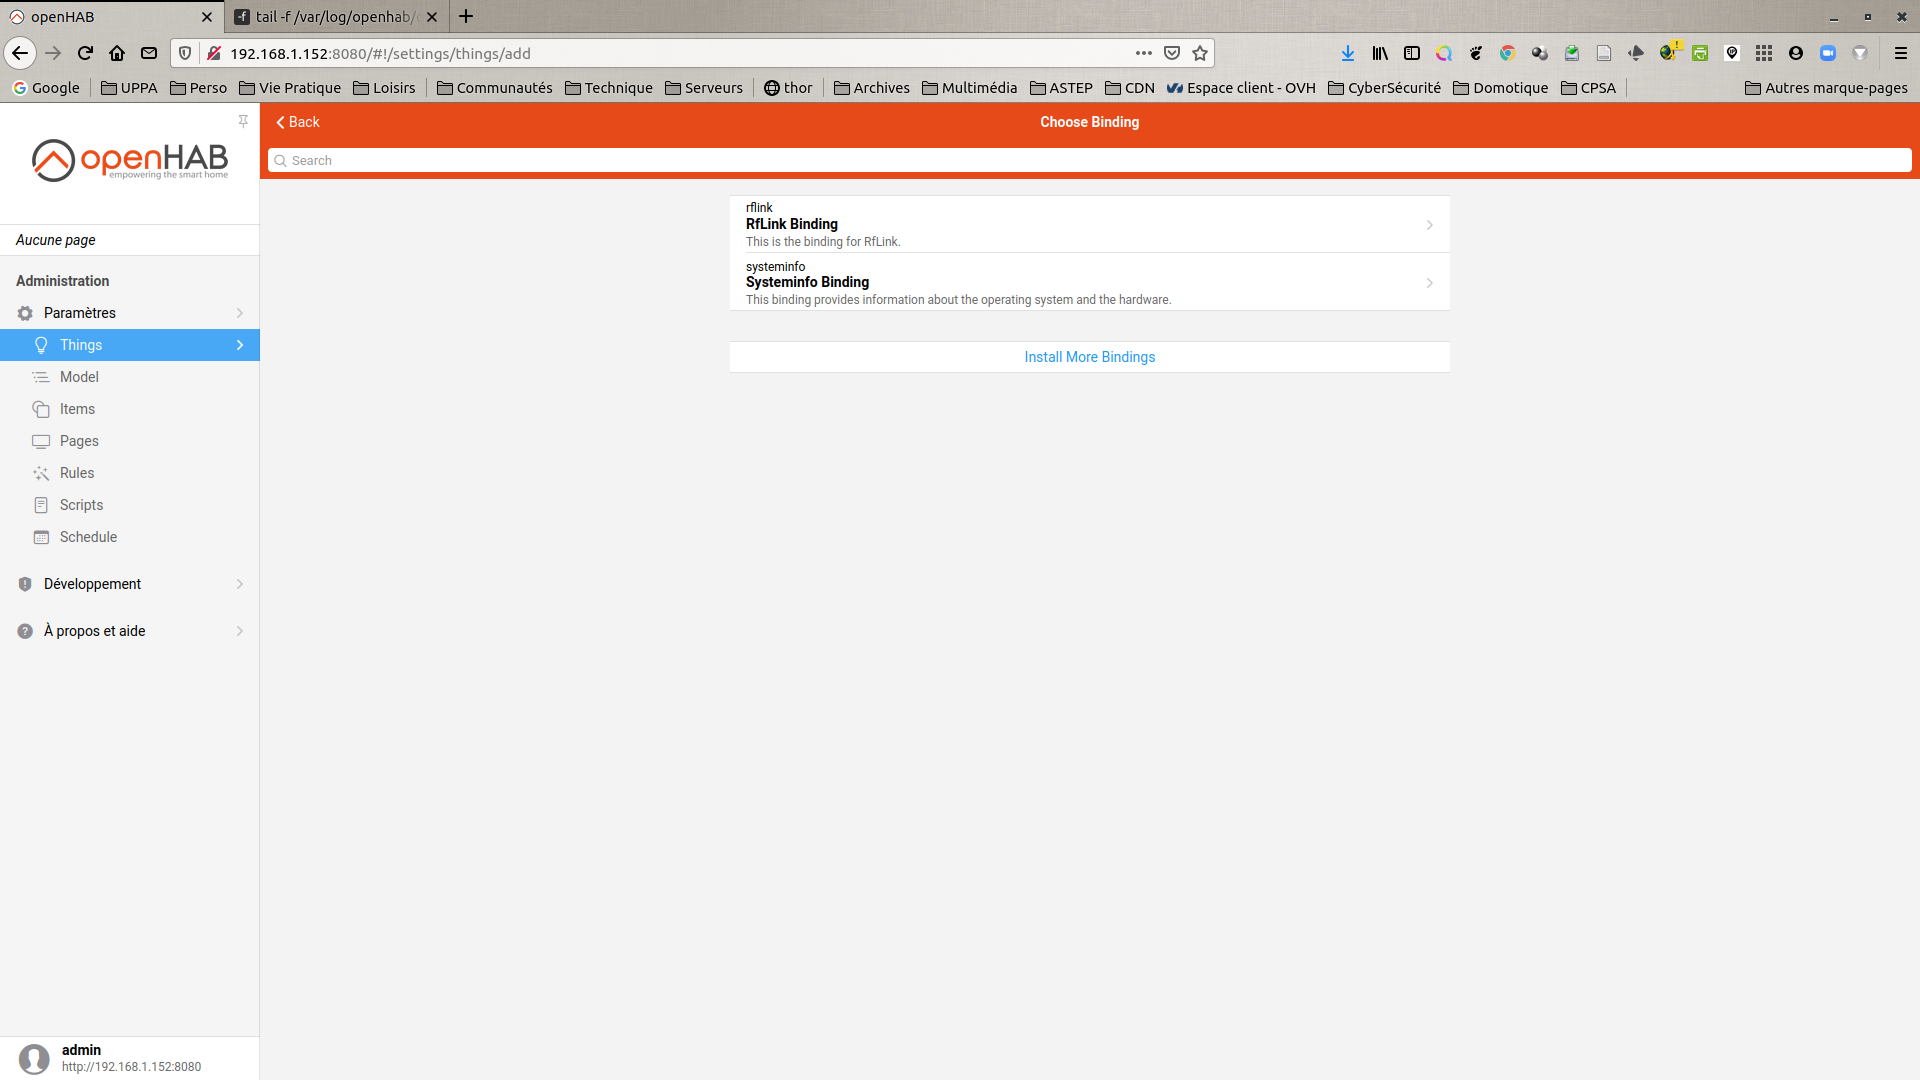
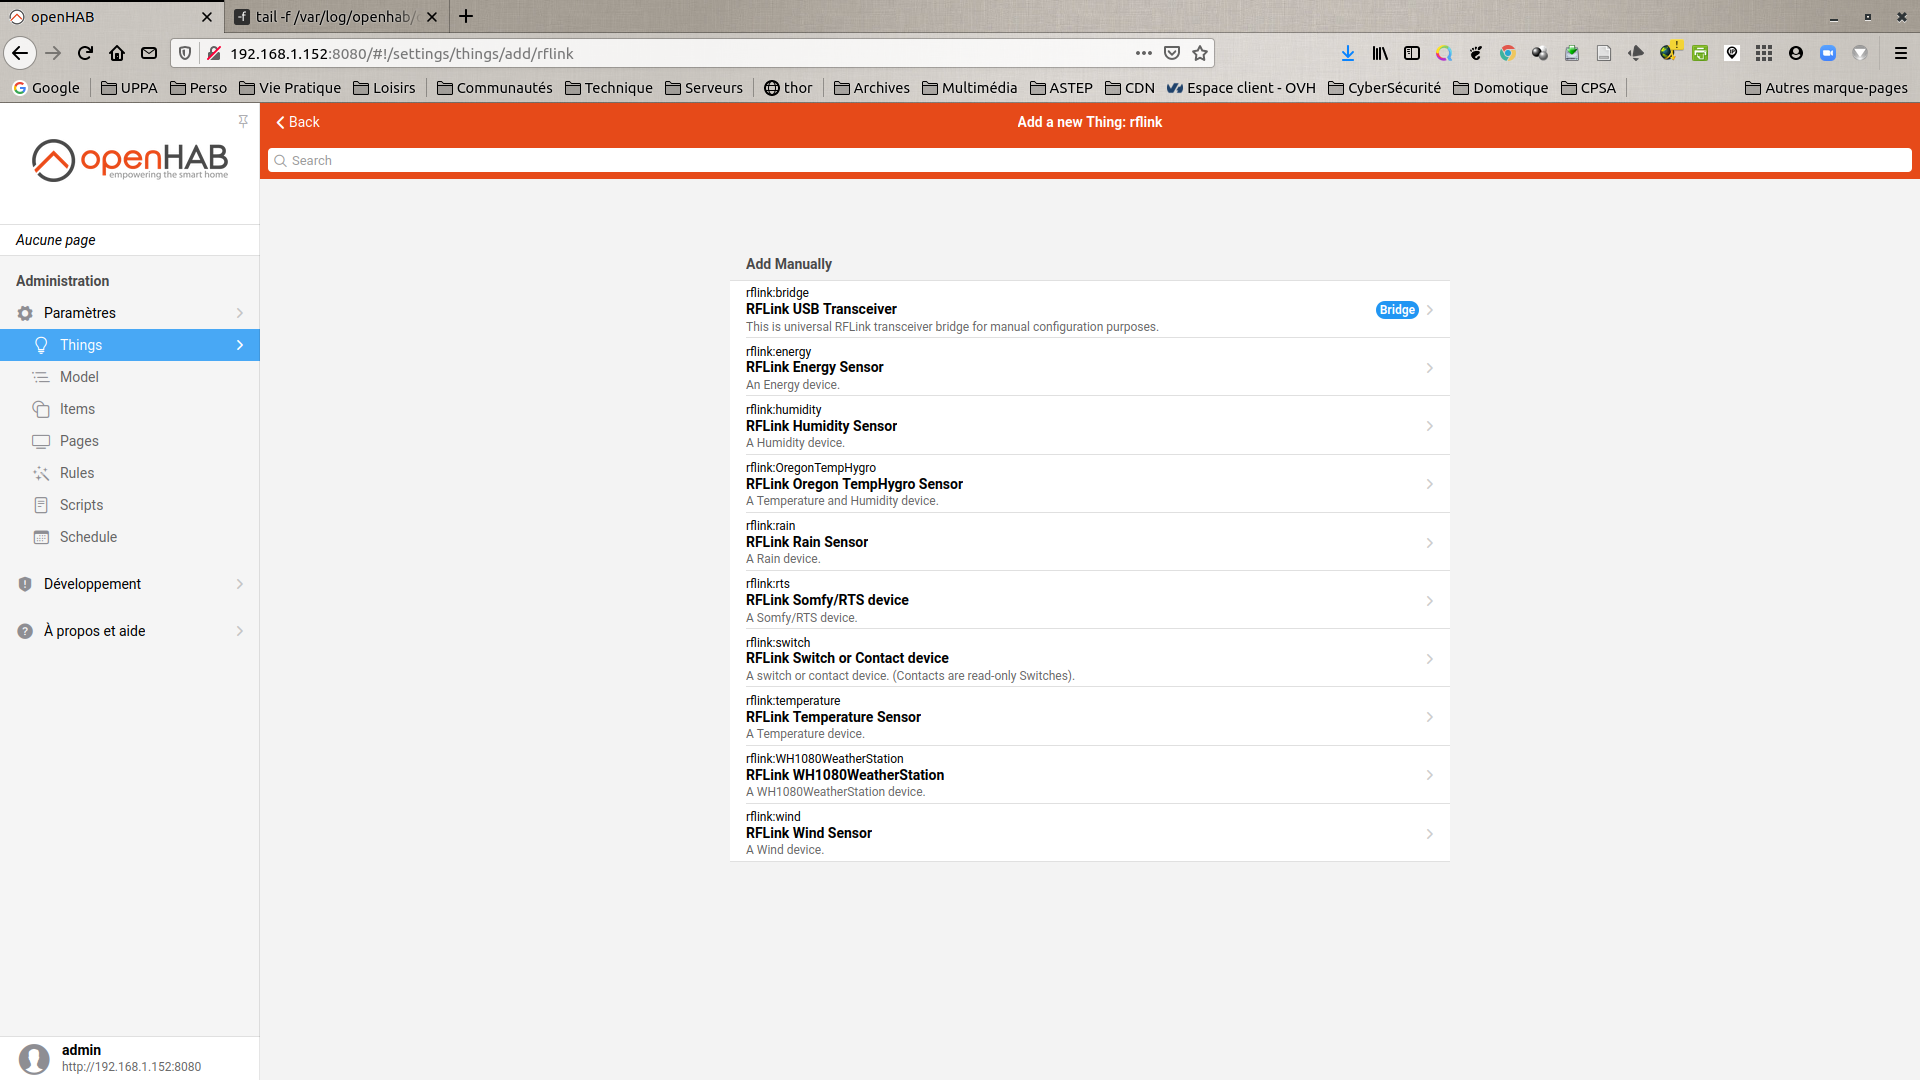
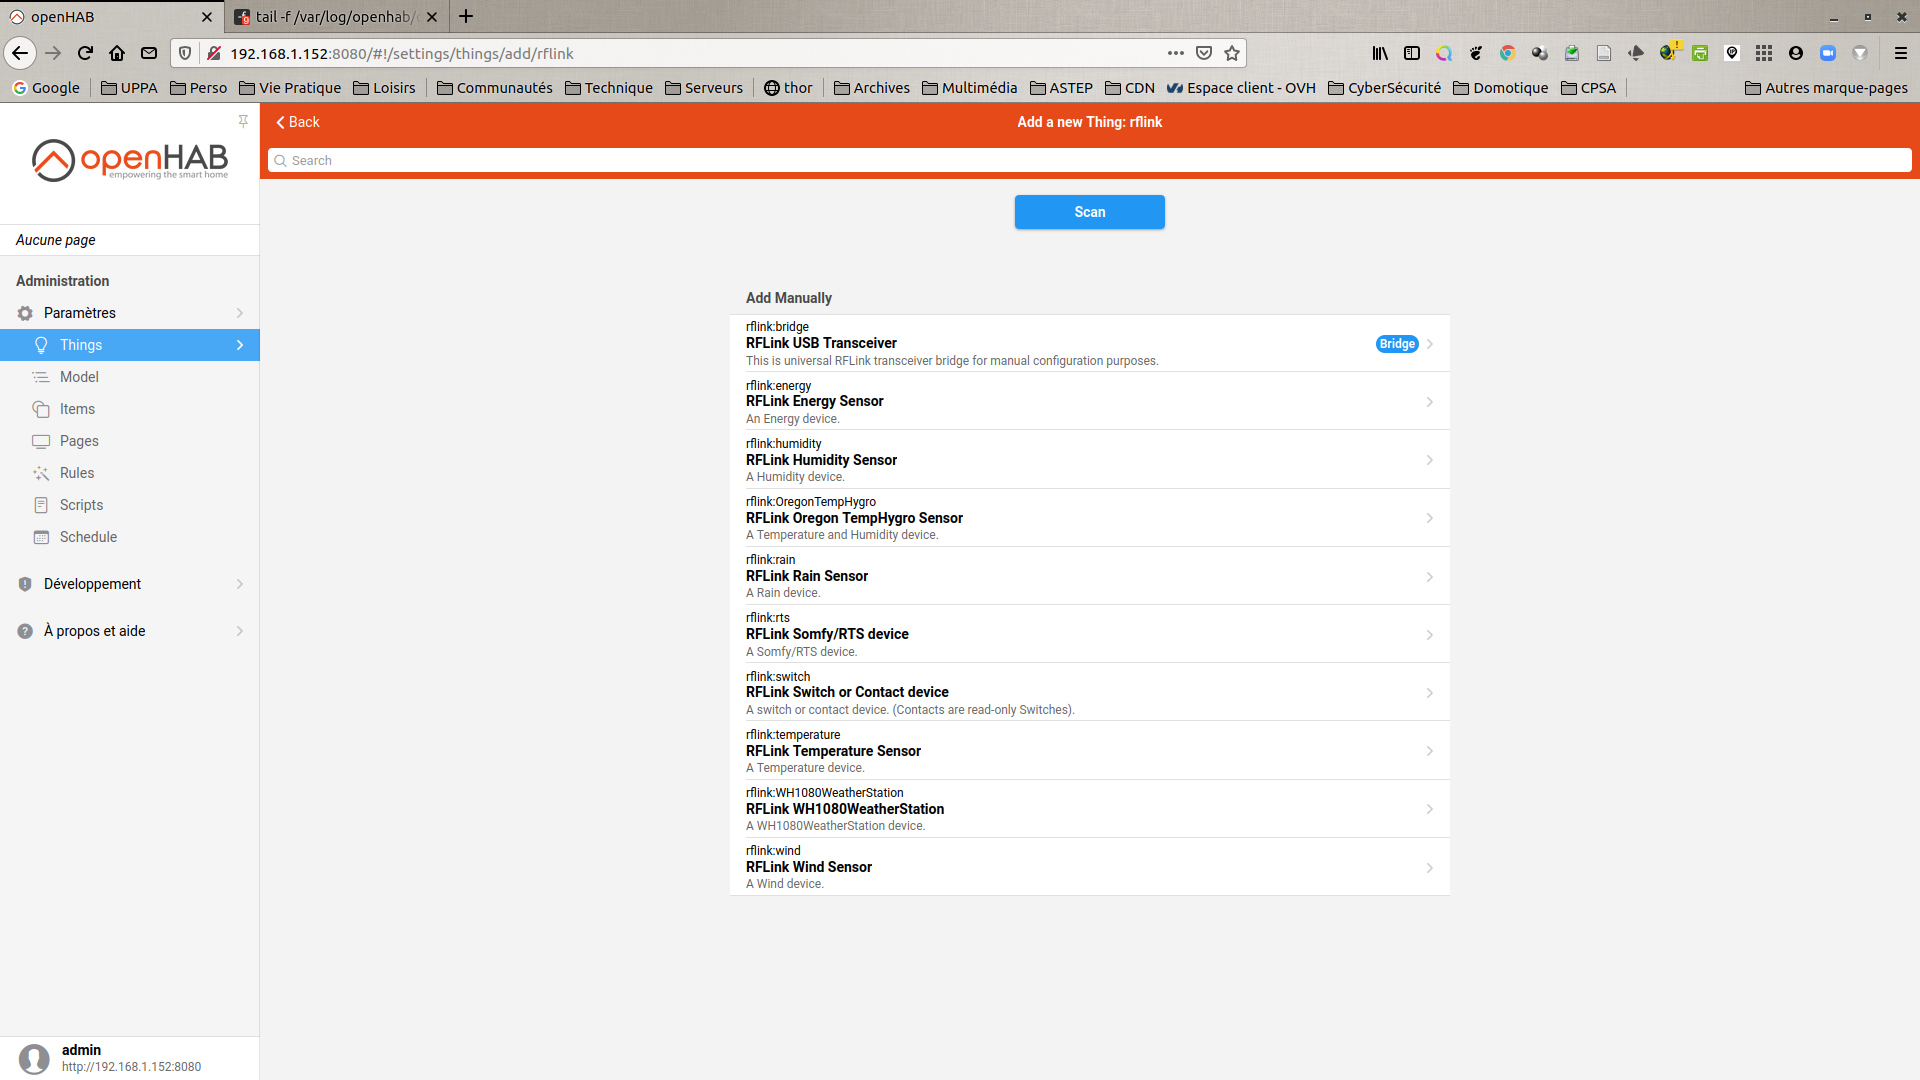
We can now connect to the OH3 web interface using the URL http://openhabianraspi4-01:8080/ and in Settings → Things → Blue « + » we can see the RfLink Binding.
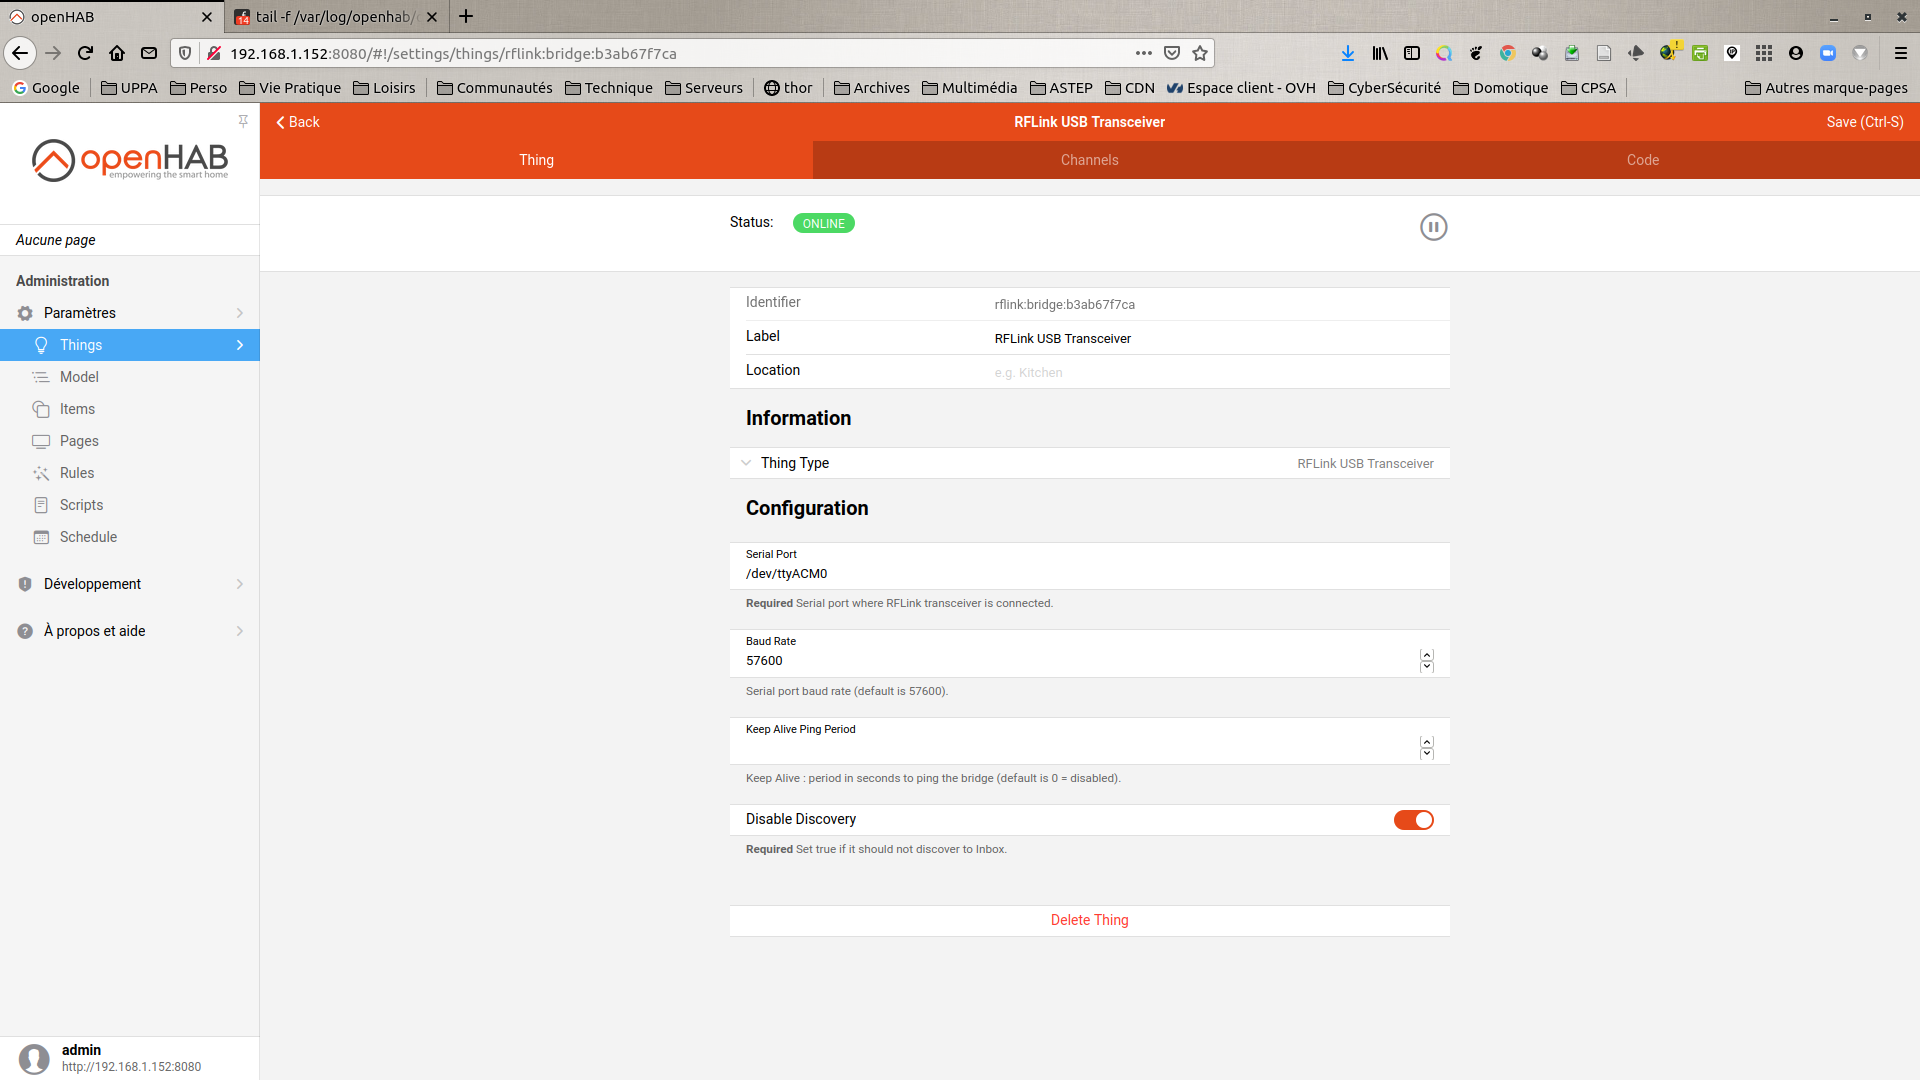
Setup RFLink
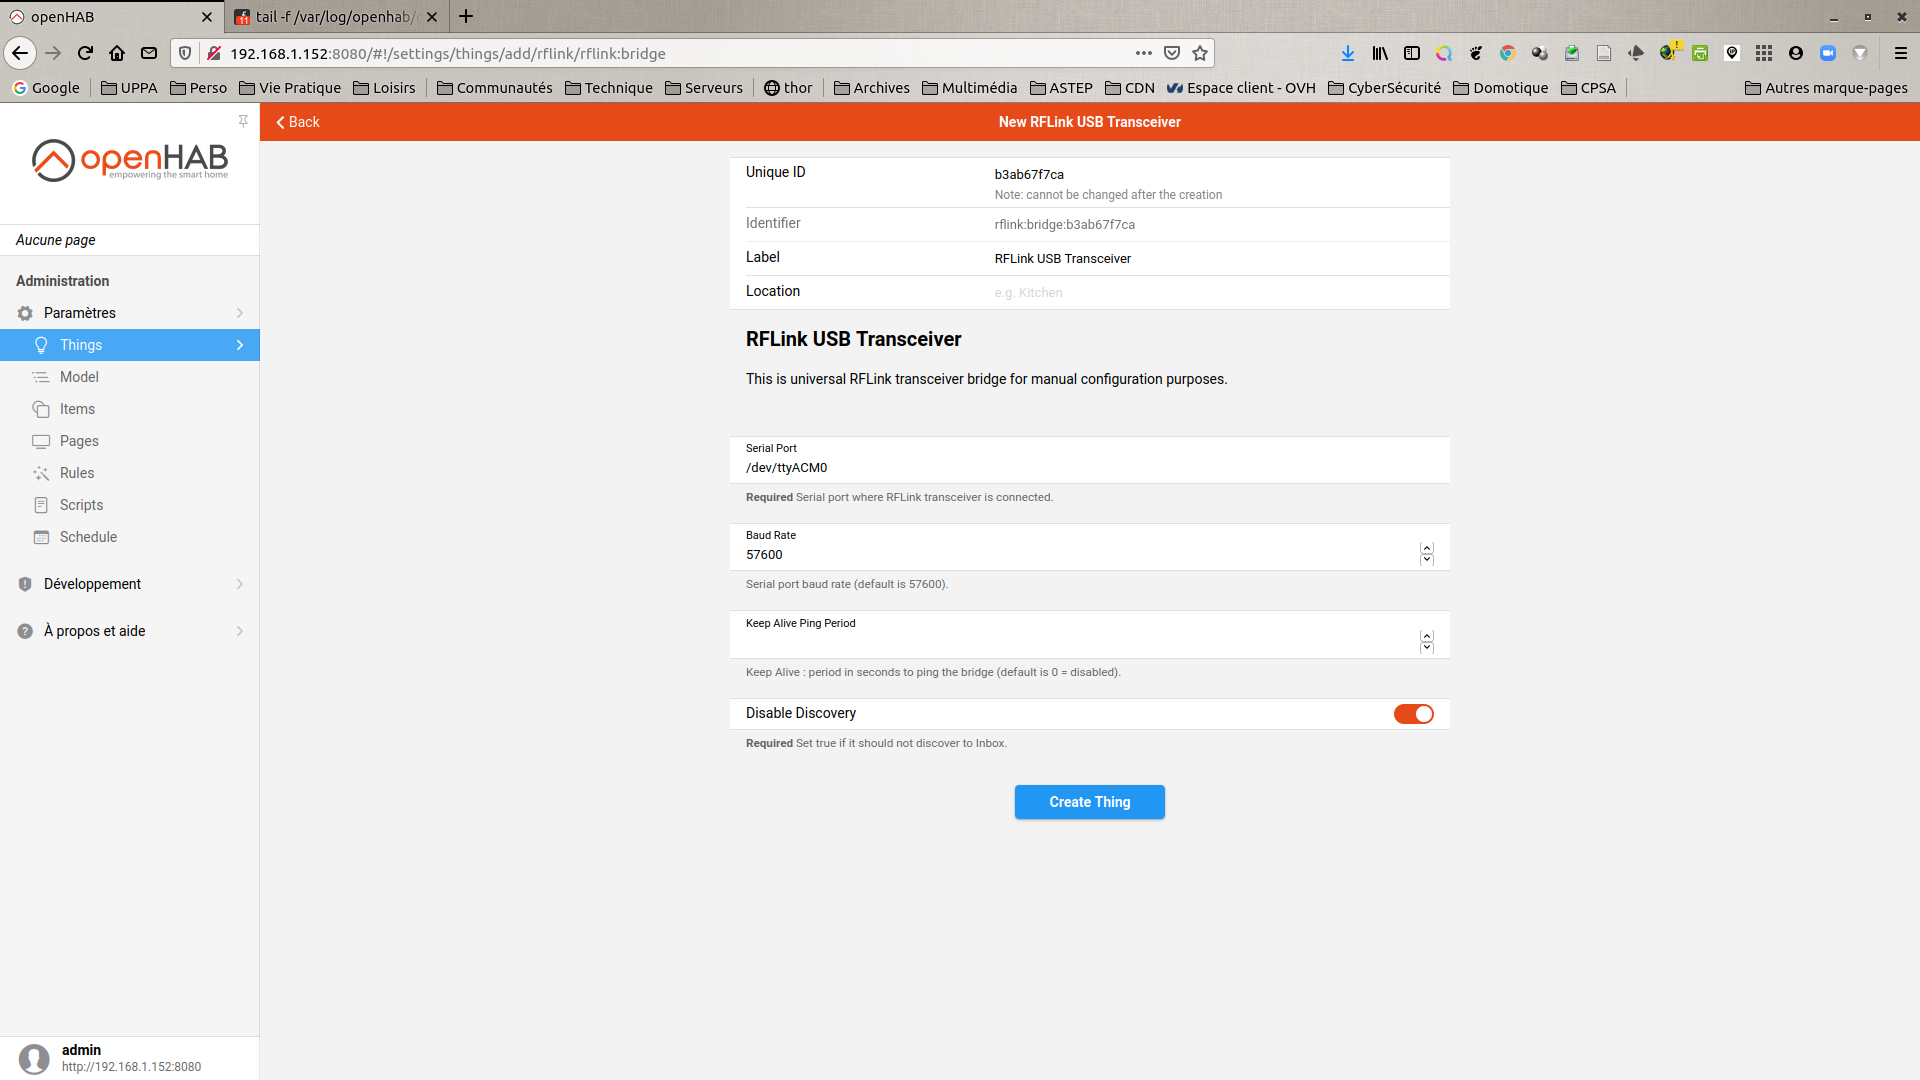
- On this RfLink Binding we select the RFLink USB Transceiver bridge and configure it (cf. info found here)
- Serial Port =
/dev/ttyACM0 - Baud Rate =
57600 - Disable Discover =
True - click on Create Thing
- Serial Port =
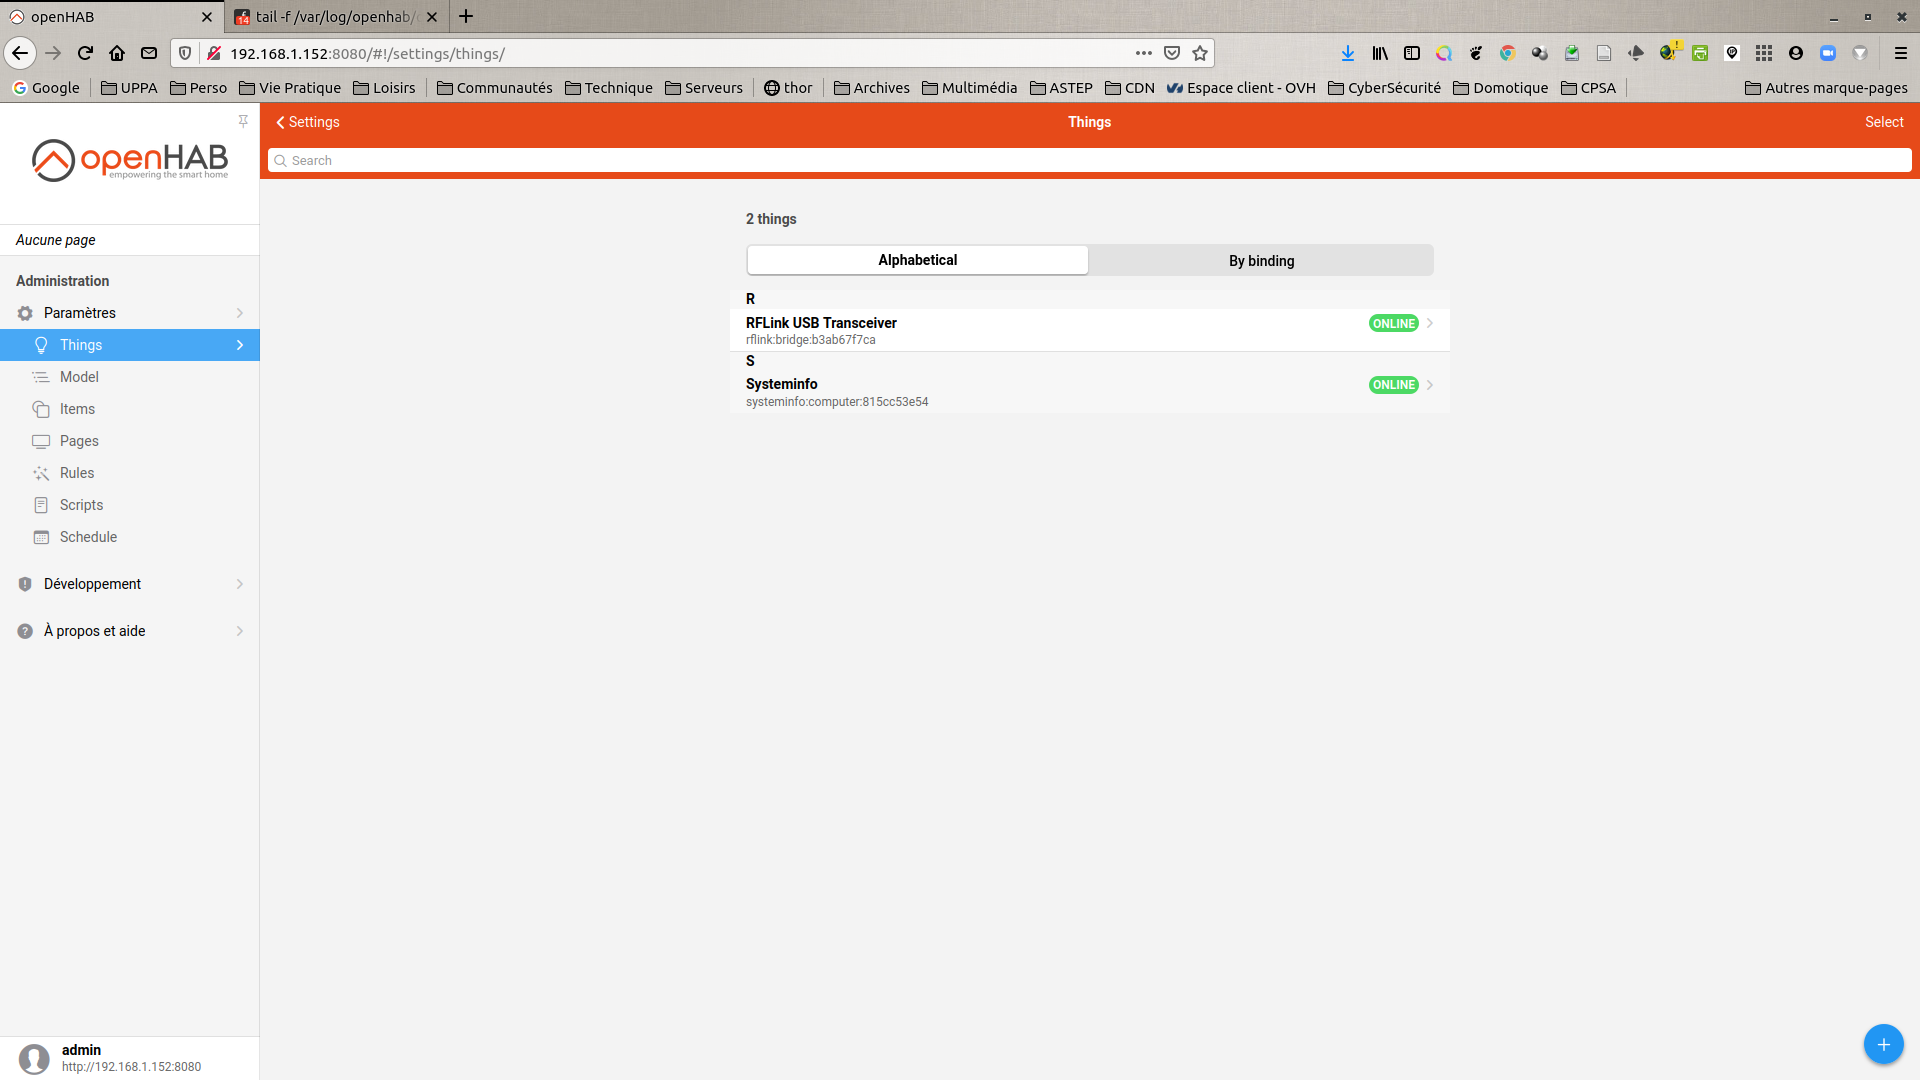
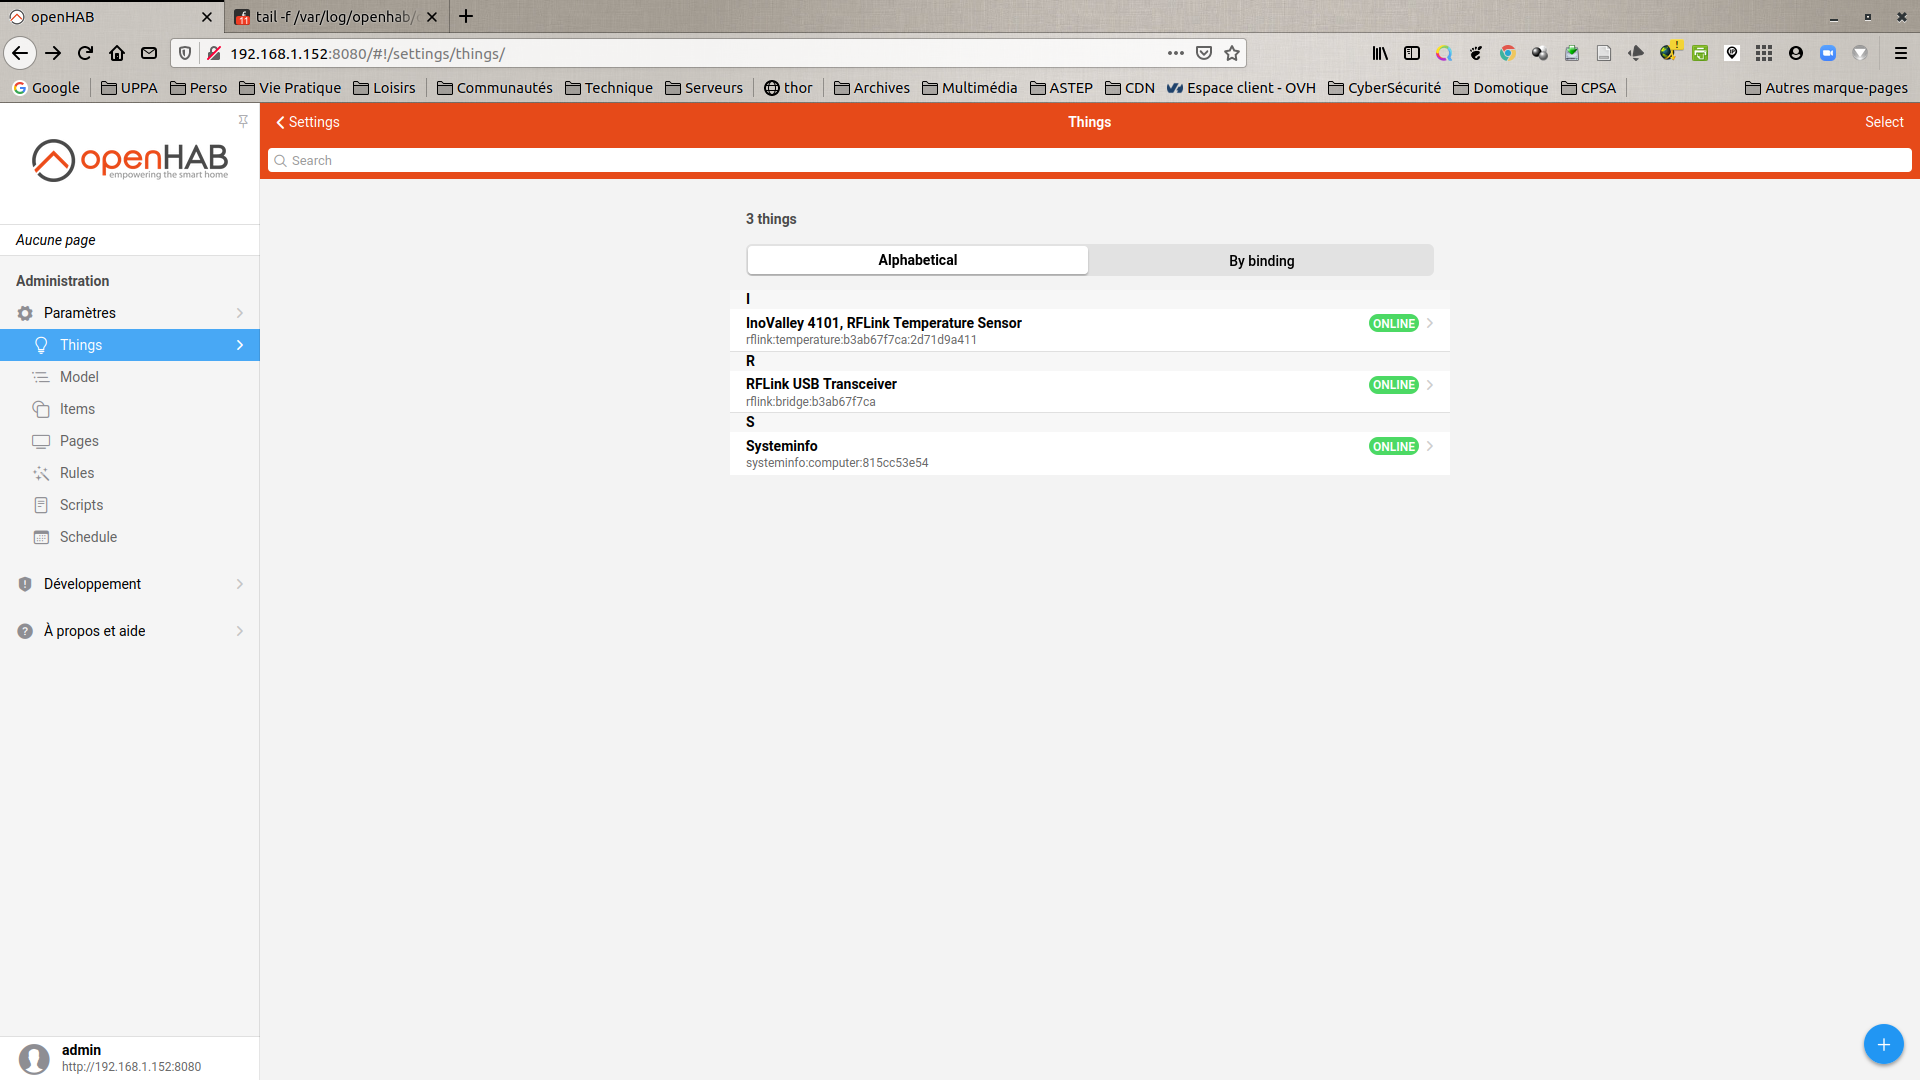
- the RFLink USB Transceiver will appear in your list of Things and is ONLINE
Register devices
Temperature sensor
- Create Thing: Settings → Things → Blue « + » → RfLink Binding then select the addition of a RFLink Temperature Sensor
- Label =
InoValley 4101, RFLink Temperature Sensor - Bridge =
RFLink USB Transceiver - Device Id =
InoValley-4101 - click on Create Thing
- Label =


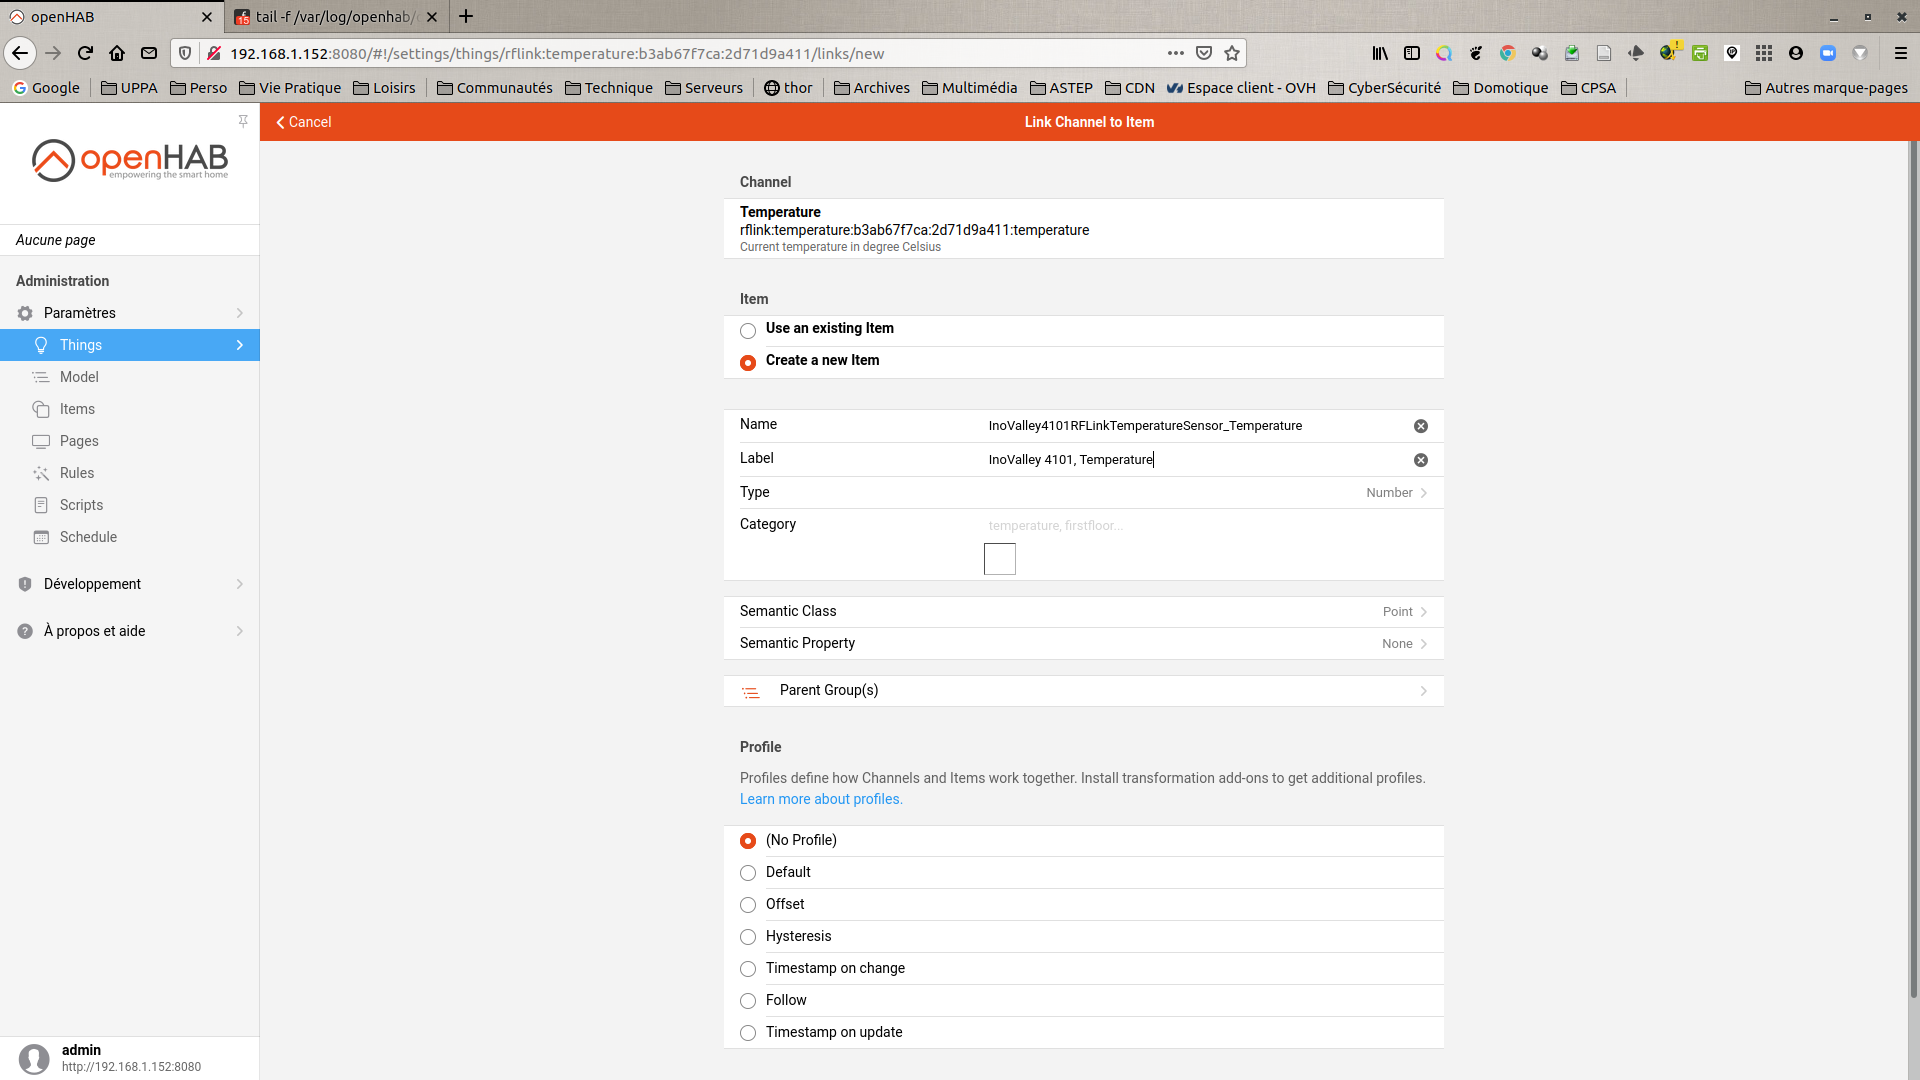
- Create Item: Settings → Things → Blue « + » → InoValley 4101, RFLink Temperature Sensor → Channels → Temperature
- click on Add Link to Item
- select Create a new Item
- Name =
InoValley4101RFLinkTemperatureSensor_Temperature - Label =
InoValley 4101, Temperature - click on Link
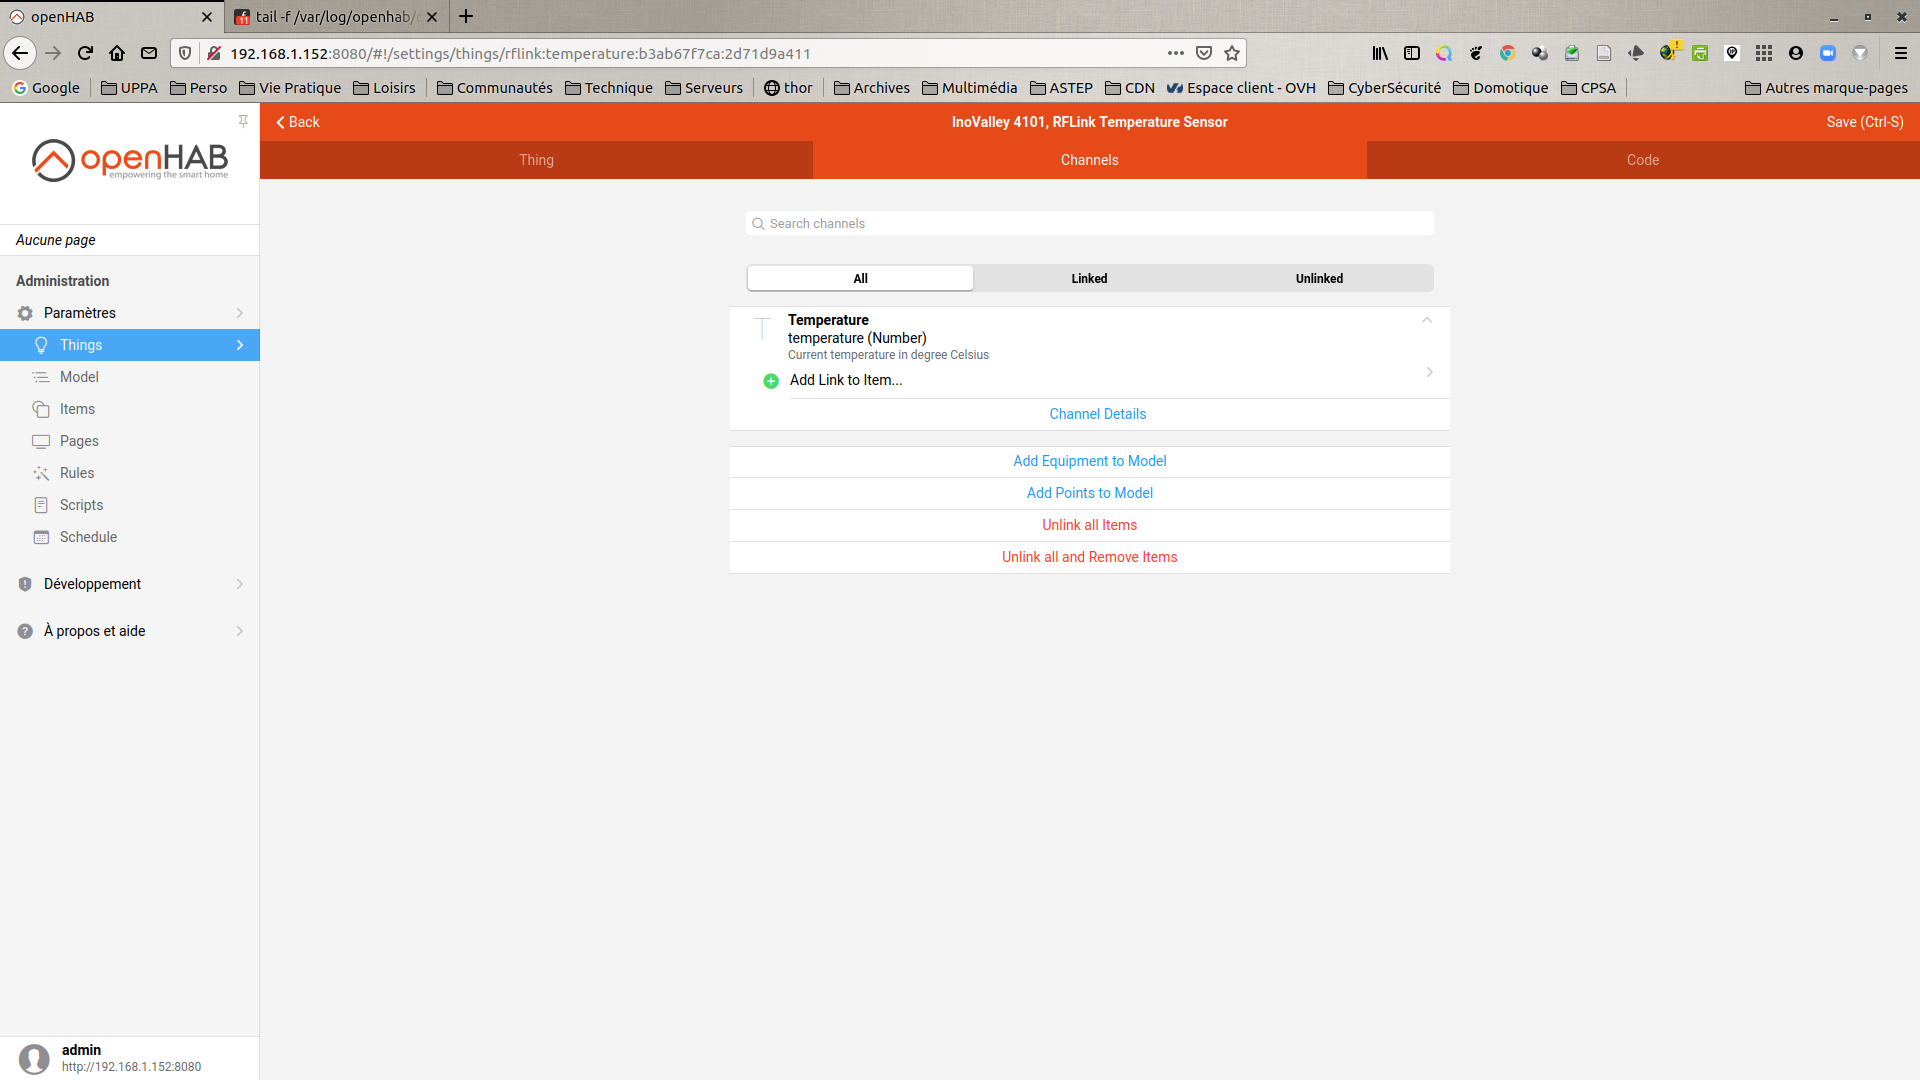

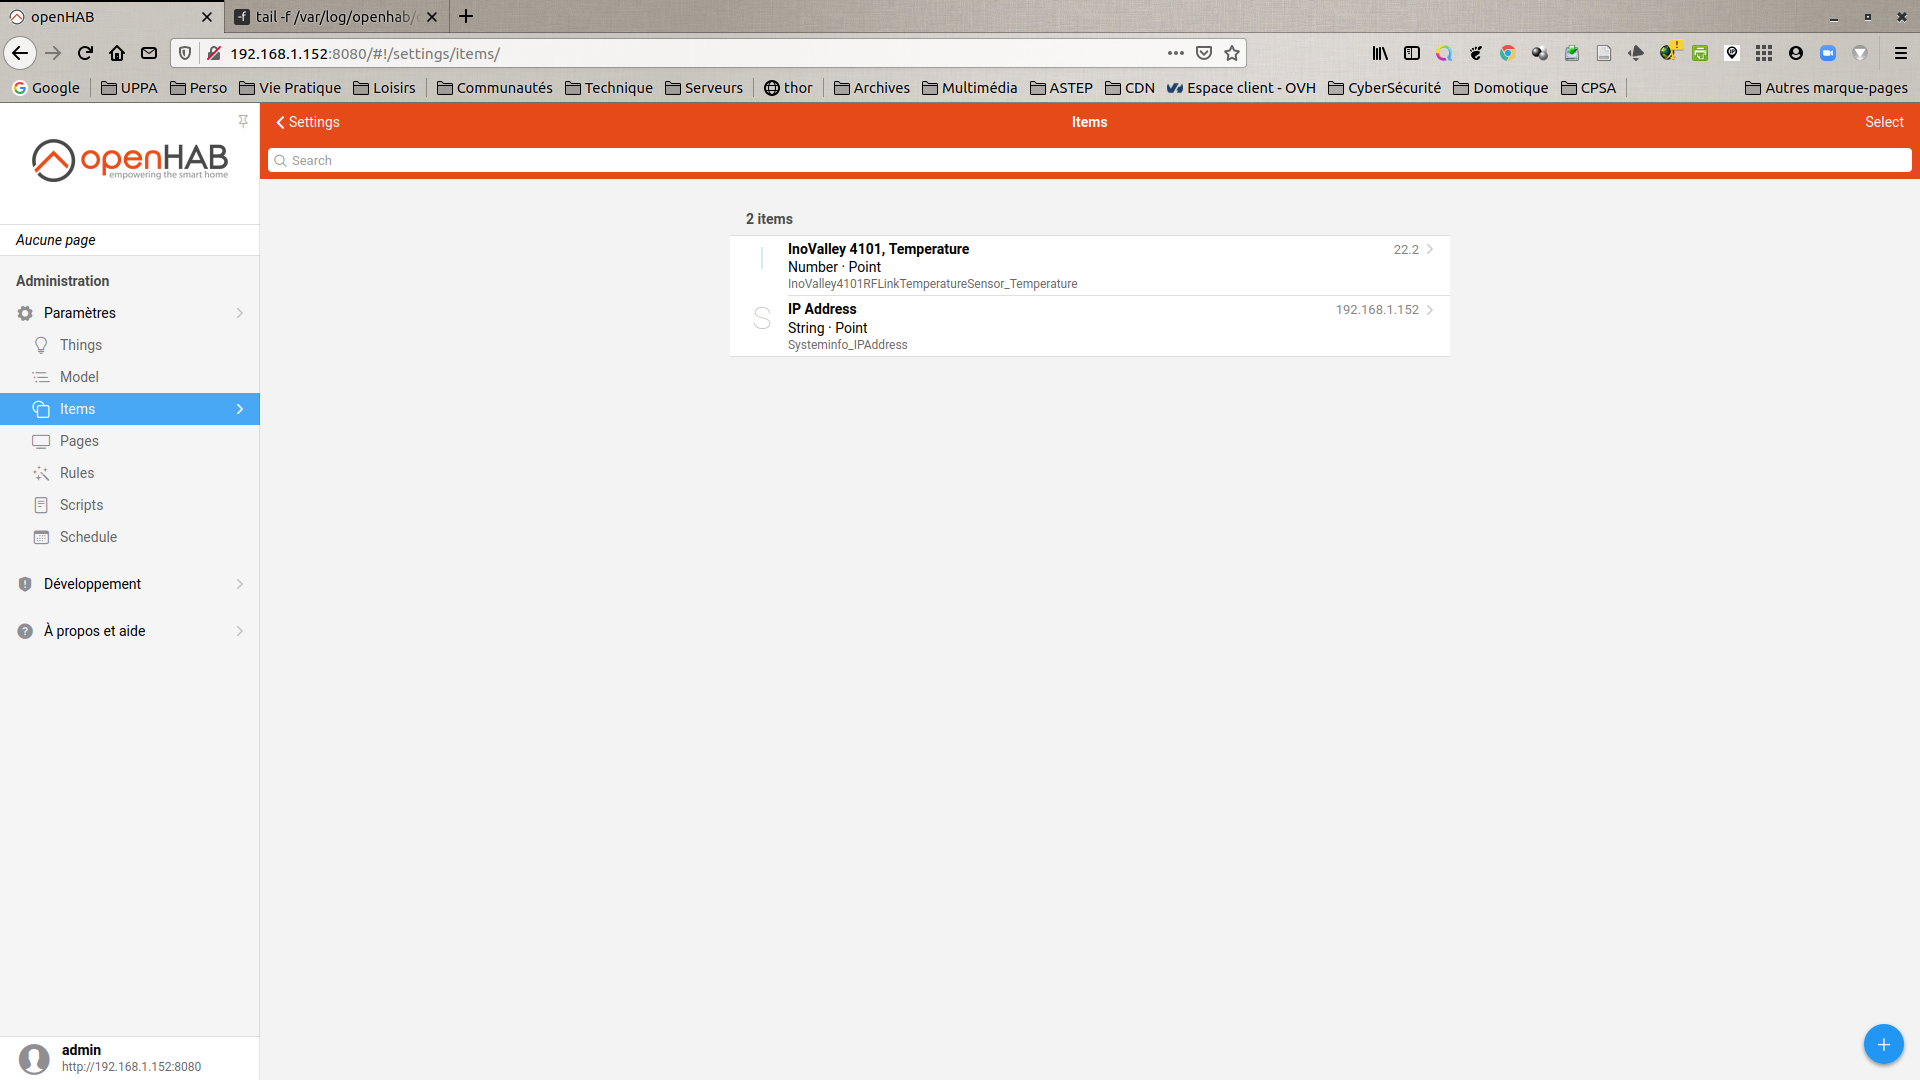
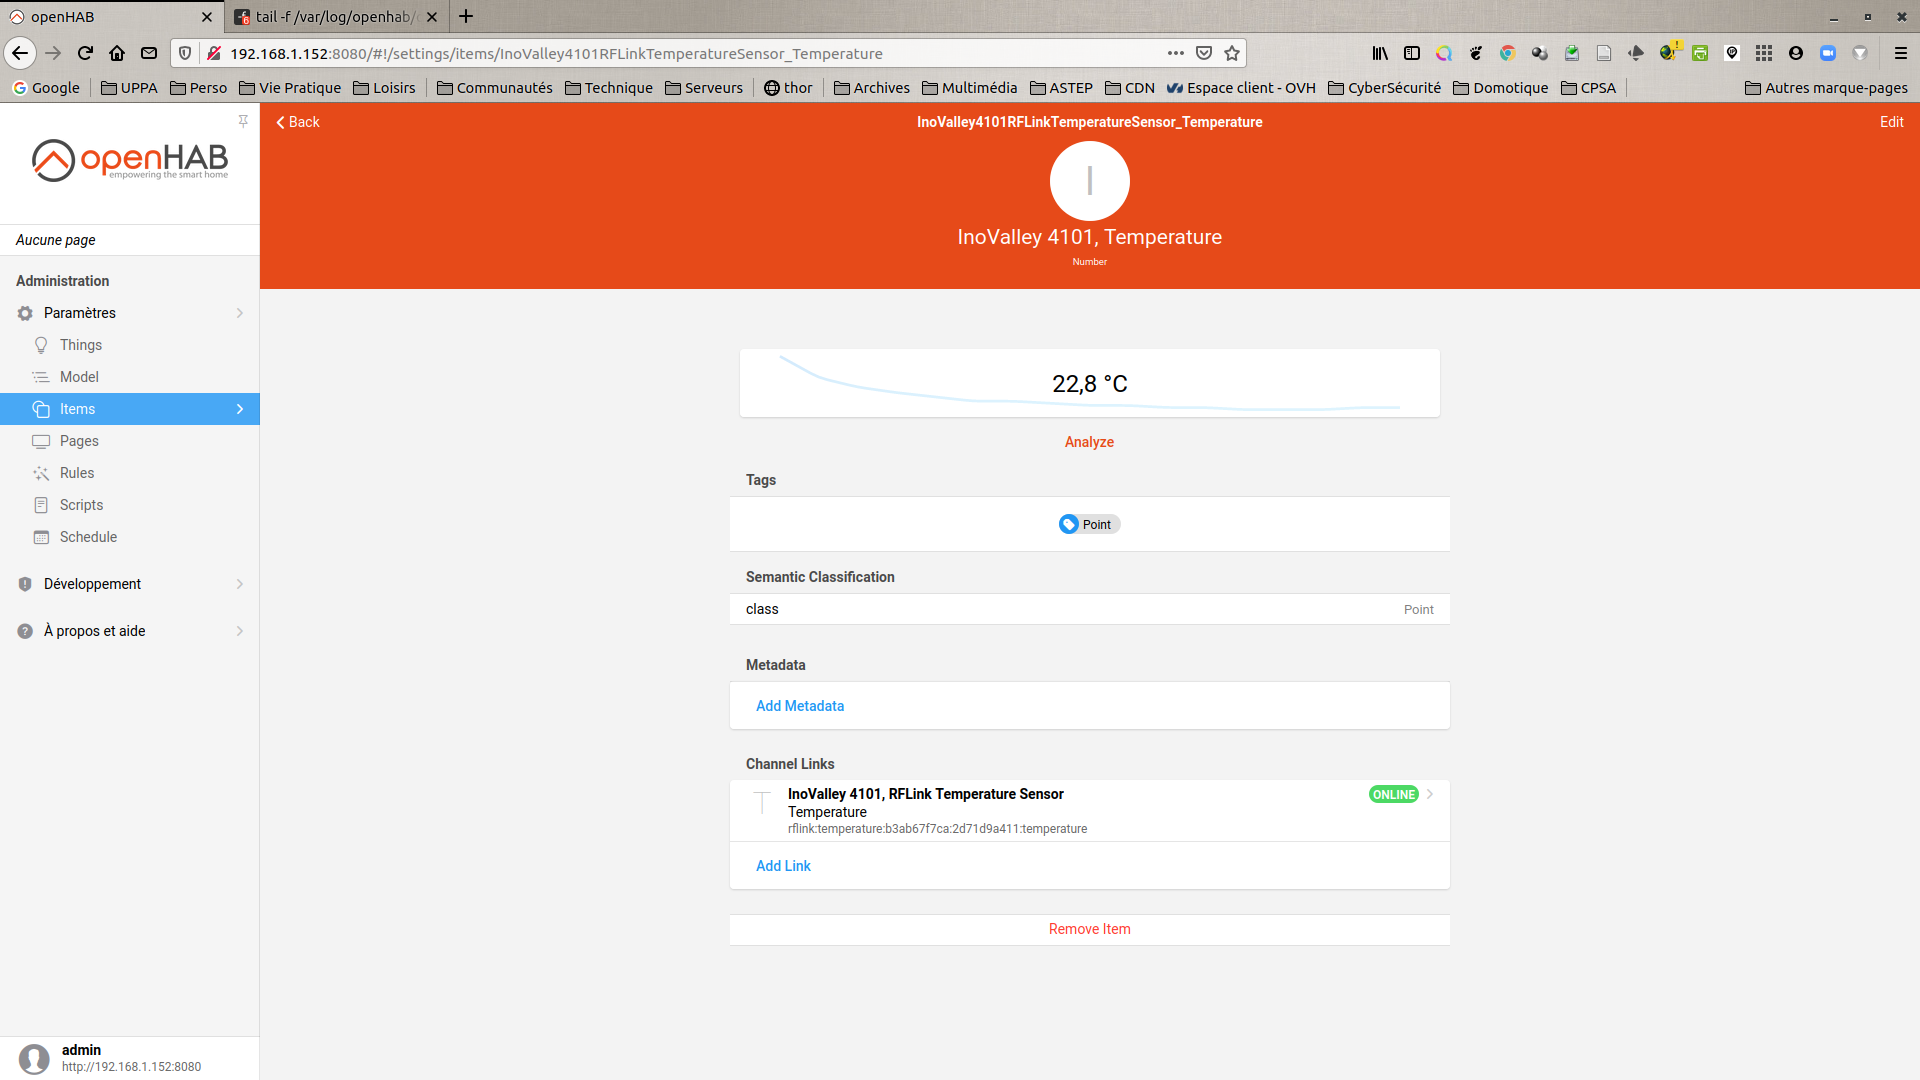
- In the list of Items we see InoValley 4101, Temperature and a few seconds later its value is updated.
Note
As we can see, it is necessary to know the device id. In our case, we had discovered this previously using the serial monitor from the Arduino IDE. Once the Arduino is plugged into the Raspberry and the USB port is correctly configured (via the RFLink USB Transceiver bridge), all you have to do is do a cat /dev/ttyACM0 in a terminal. This is very practical …
- when adding new devices
- when certain sensors (eg: InoValley temperature sensors used here) change their id randomly when replacing the batteries…
Humidity sensor
We can now reproduce the steps for the humidity channel.
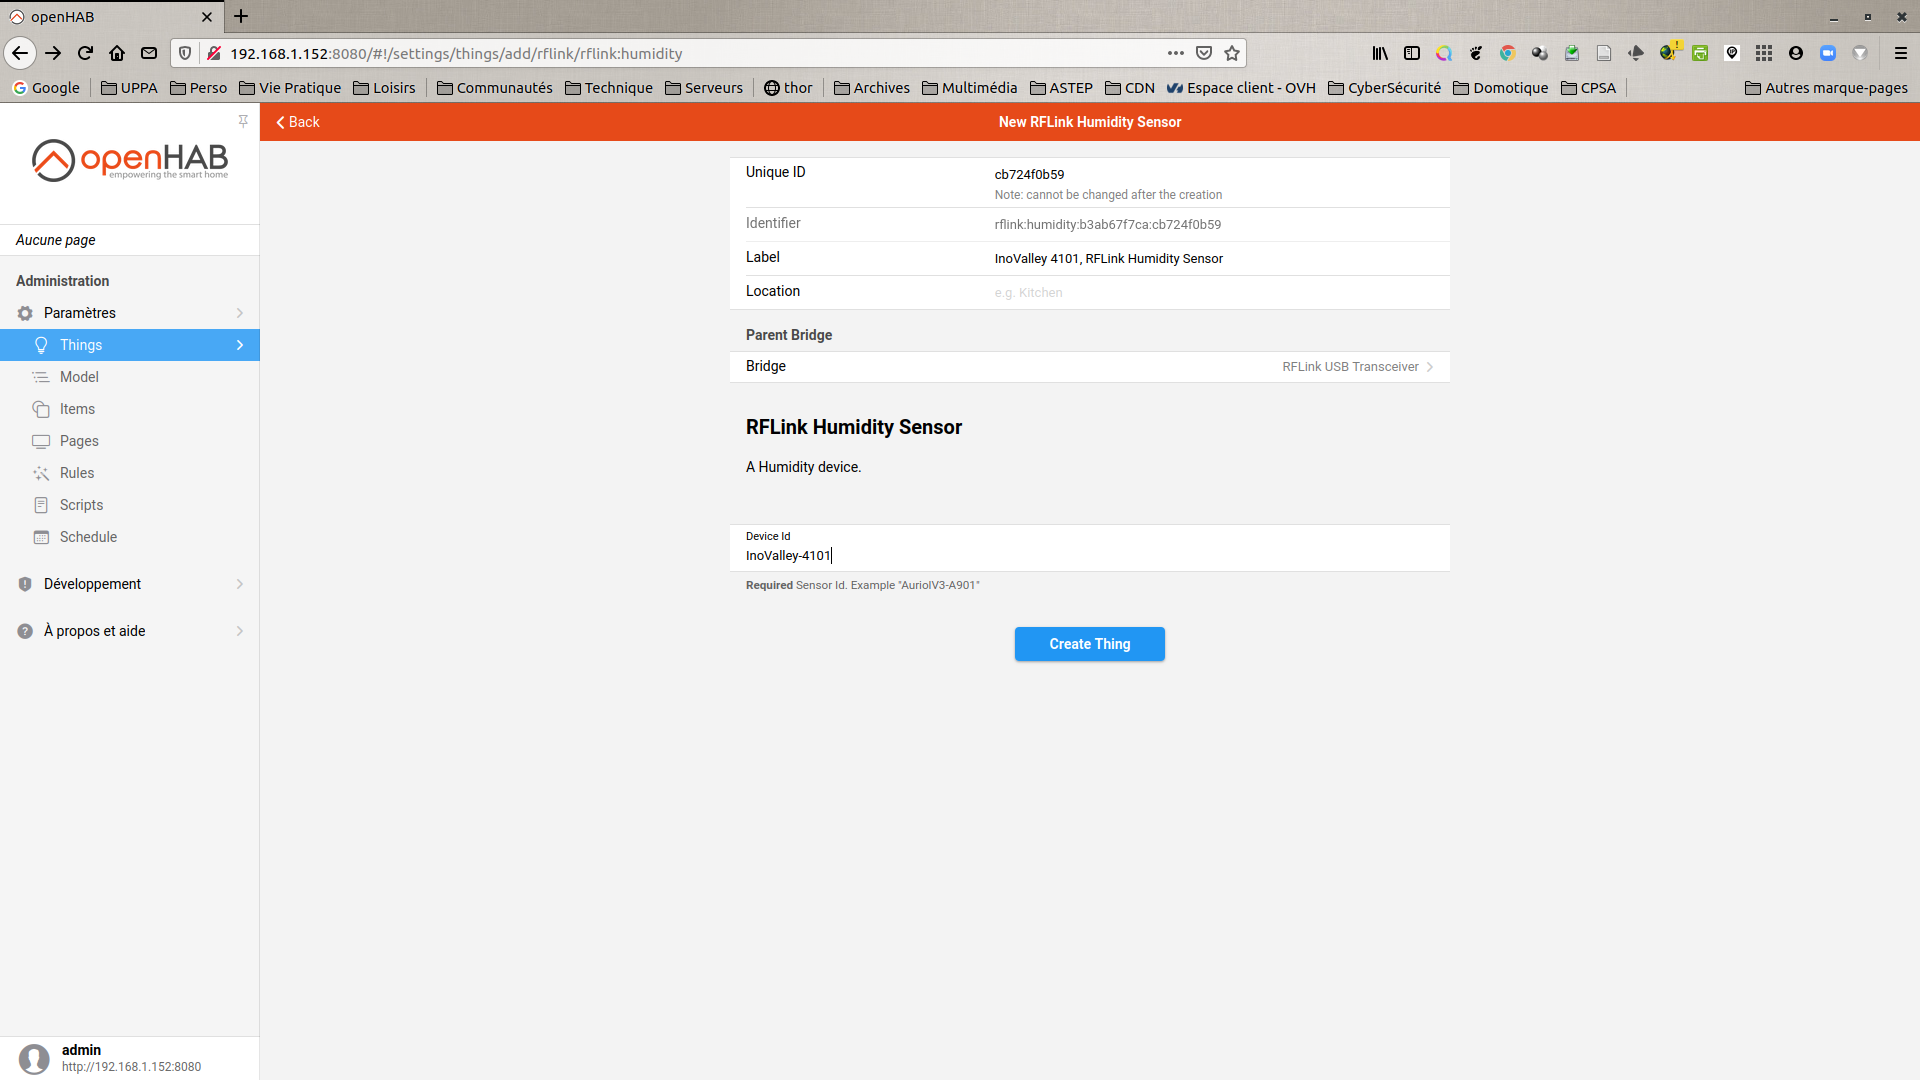
- Create Thing: Settings → Things → Blue « + » → RfLink Binding then select the addition of a RFLink Humidity Sensor
- Label =
InoValley 4101, RFLink Humidity Sensor - Bridge =
RFLink USB Transceiver - Device Id =
InoValley-4101 - click on Create Thing
- Label =
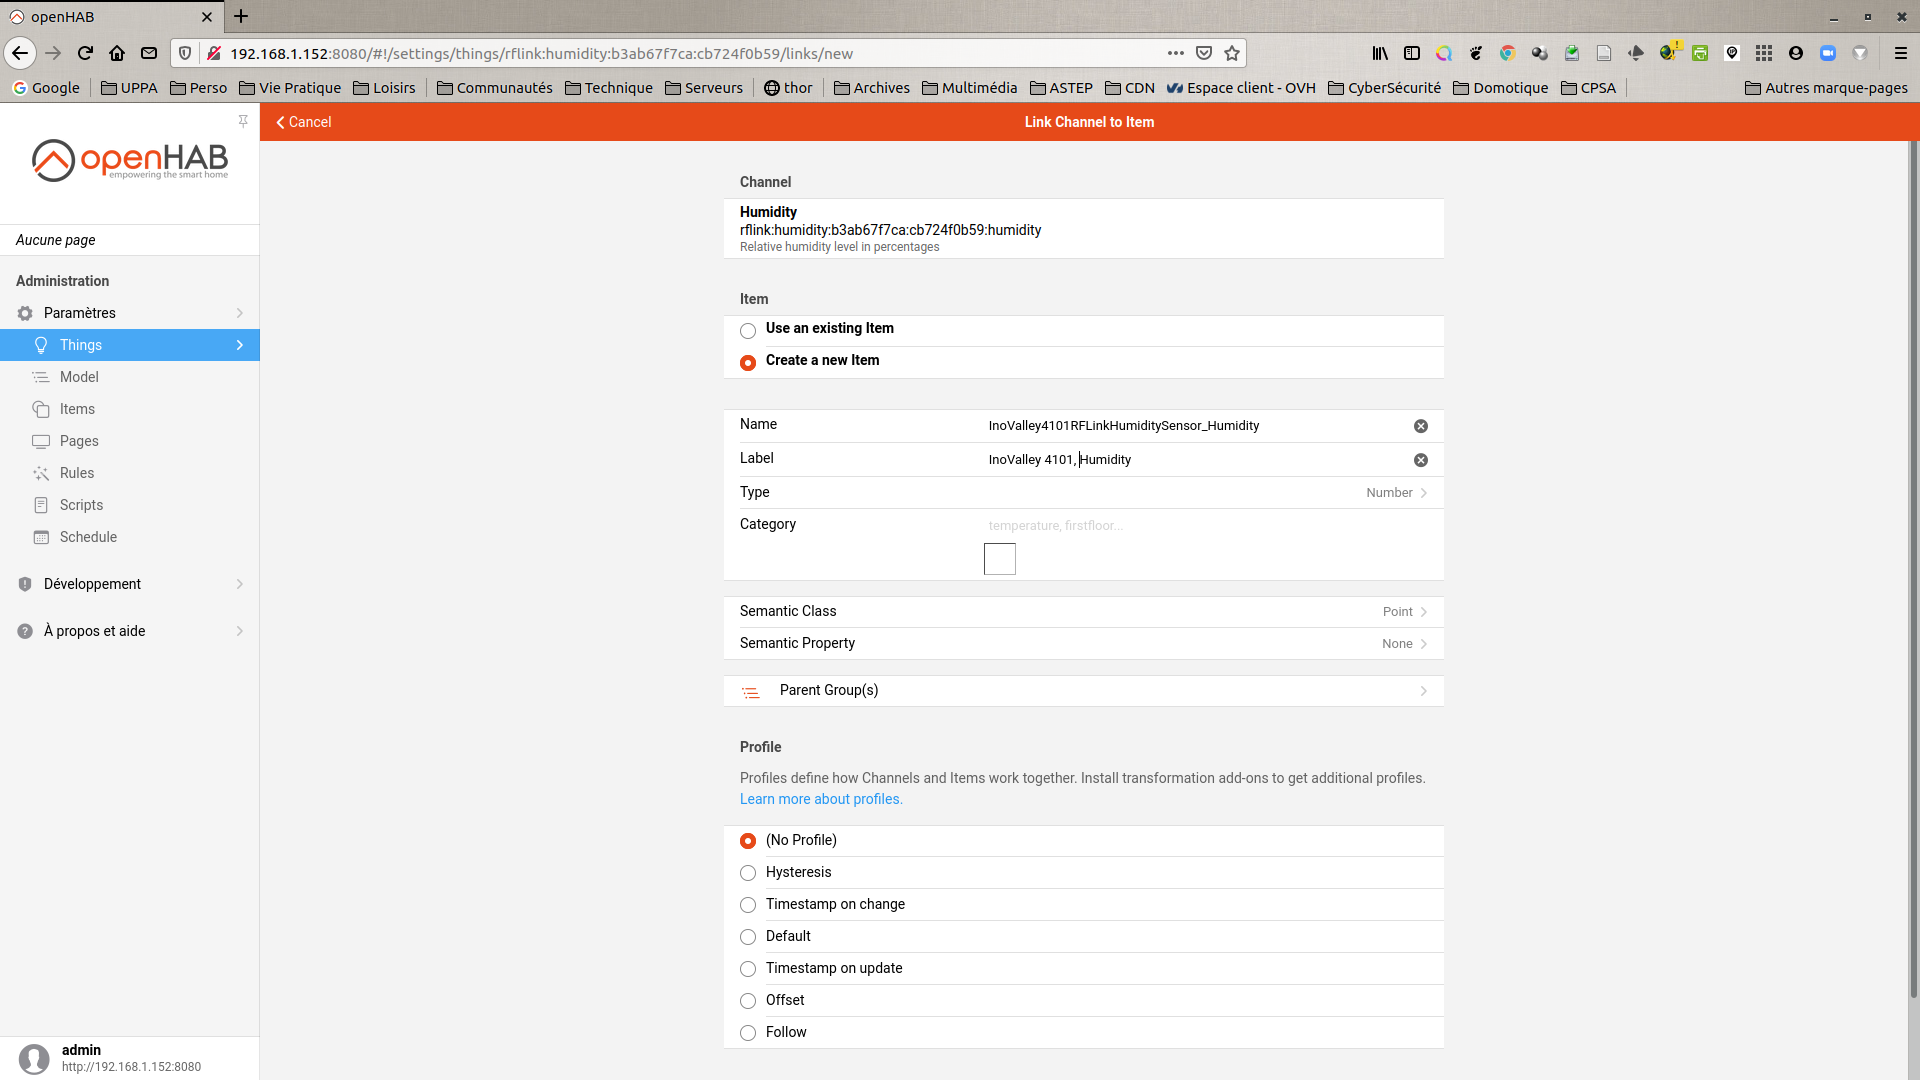
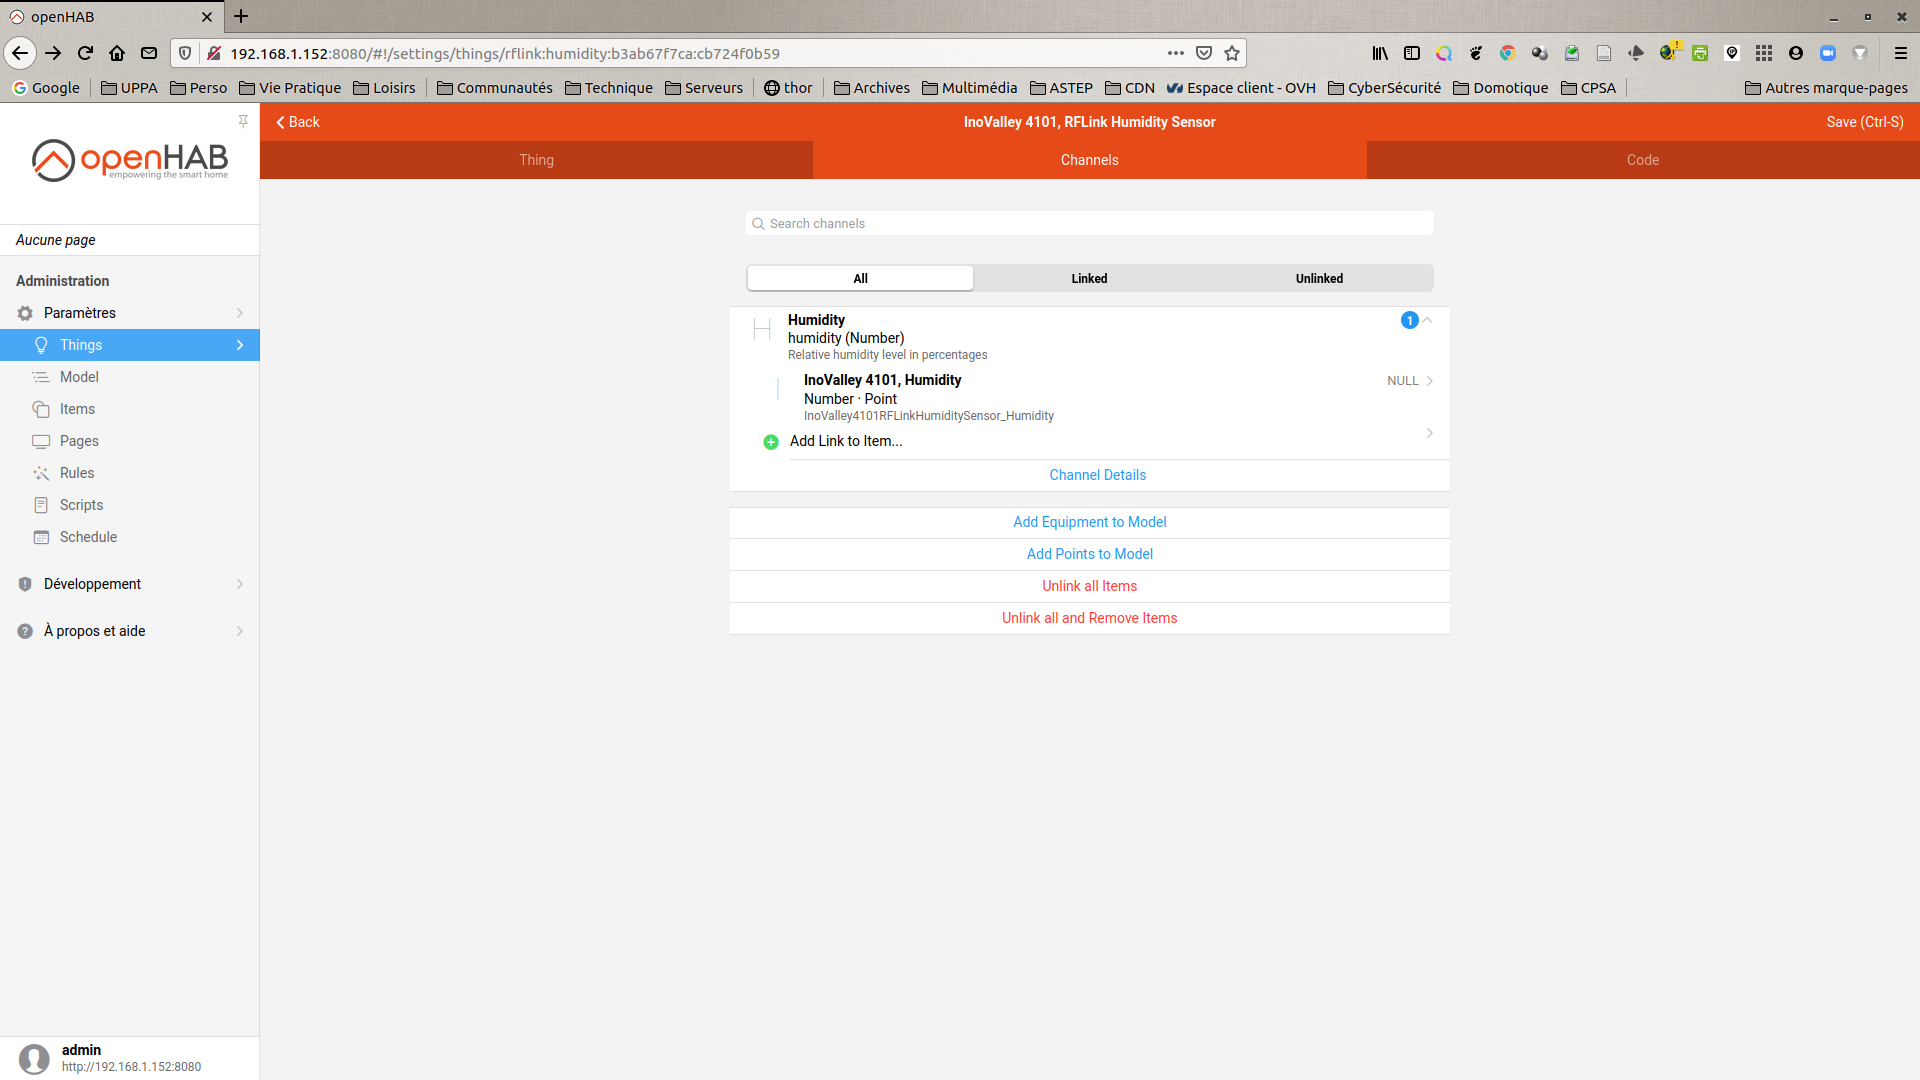
- Create Item: Settings → Things → Blue « + » → InoValley 4101, RFLink Humidity Sensor → Channels → Humidity
- click on Add Link to Item
- select Create a new Item
- Name =
InoValley4101RFLinkHumiditySensor_Humidity - Label =
InoValley 4101, Humidity - click on Link

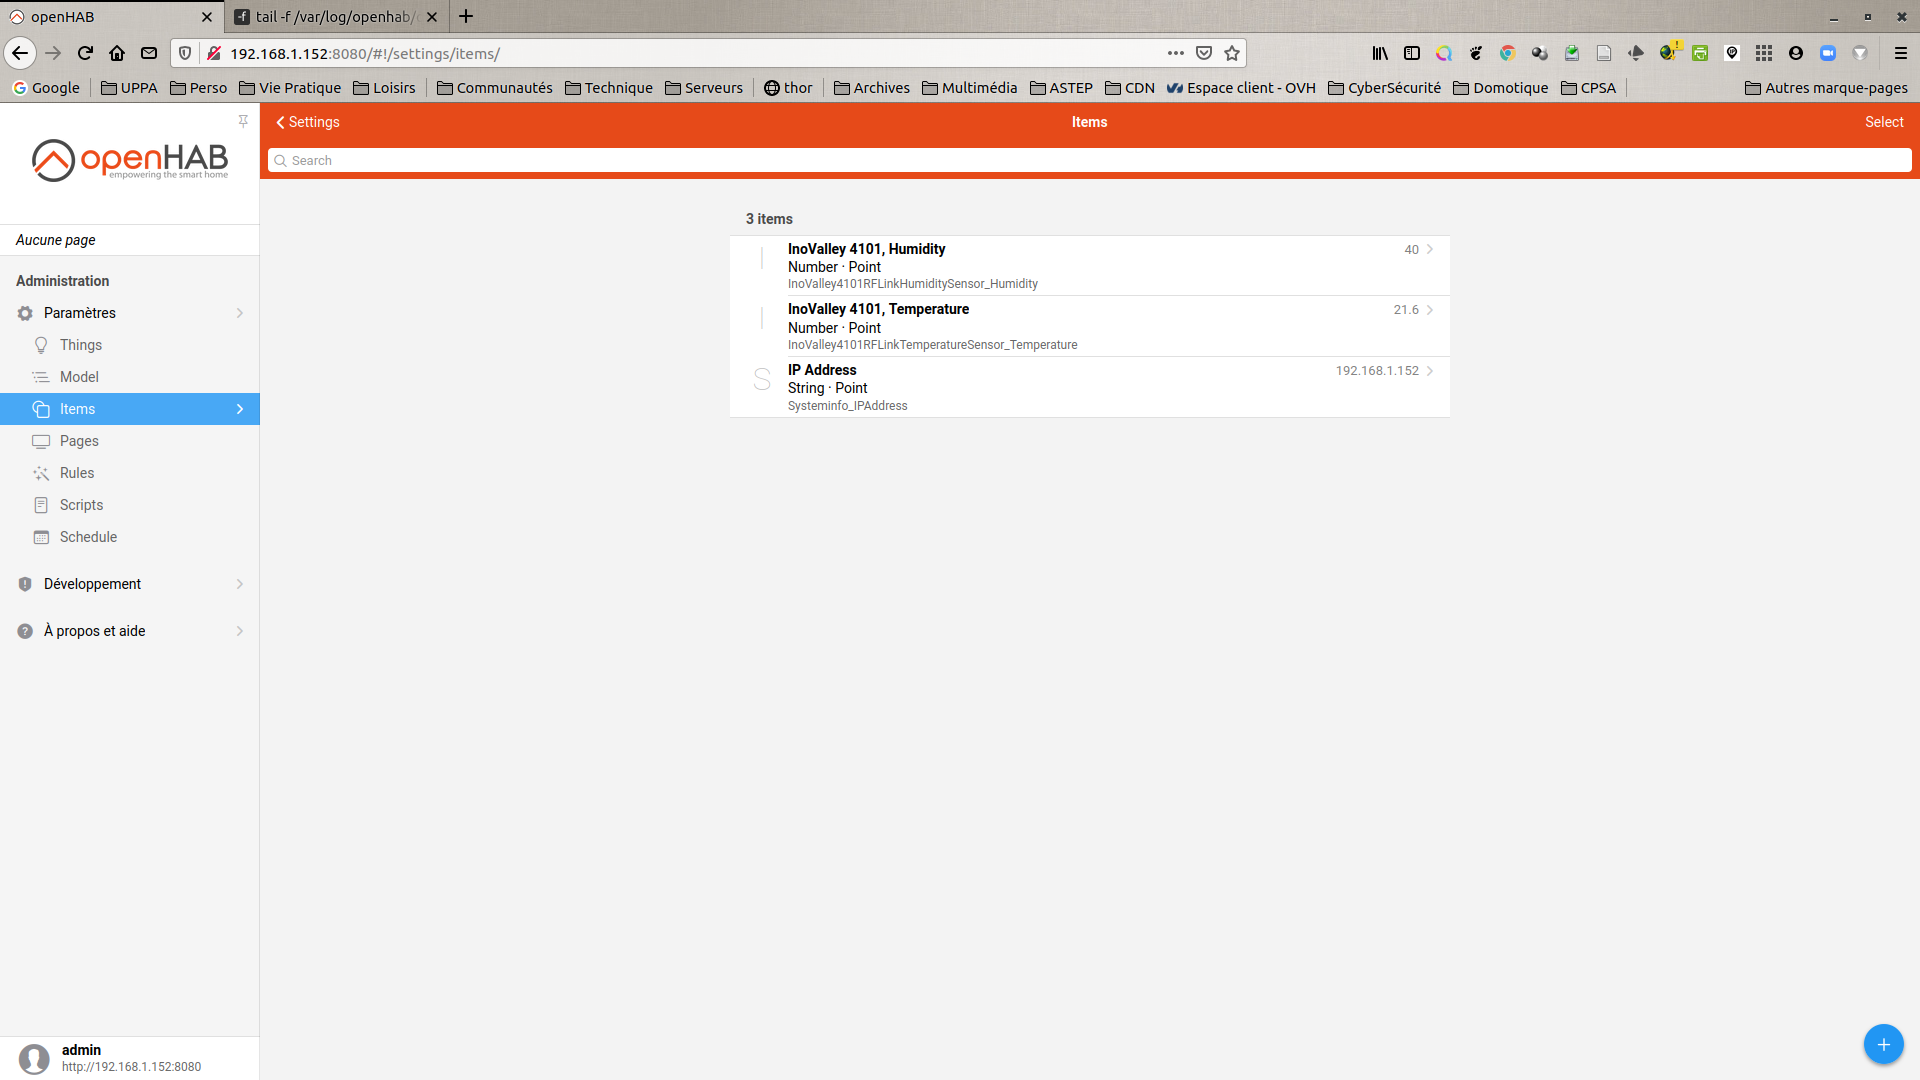
- In the list of Items we see InoValley 4101, Humidity and a few seconds later its value is updated.
Conclusion
After several manipulations under OH3 with Z-Wave devices (see my previous tutorials), today I experimented with the use of devices communicating at 433MHz via an RFLink gateway based on Arduino. Here again I tried to carry out all the steps directly via the OH3 graphical interface.
For any comments or suggestions, do not hesitate to contact me on manuel.munier@univ-pau.fr.