openHAB 3.0 - remote control of a Z-Wave smart plug via MQTT
Here is in a way the culmination of the first step of my experiments with openHAB 3.0, Z-Wave devices, and an MQTT architecture: configure a Switch (on an OH3 instance) so that it sends MQTT ON / OFF messages on a given topic in order to remotely control a Z-Wave smart plug (on a second instance of OH3) configured to modify its status on receipt of these MQTT messages.
NB: I know it is quite possible to directly “connect” two instances of OH3, but for another project I need to go through MQTT.
For this tutorial, the configurations used are on one side a Raspberry Pi 3 B + with the Z-Wave infrastructure, and on the other a laptop under Ubuntu with the Switch for remote control. For details:
- for the Z-Wave part, see my tutorial openHAB 3.0 - install and setup of a Z-Wave smart plug
- the MQTT broker is already configured in openHAB (cf. my previous tutorial openHAB 3.0 - how to create a switch that publishes its state via MQTT messages) on the 2 computers
- again, no frills on the topic naming; we will use a topic simply named
smartplug… - and the various steps were entirely carried out via the openHAB3 graphic interface
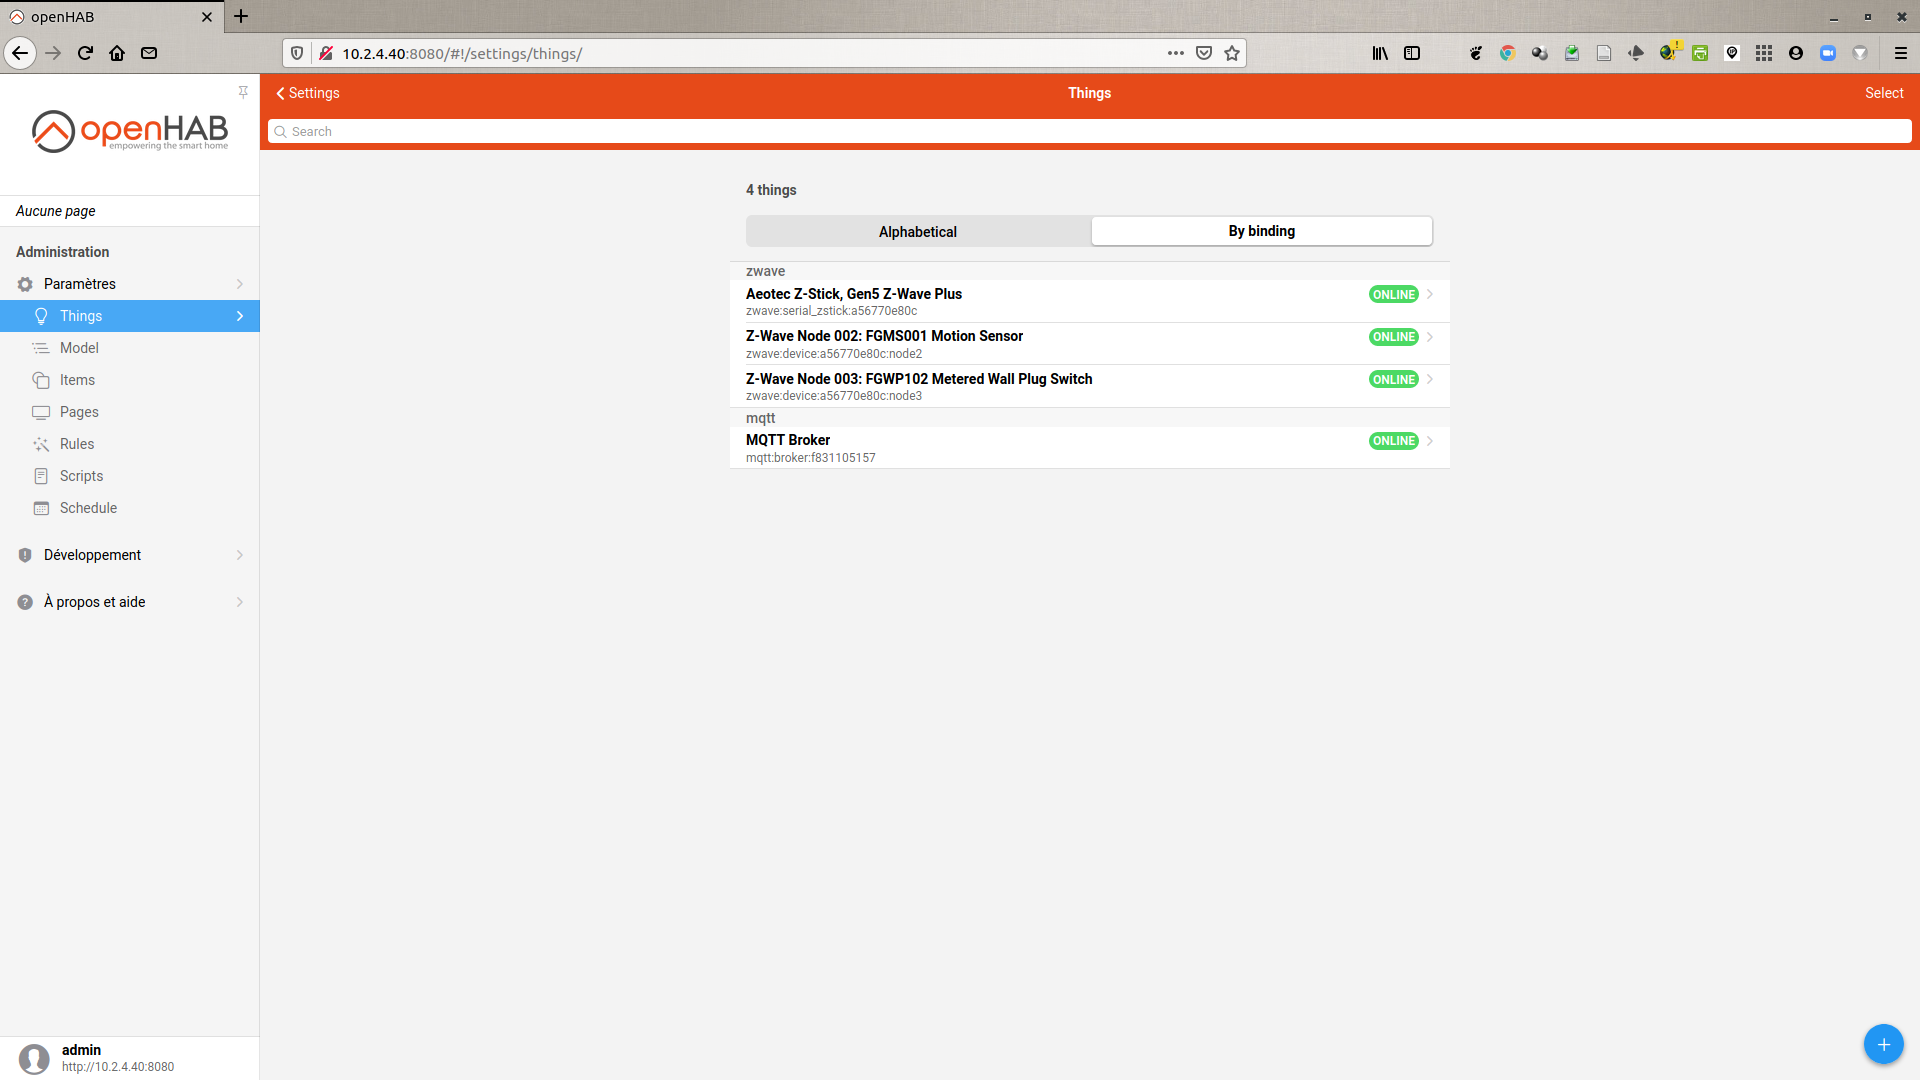
Create a Generic MQTT Thing
- Settings → Things → Blue « + » → MQTT Binding → Generic MQTT Thing
- Label =
Generic MQTT Thing 002 - Parent Bridge =
MQTT Broker(cf. previous tests here)
- Label =
- the Generic MQTT Thing will appear in your list of Things and is ONLINE


Setup of the smart plug to react to the values received on the MQTT topic
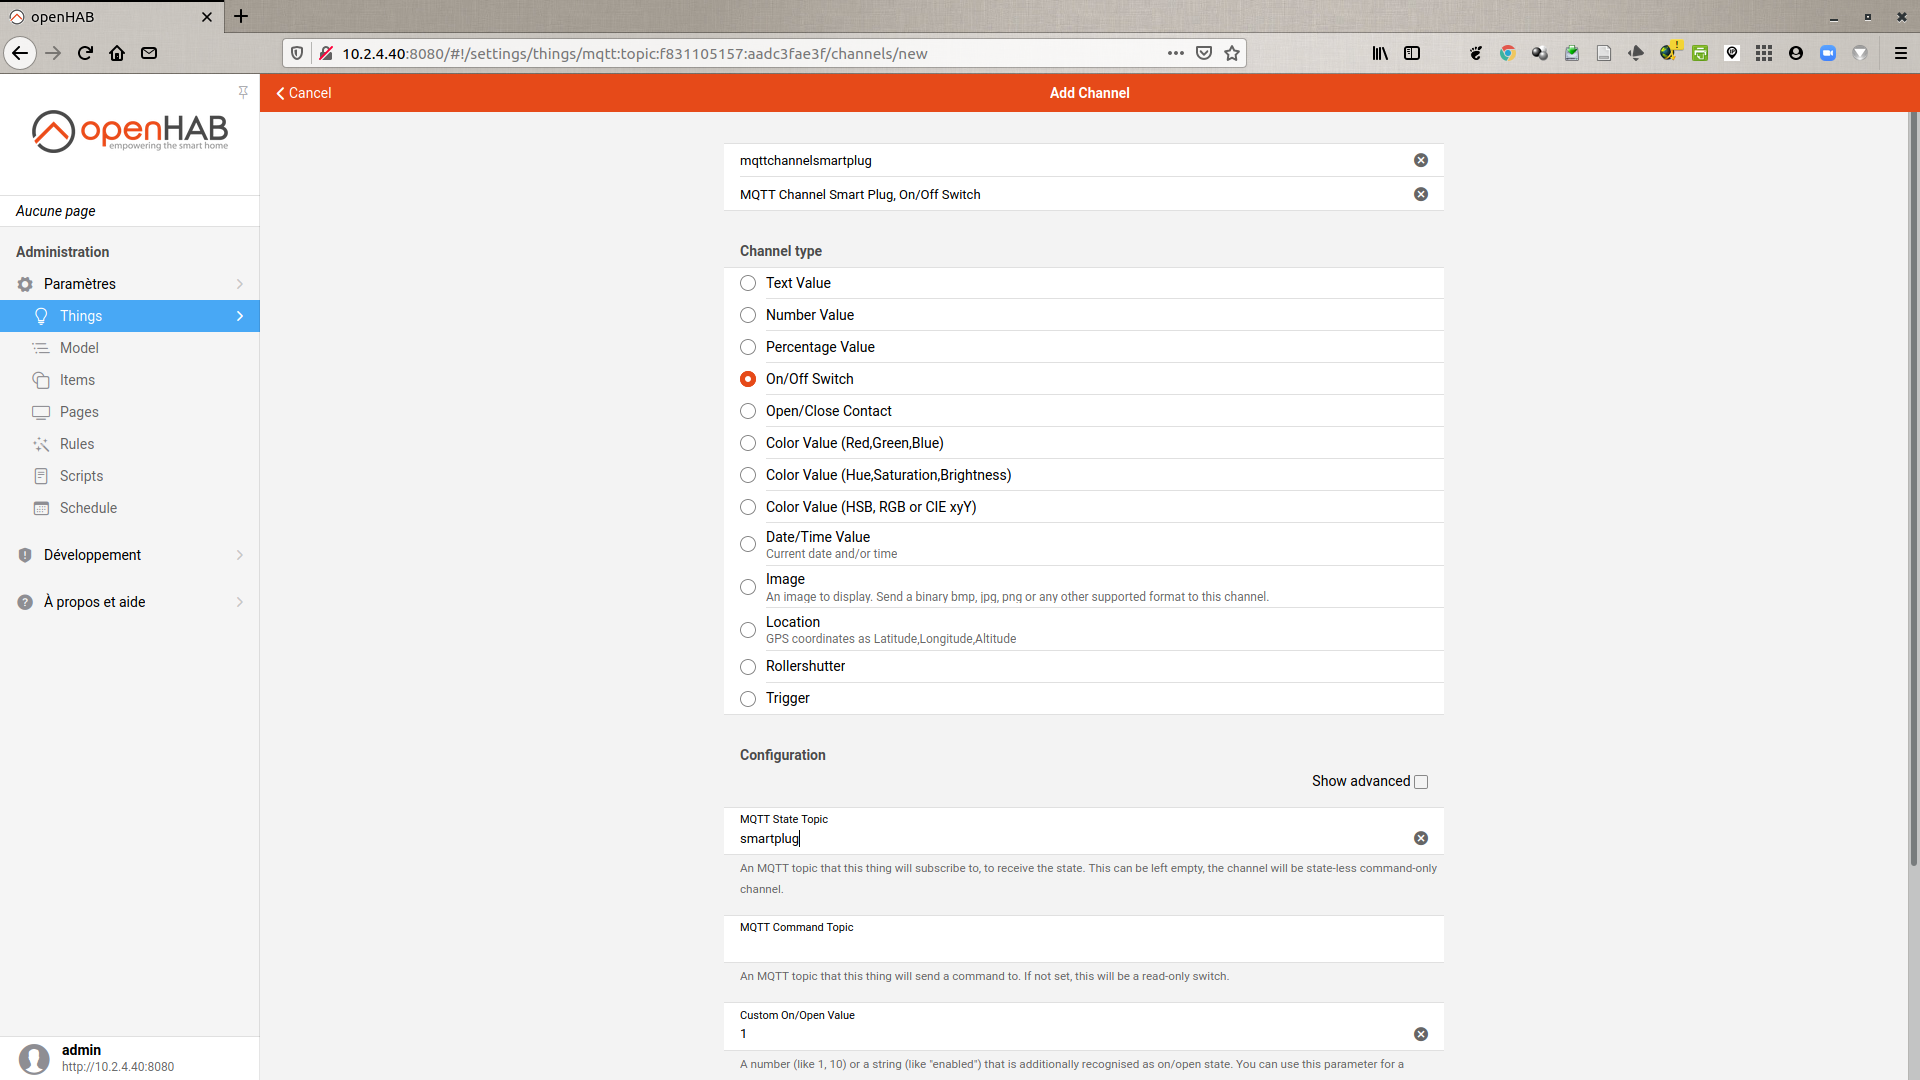
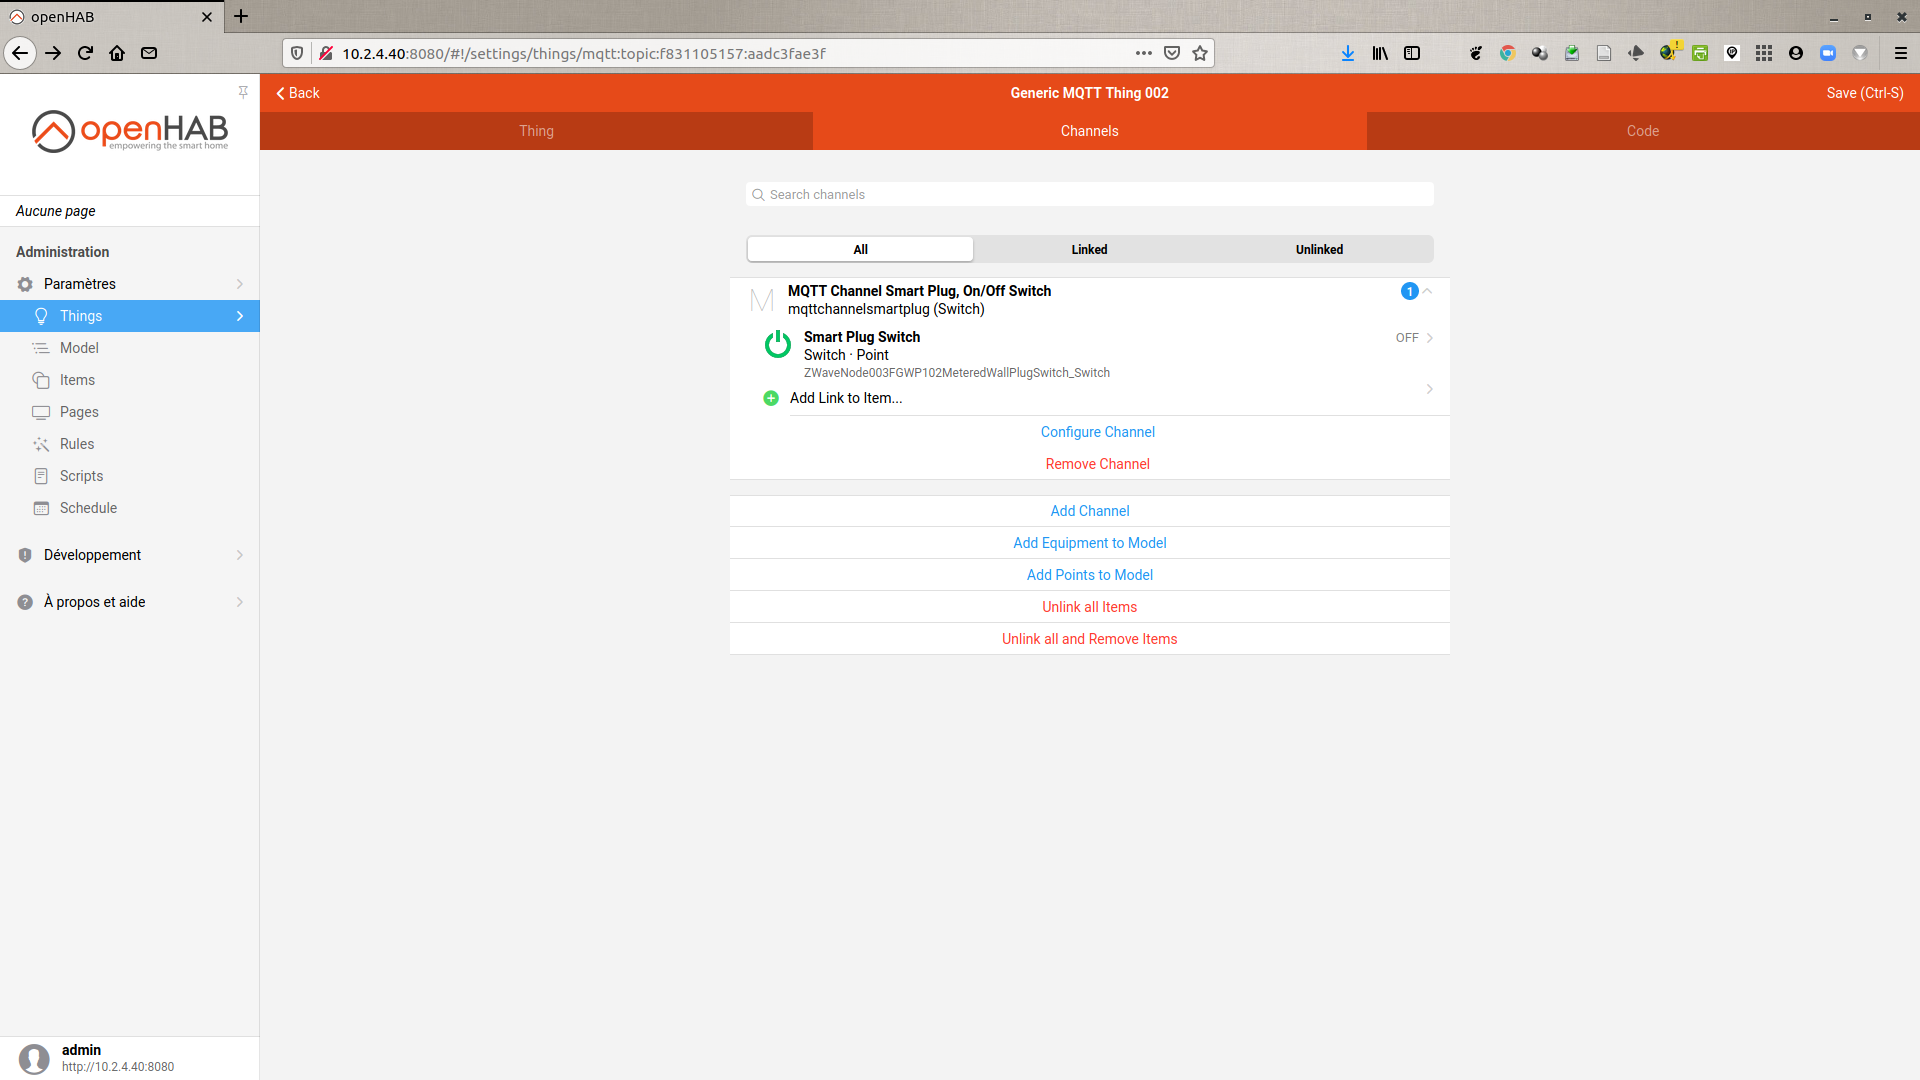
- create a Channel with the Switch type: Settings → Things → Generic MQTT Thing 002 → Channels → Add Channel
- Id =
mqttchannelsmartplug - Label =
MQTT Channel Smart Plug, On/Off Switch - Channel type =
On/Off Switch - MQTT State Topic =
smartplug - click on Create
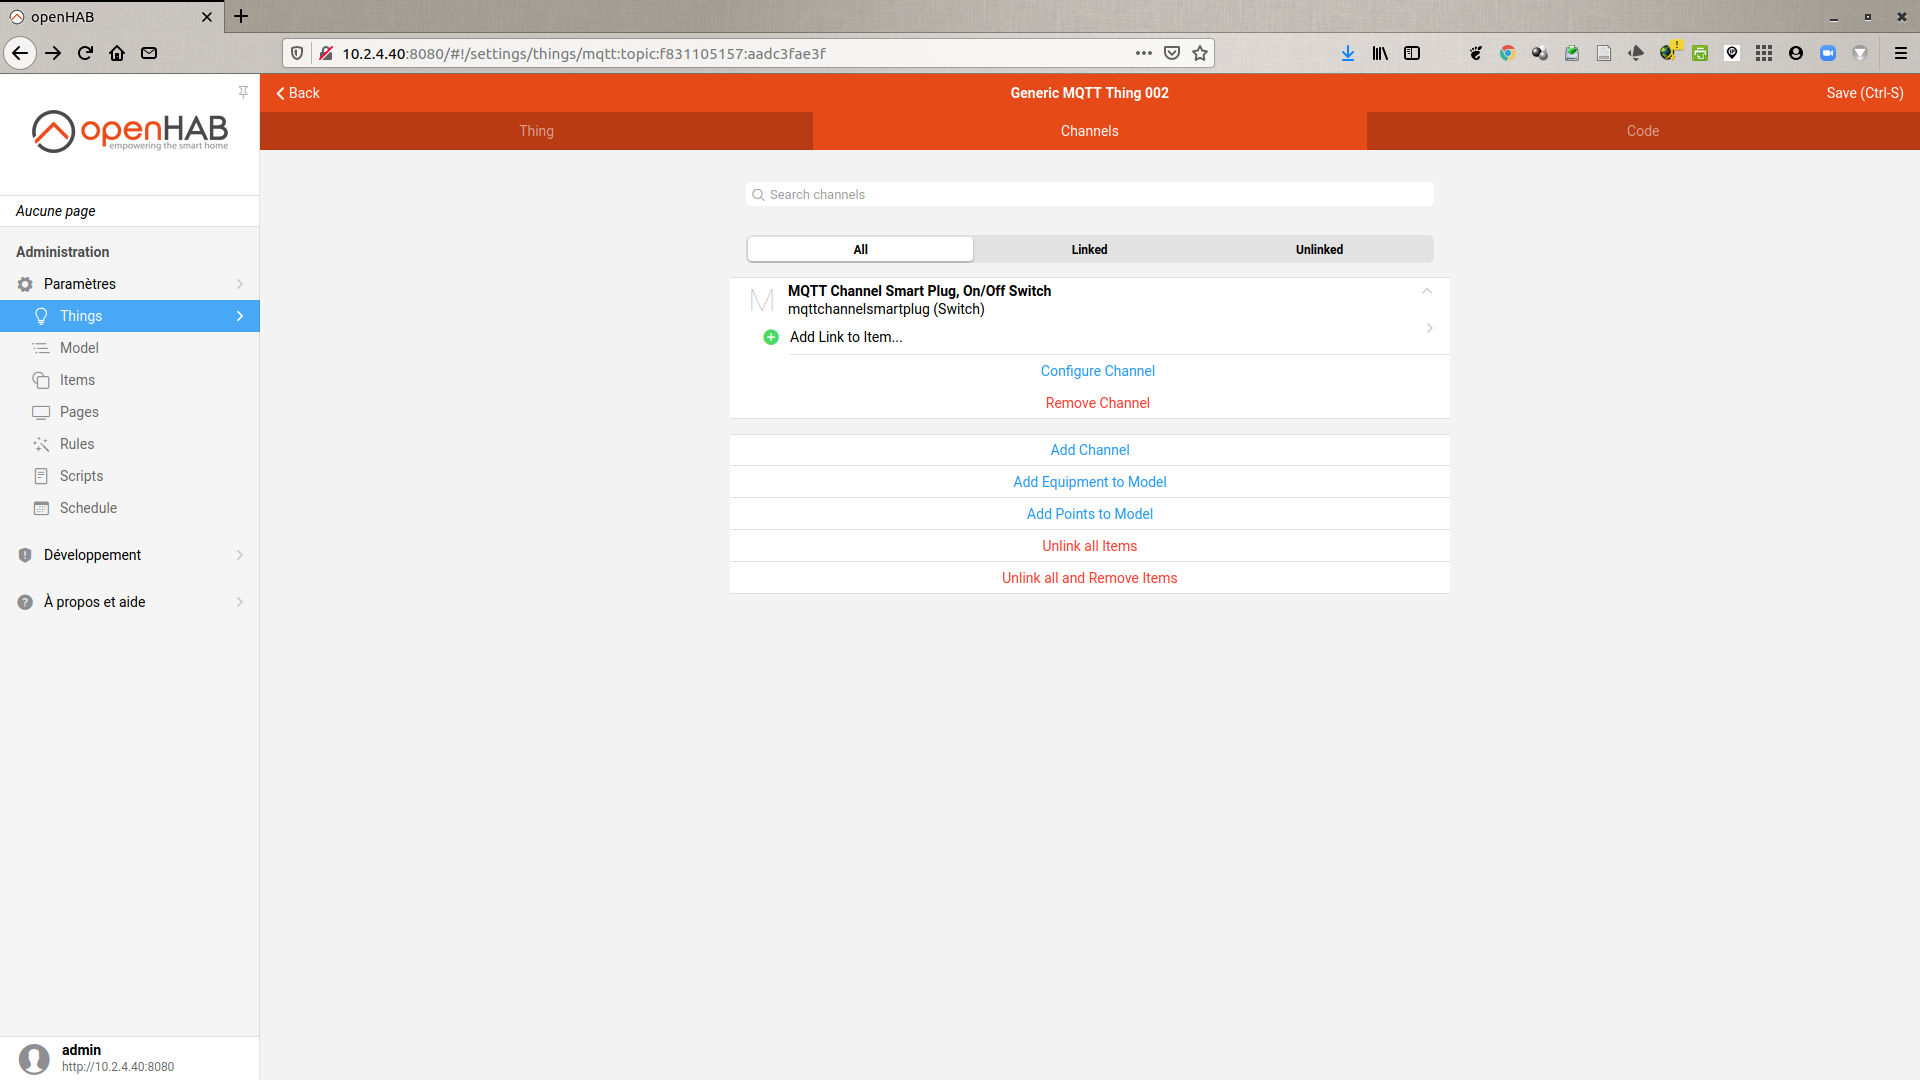
- Id =
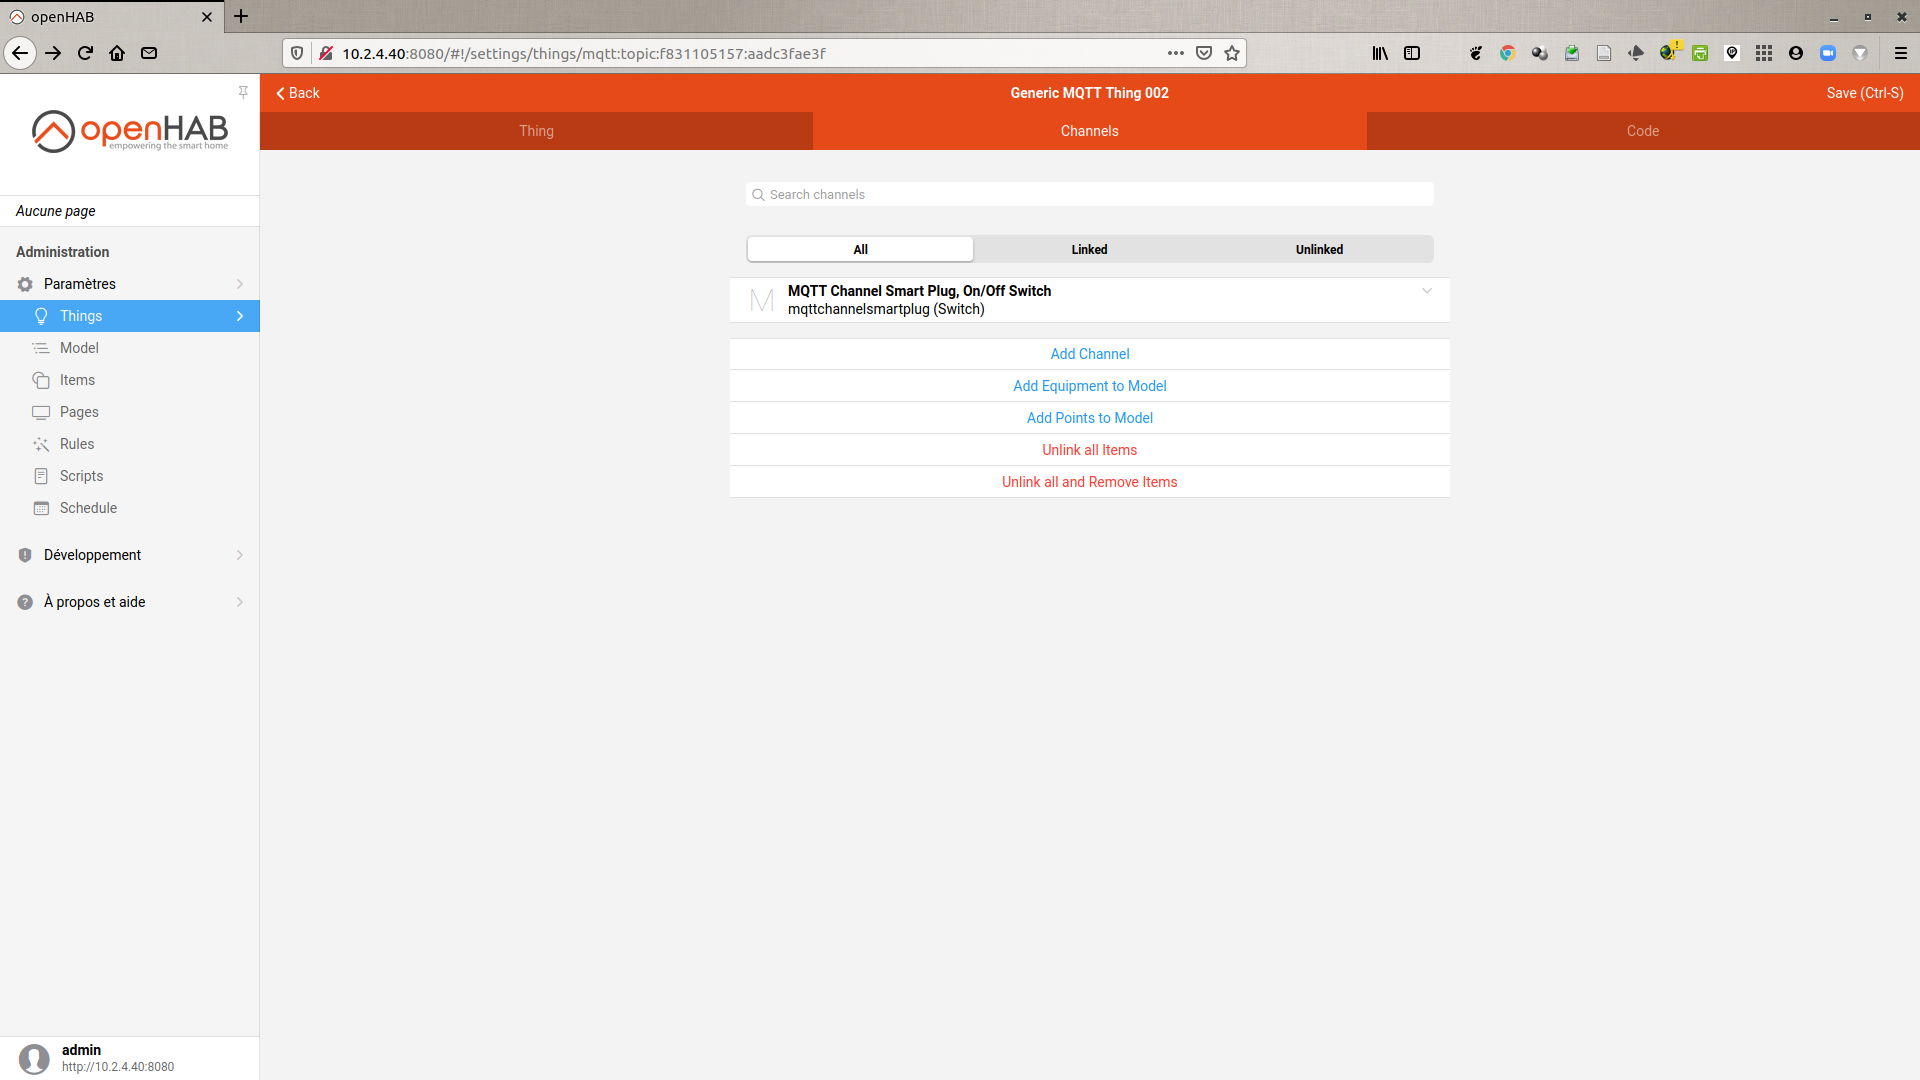
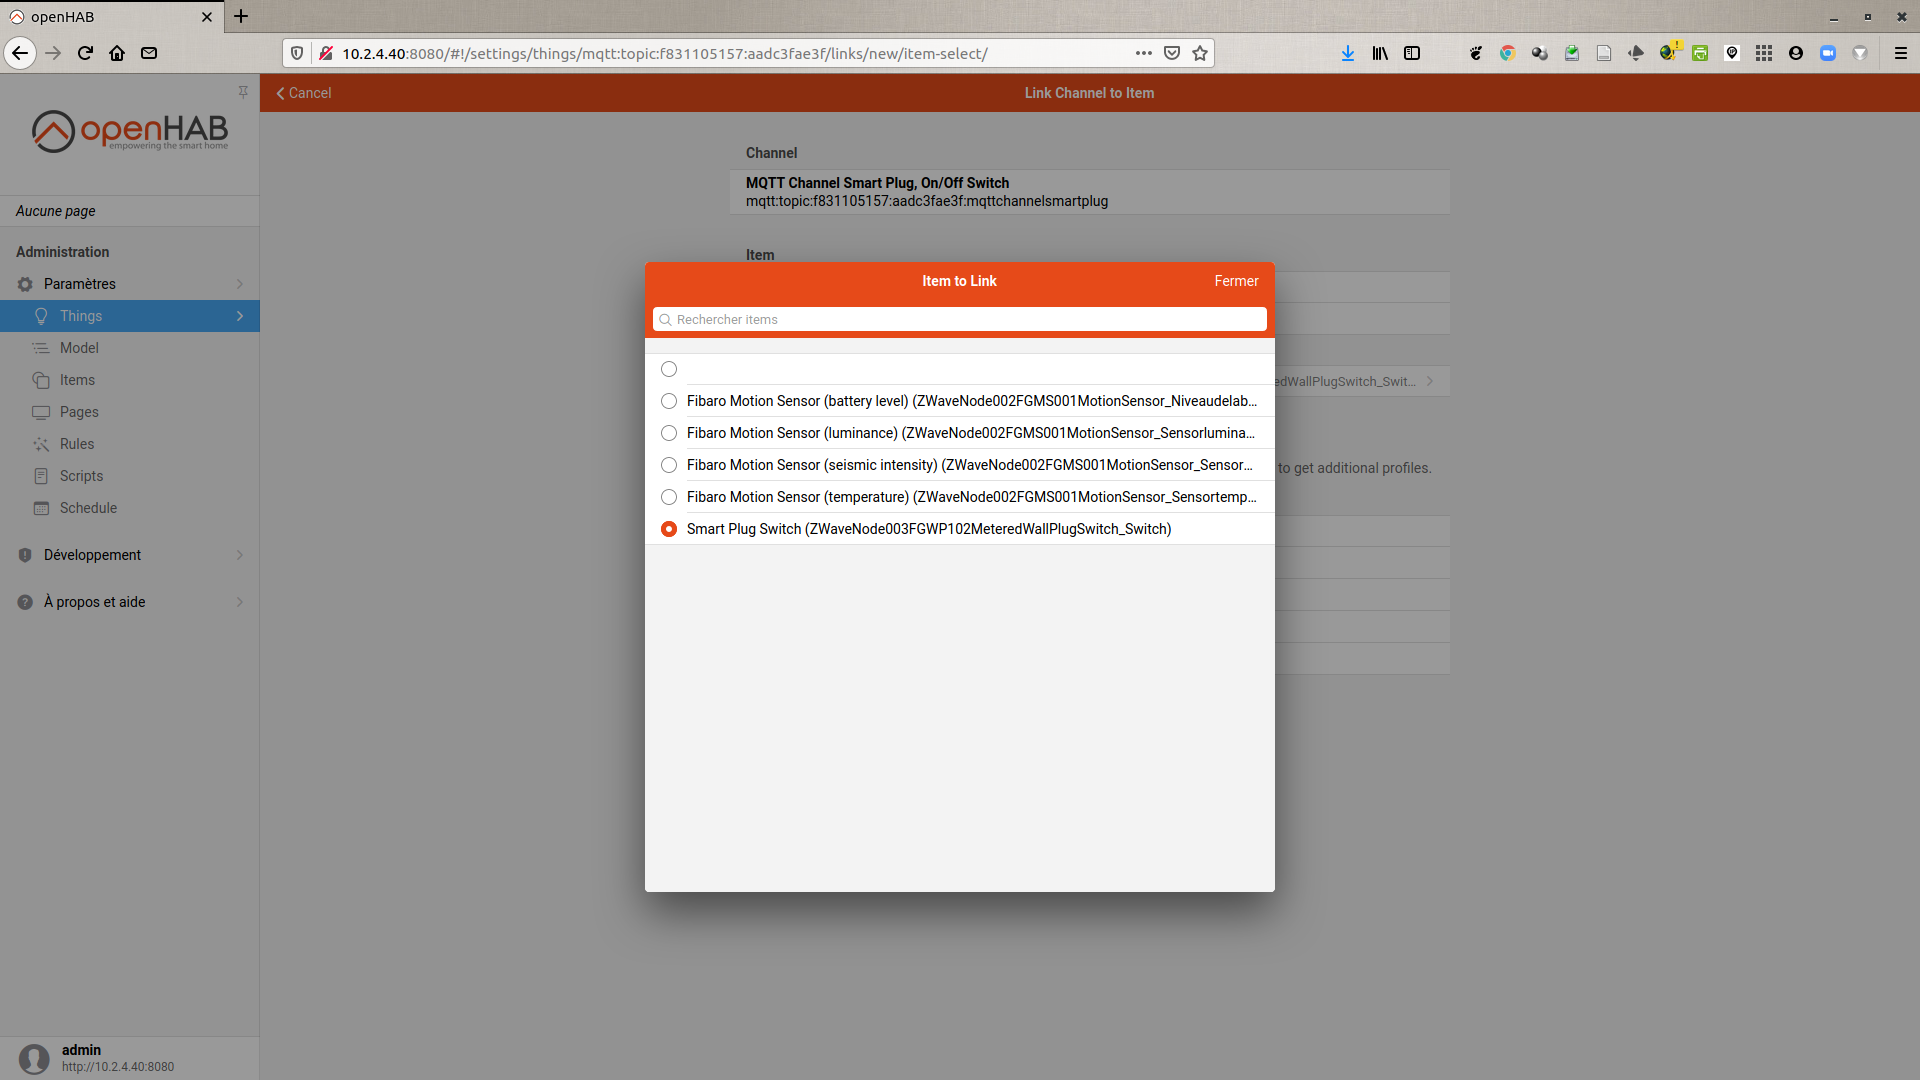
- link this Channel to an existing Item (the Switch of the smart plug): Settings → Things → Generic MQTT Thing 002 → Channels → Add Link to Item
- select the previously created Channel →
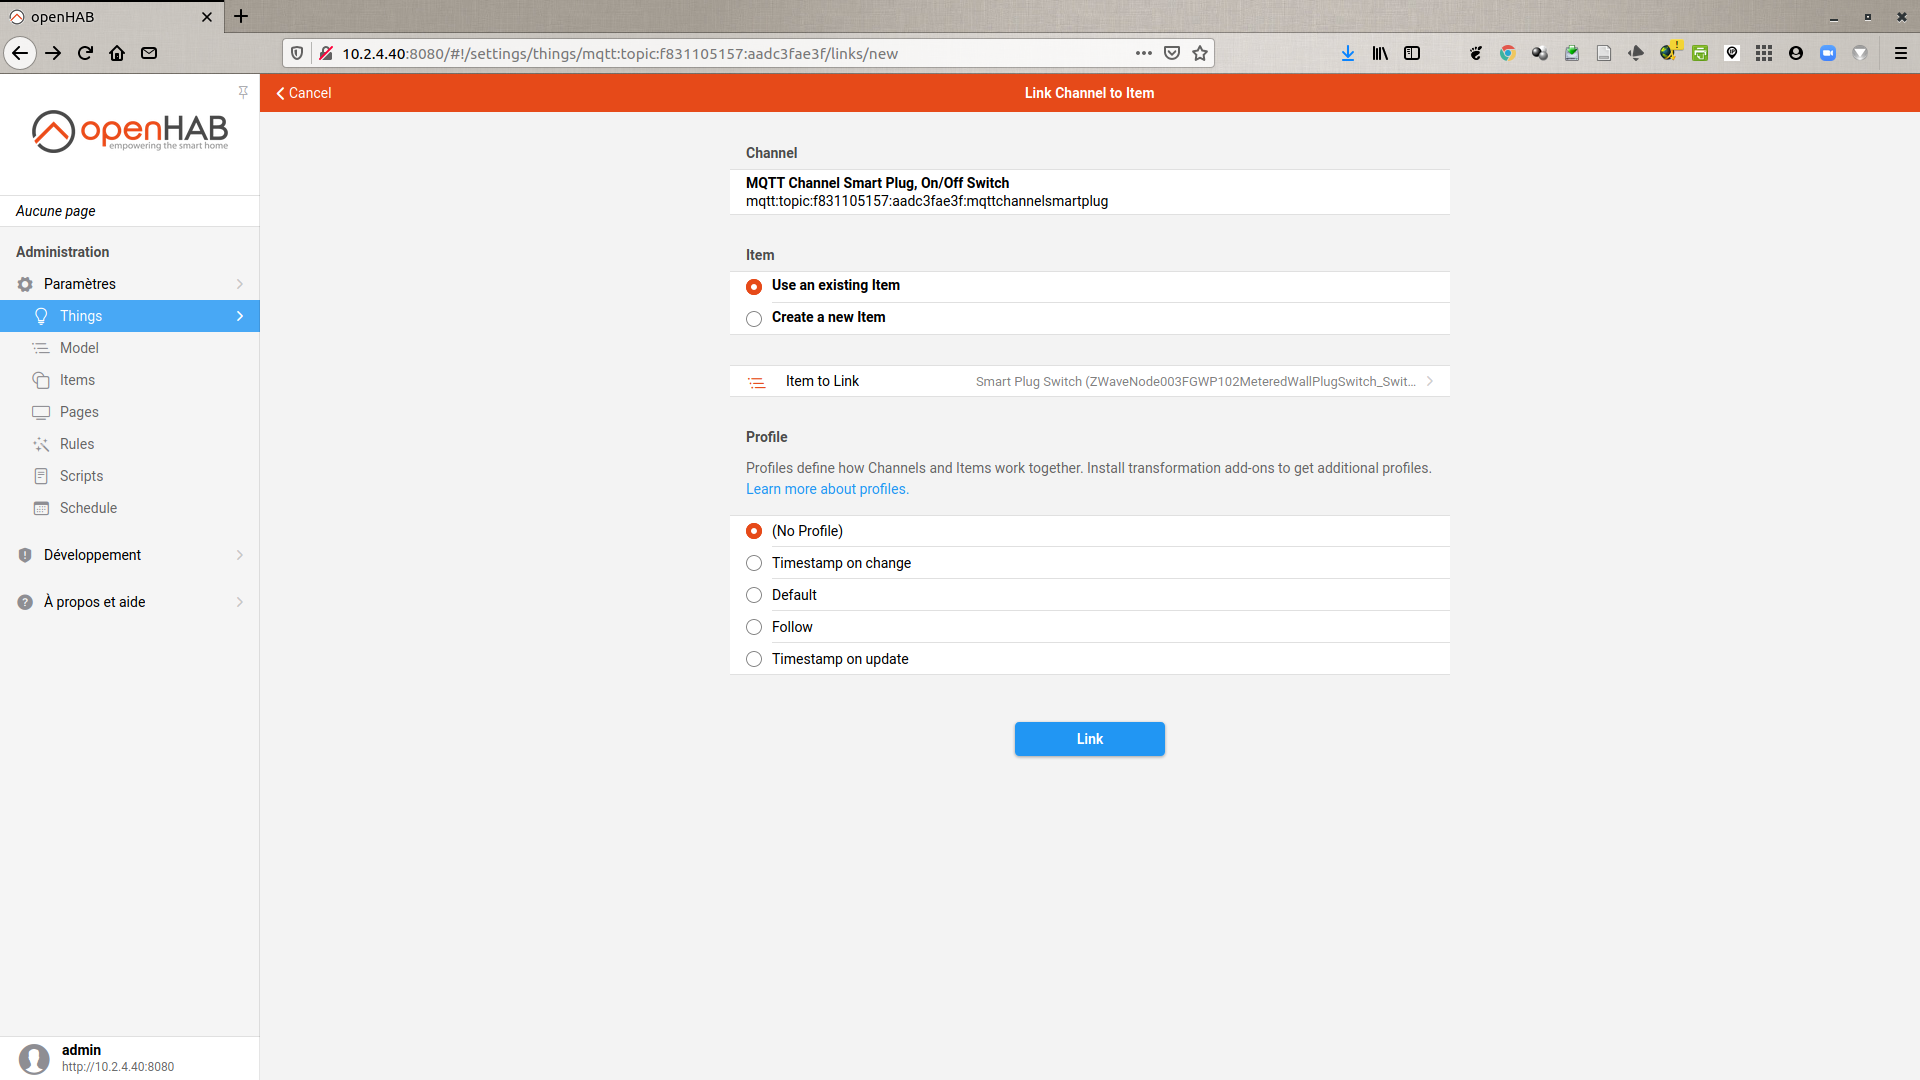
MQTT Channel Smart Plug, On/Off Switch - select Use an existing Item
- click on Item to Link and select
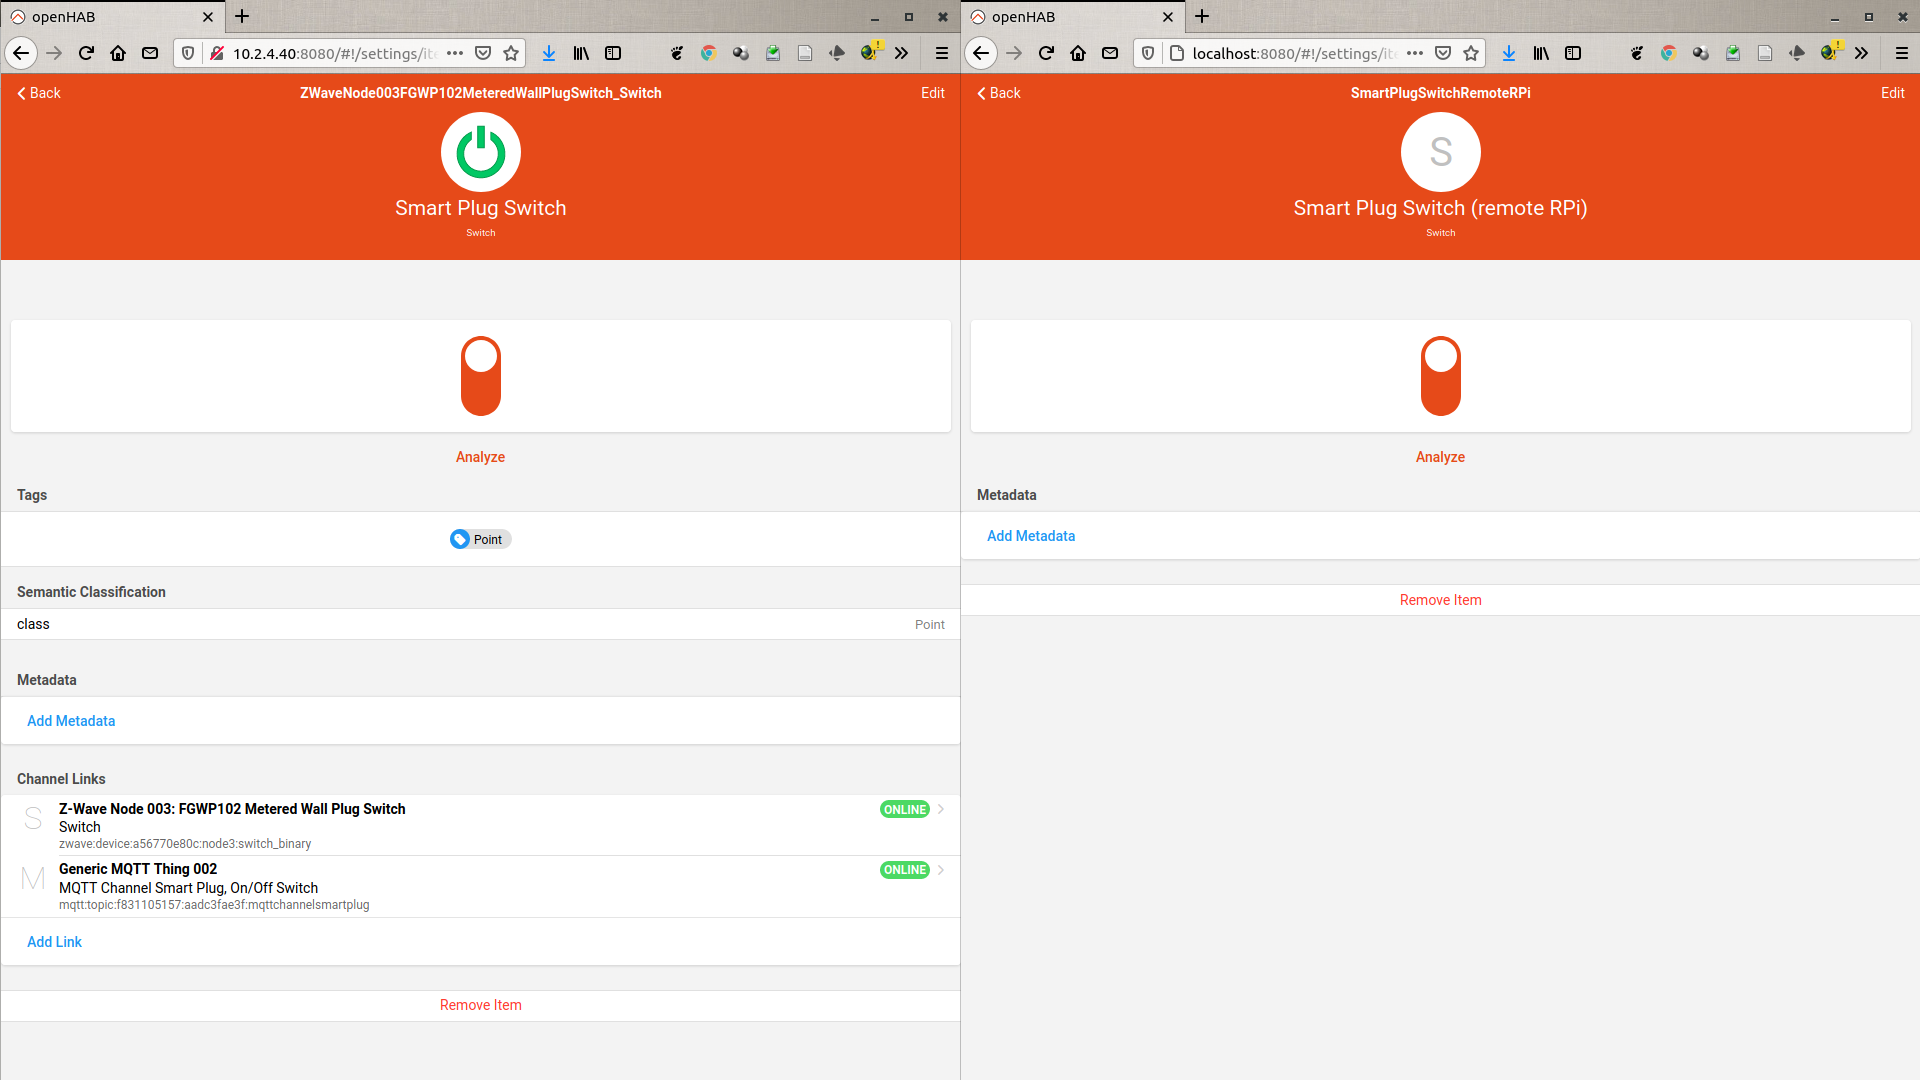
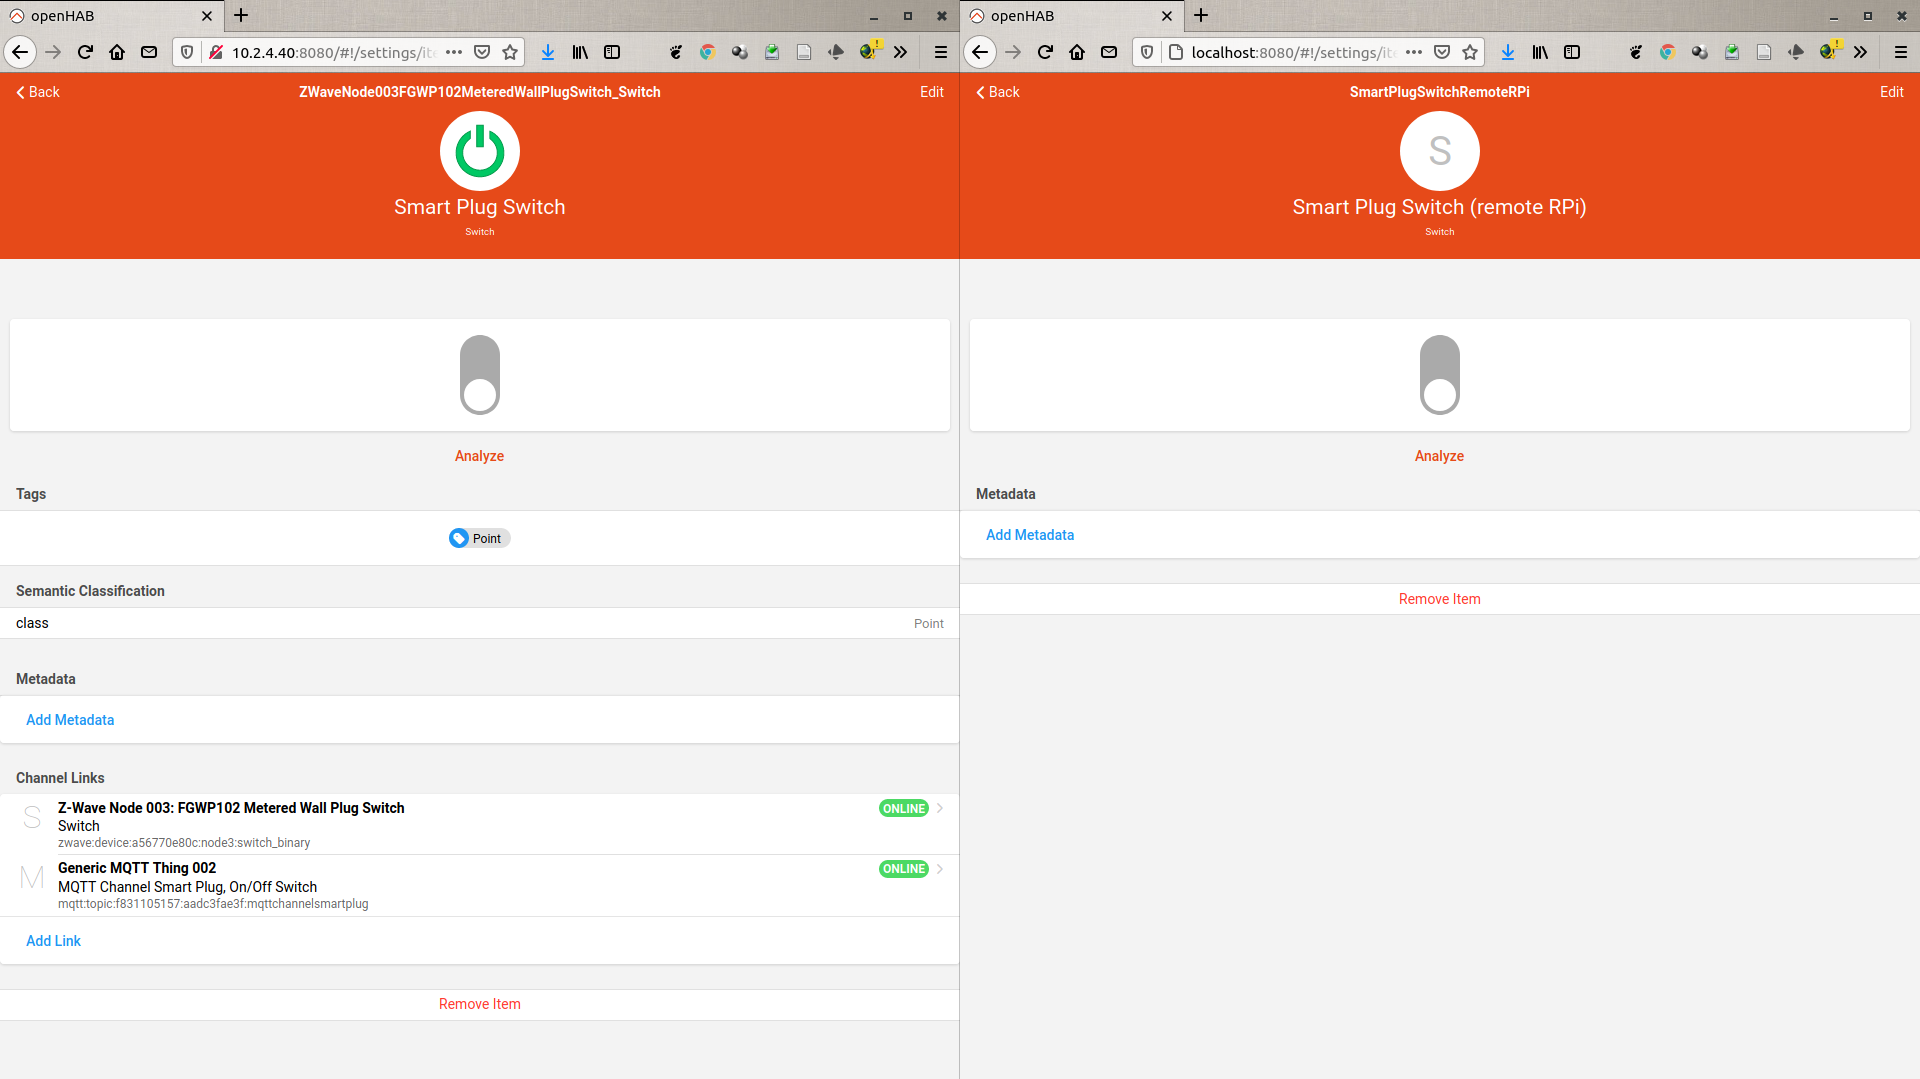
Smart Plug Switch (ZWaveNode...) - validate by clicking on Link
- the Switch of our smart plug is now linked to the Channel of our Generic MQTT Thing
- select the previously created Channel →

- now let’s come back to our Item
Smart Plug Switch: Settings → Things → Smart Plug Switch- select the Channel Link corresponding to
Z-Wave Node 003: FGWP102 Metered Wall Plug Switchand set the Profile toDefault - according to the openHAB documentation: “If you don’t specify any Profile, this Profile will be used. For State Channels, this means that states and commands are just propagated from the Channel to the Item and vice versa without any changes.”
- ditto for the second Channel Link corresponding to
Generic MQTT Thing 002
- select the Channel Link corresponding to
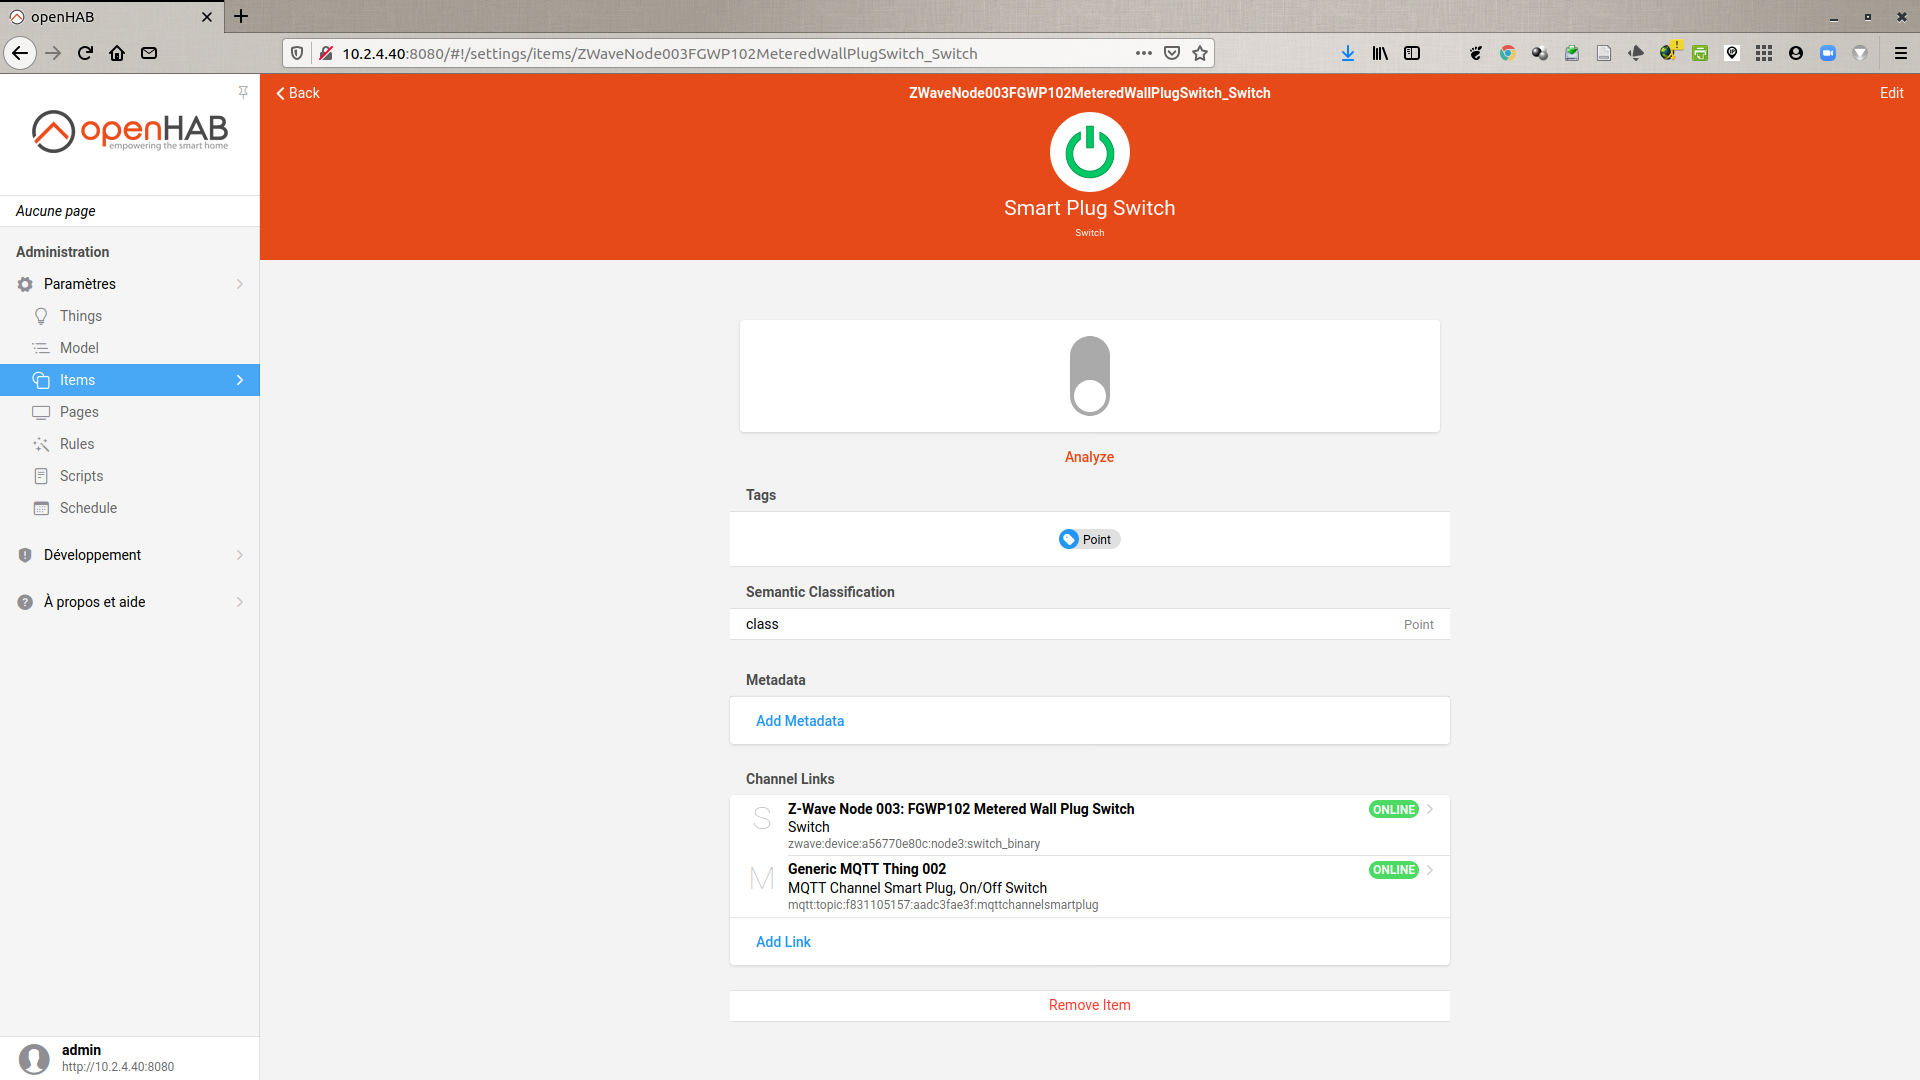


Note
We can then use any MQTT client to send the ON or OFF messages to the smartplug topic of the Raspberry Pi 3 B + MQTT broker → the value of the Smart Plug Switch Item is set up to date. Problem: the item’s status is updated, but no command is sent to the physical plug …
Control of the smart plug
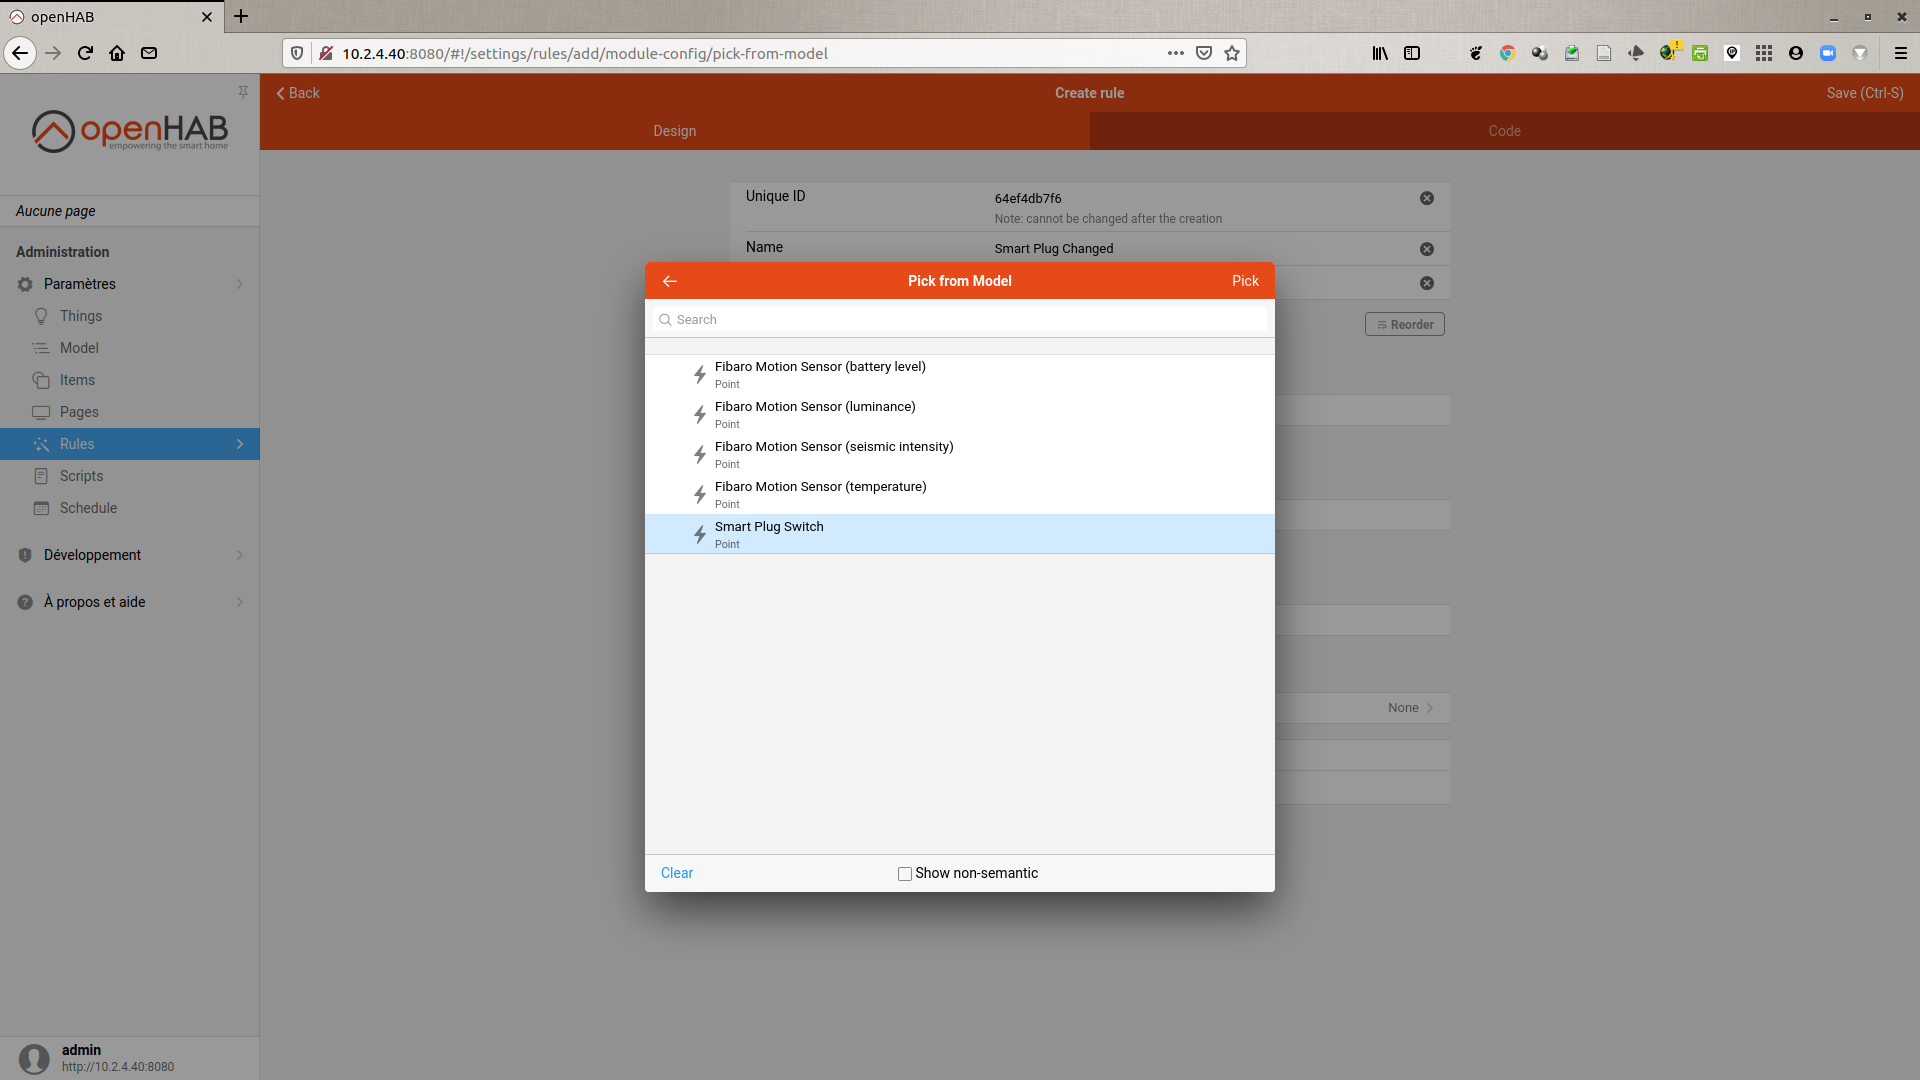
We are therefore going to create a rule to send a command to the physical device when the state of the Item is modified.
-
Rules → Blue « + » → Name = « Smart Plug Changed »
-
When → Add Trigger → Item Event →
Smart Plug Switch→ Pick → changed -
Then → Add Action → Run Script →
ECMAScriptevents.sendCommand("ZWaveNode003FGWP102MeteredWallPlugSwitch_Switch", itemRegistry.getItem("ZWaveNode003FGWP102MeteredWallPlugSwitch_Switch").getState()) -
Save…

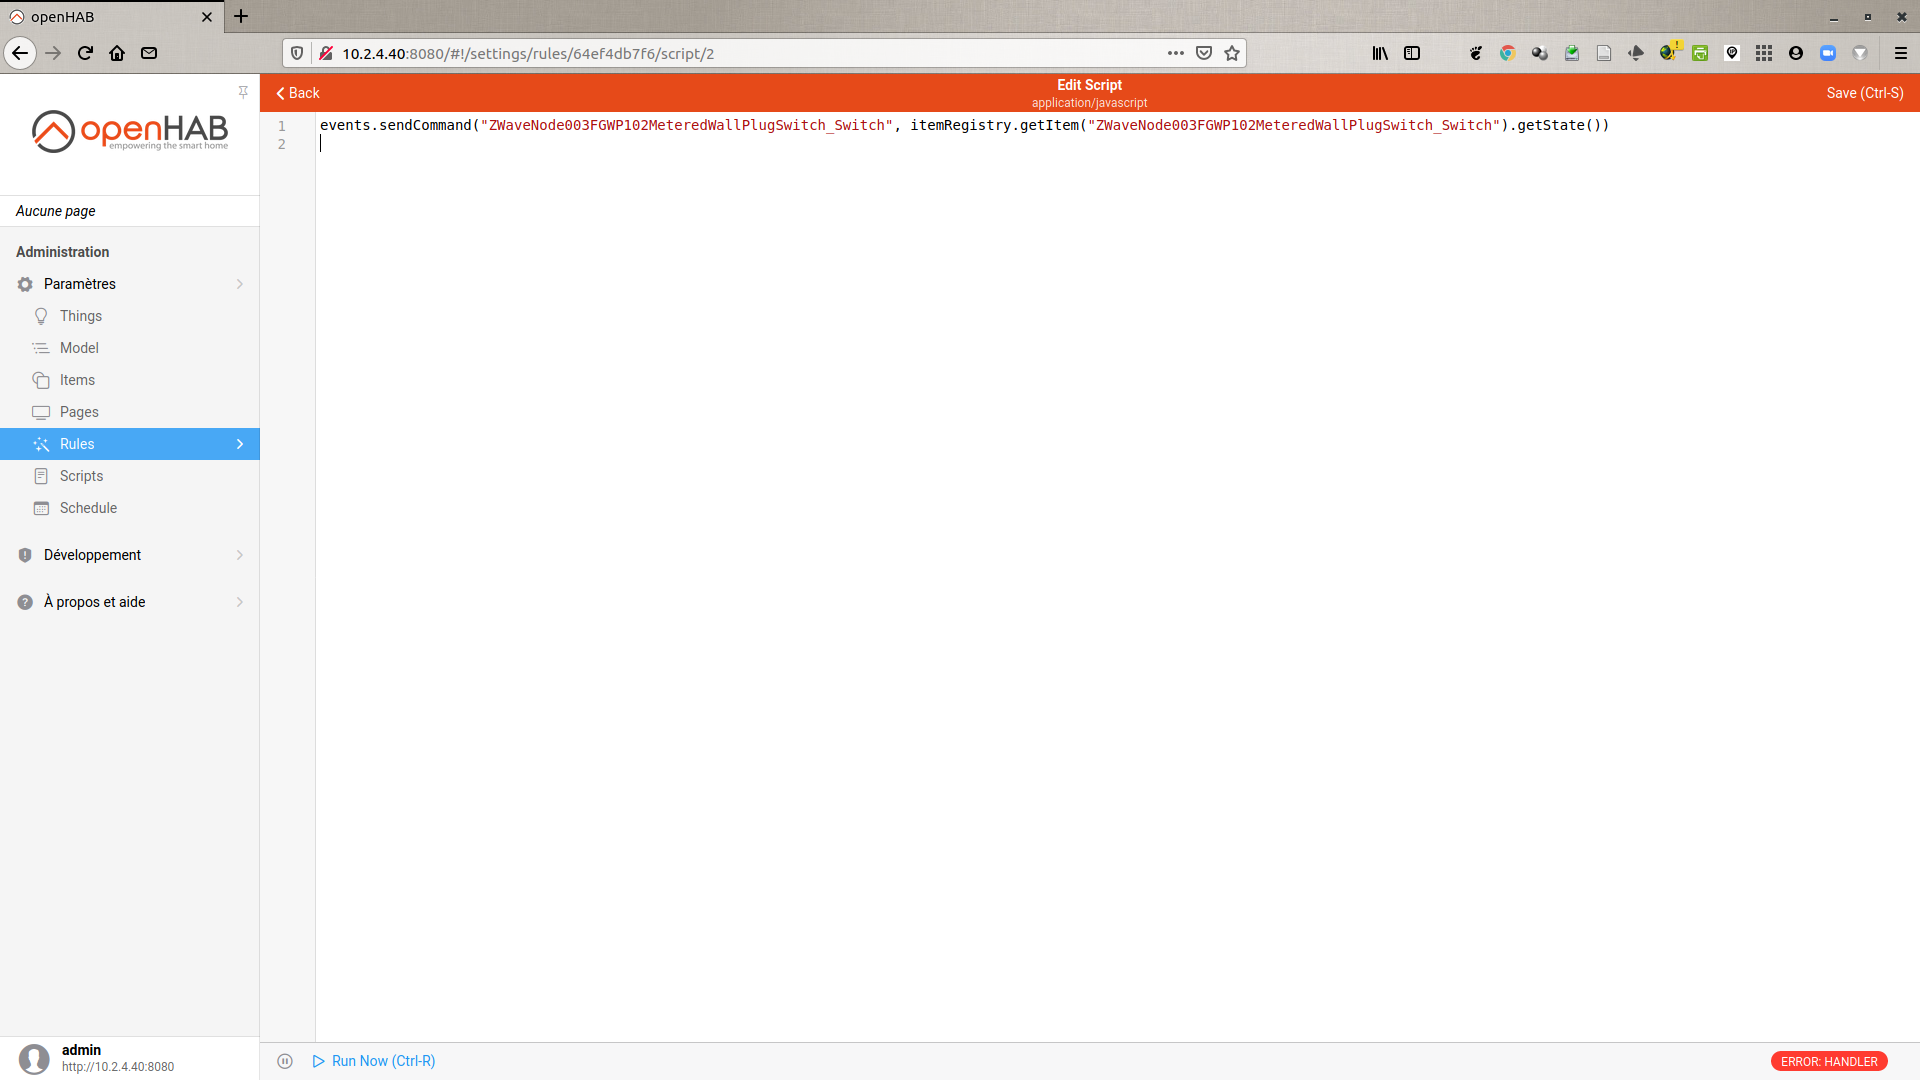
On a first attempt, I created the rule to be activated on the was updated event. This was a big mistake, because the script executed by this rule does a sendCommand, which updates the state, and therefore re-triggers the rule → infinite loop !
Notes
- the first tests were carried out with MQTT Explorer in order to emulate the operation of a switch by manually sending MQTT messages containing
ONorOFF - only the strings
ONandOFFare « accepted » to update the Item, which is logical given that this is an on/off switch…
Creating a remote switch
Based on my previous tutorial openHAB 3.0 - how to create a switch that publishes its state via MQTT messages, we will now create a switch on a second openHAB instance running on another computer.
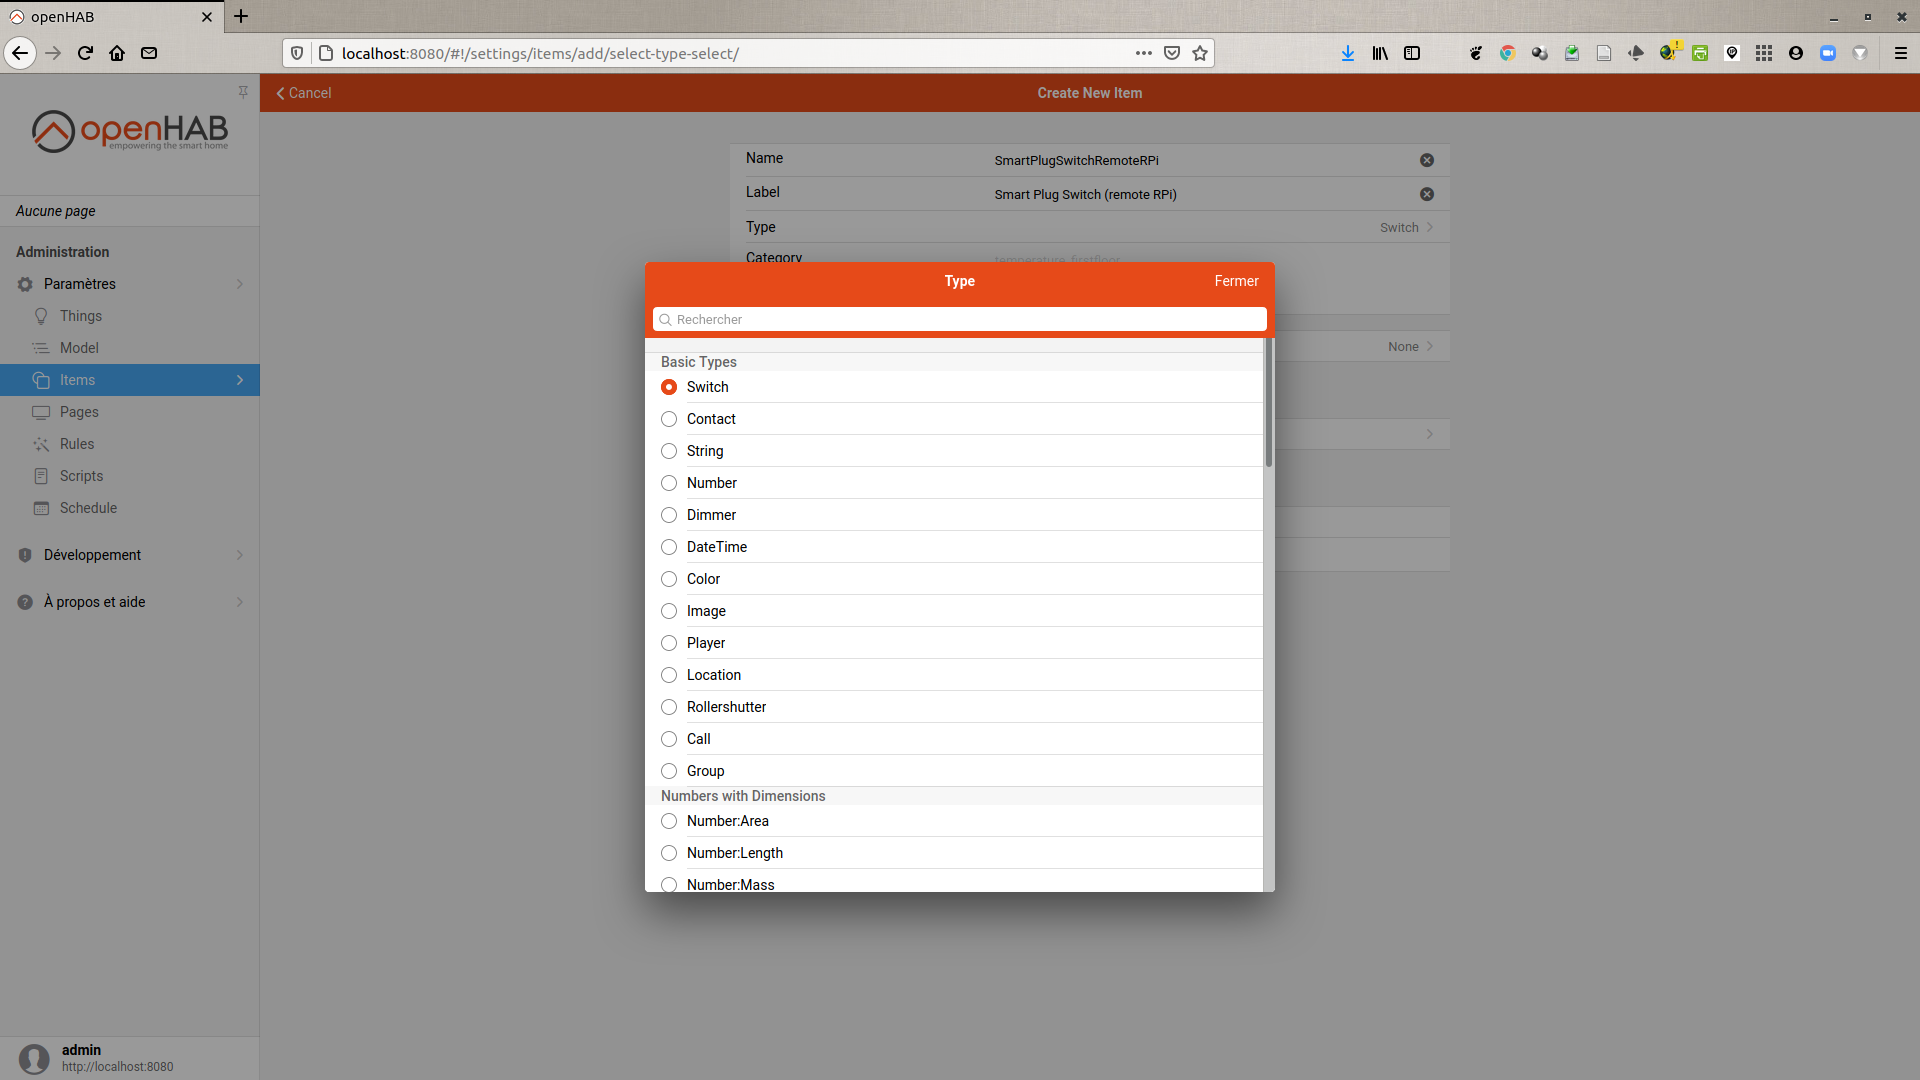
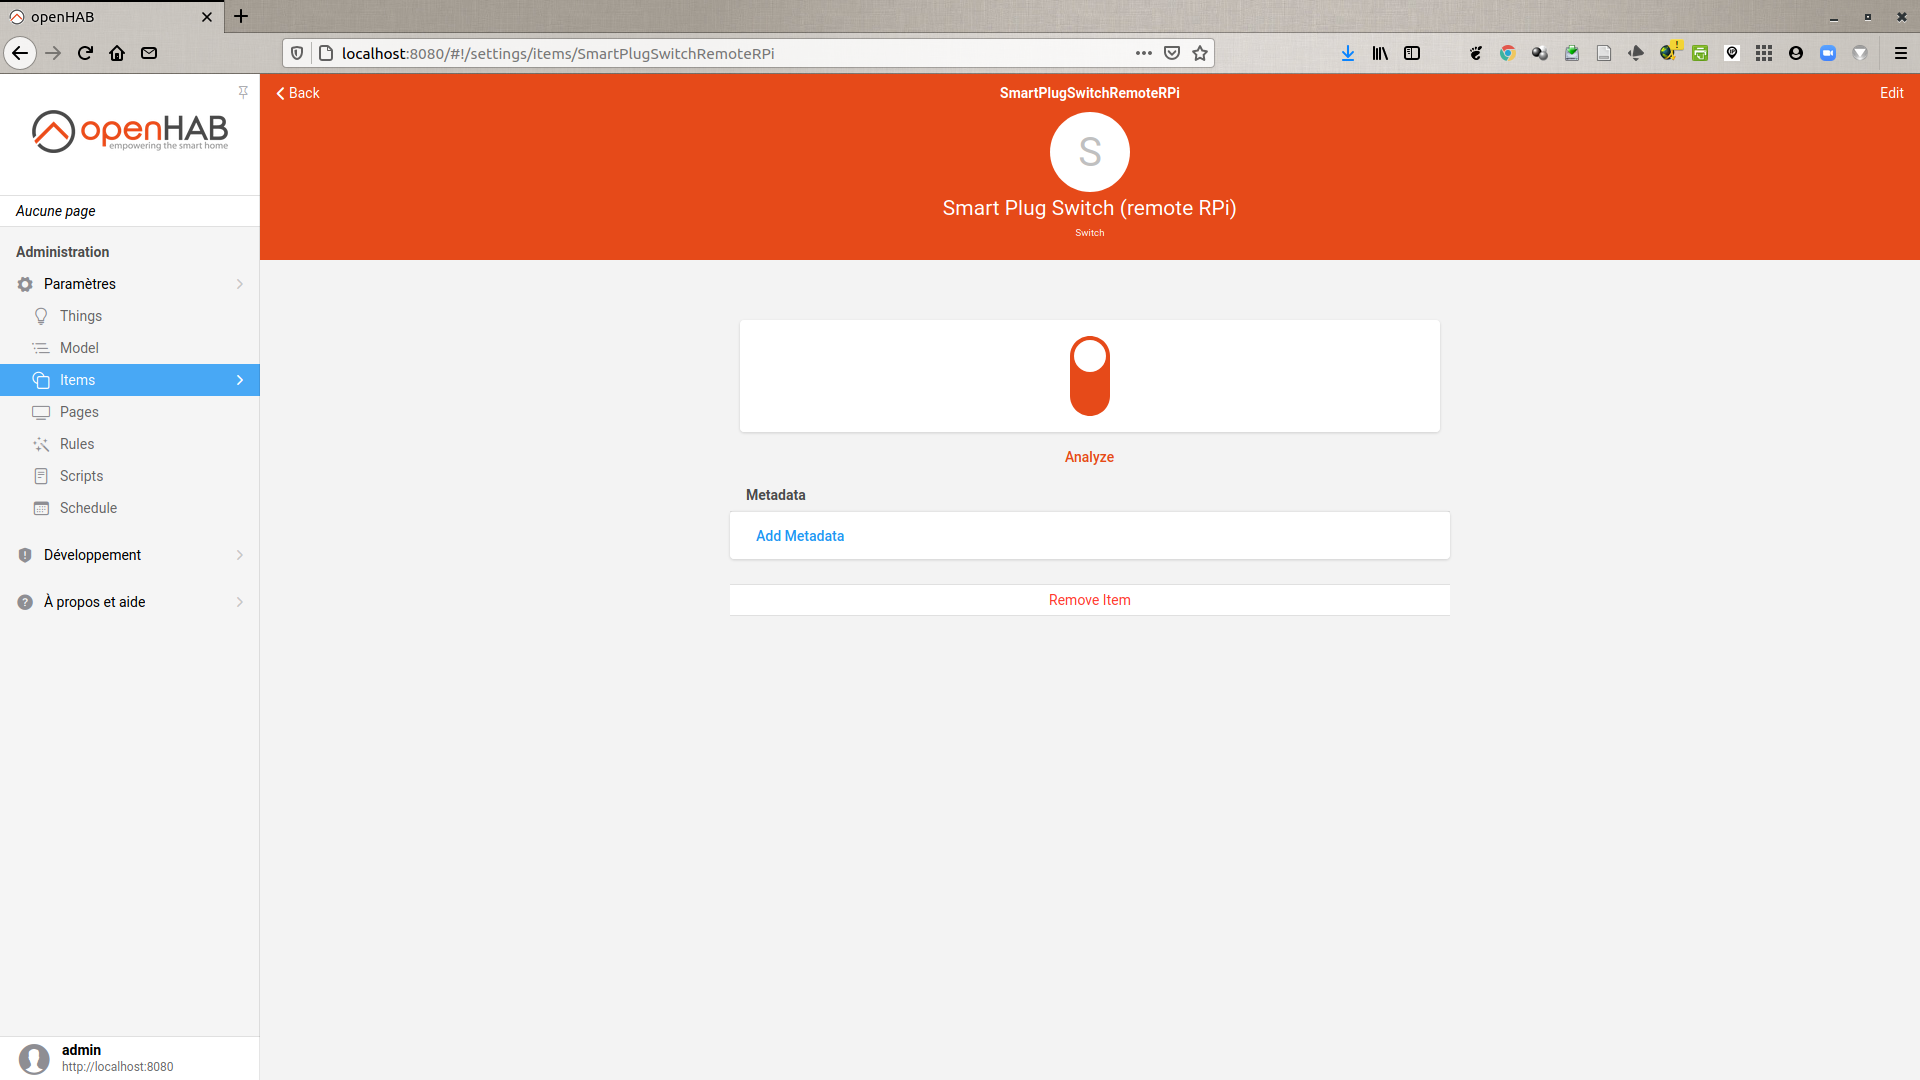
- Items → Blue « + » → Add Item → Name =
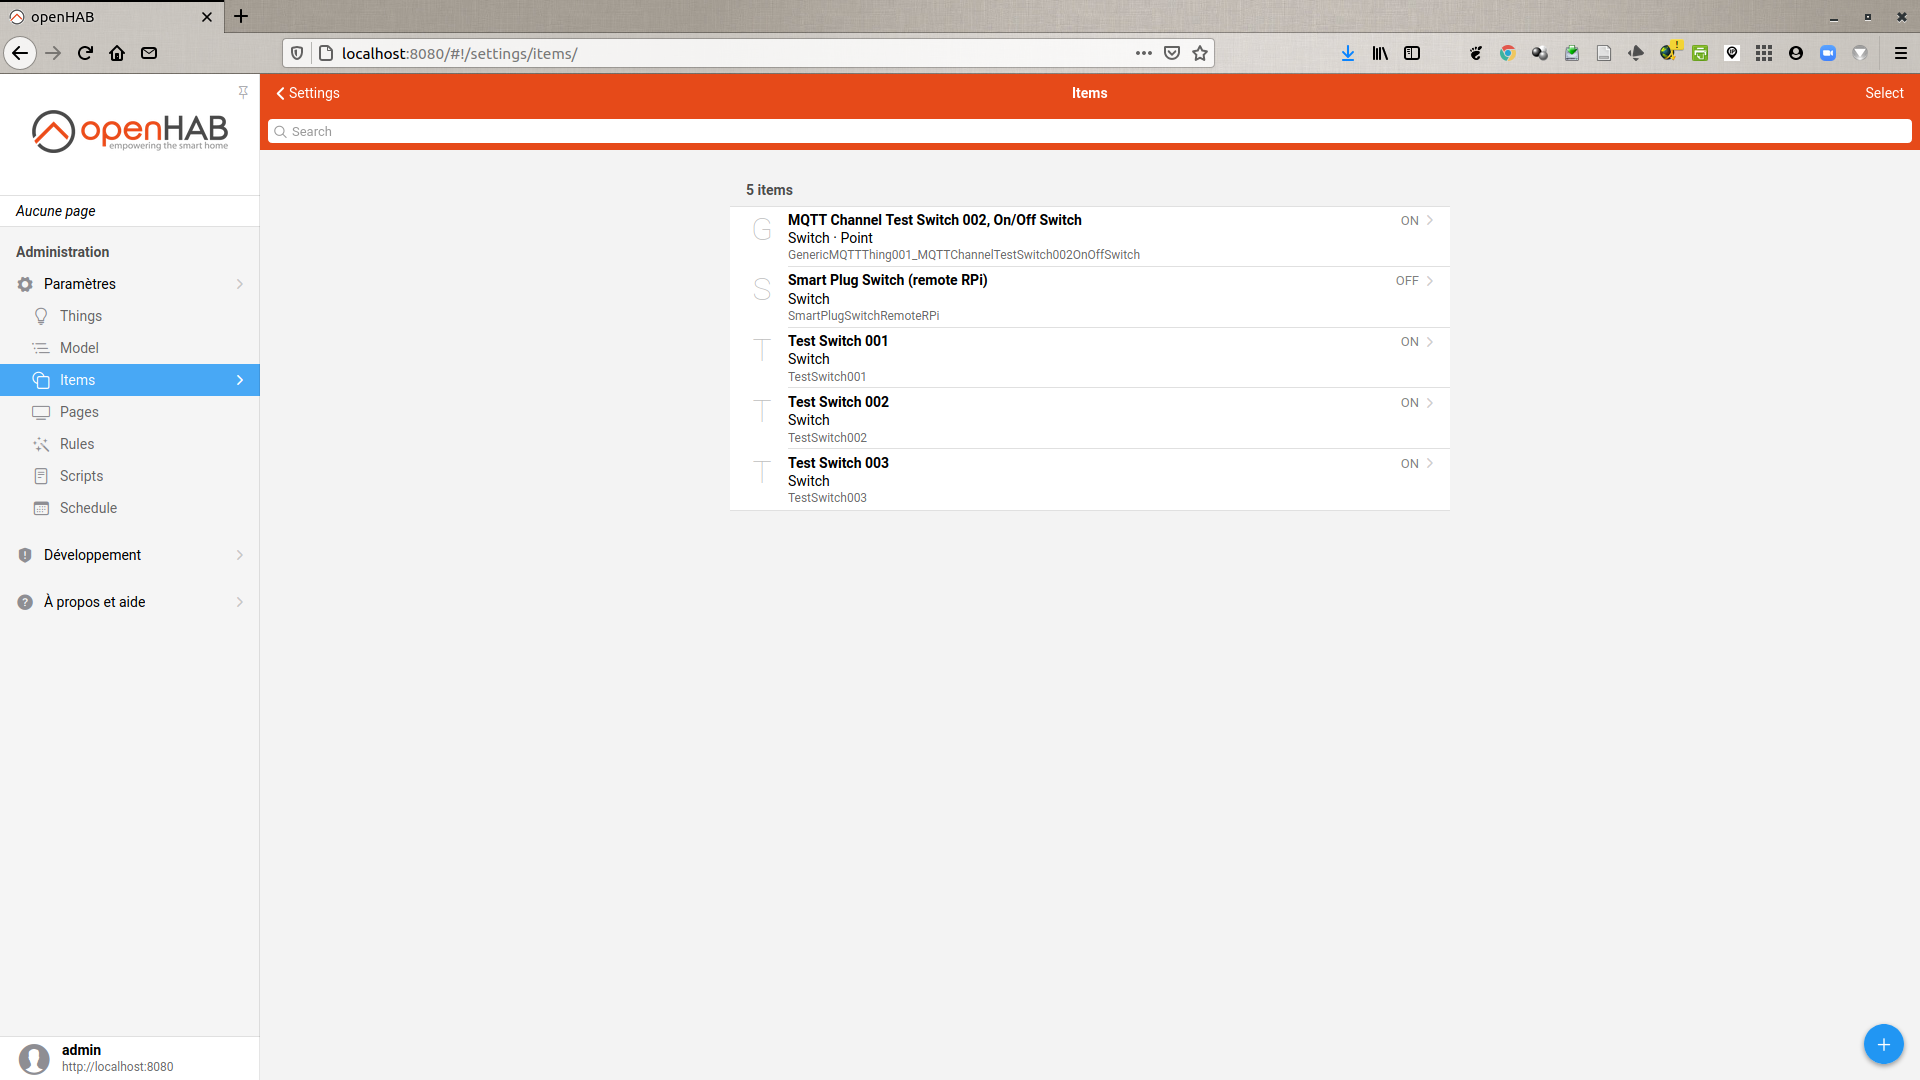
SmartPlugSwitchRemoteRPi, Label = « Smart Plug Switch (remote RPi) », Type =Switch→ Create - the new on/off switch is available in the interface under the Items tab

We then add a new rule that will publish the state of this switch (ON or OFF) on the smartplug topic each time the state of the SmartPlugSwitchRemoteRPi switch will be updated.
-
Rules → Blue « + » → Name = « Smart Plug Remote Switch Update »
-
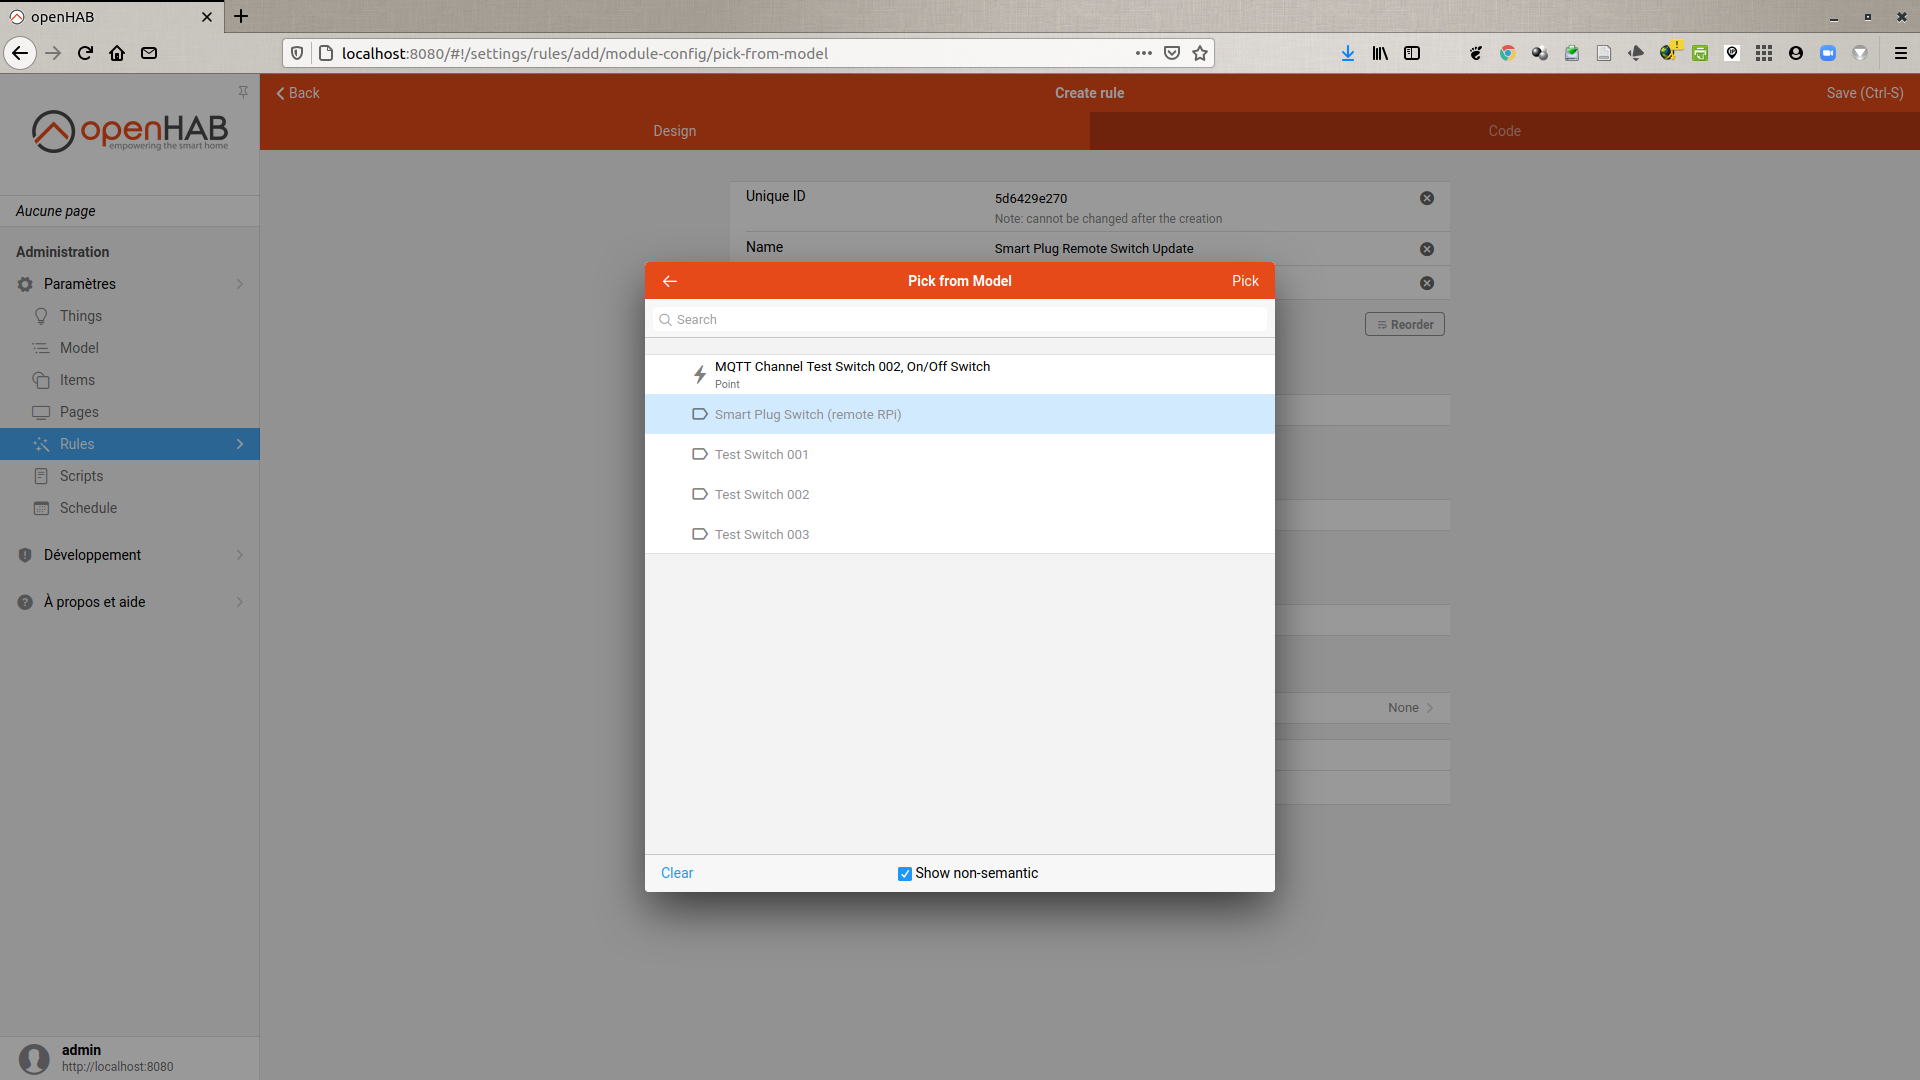
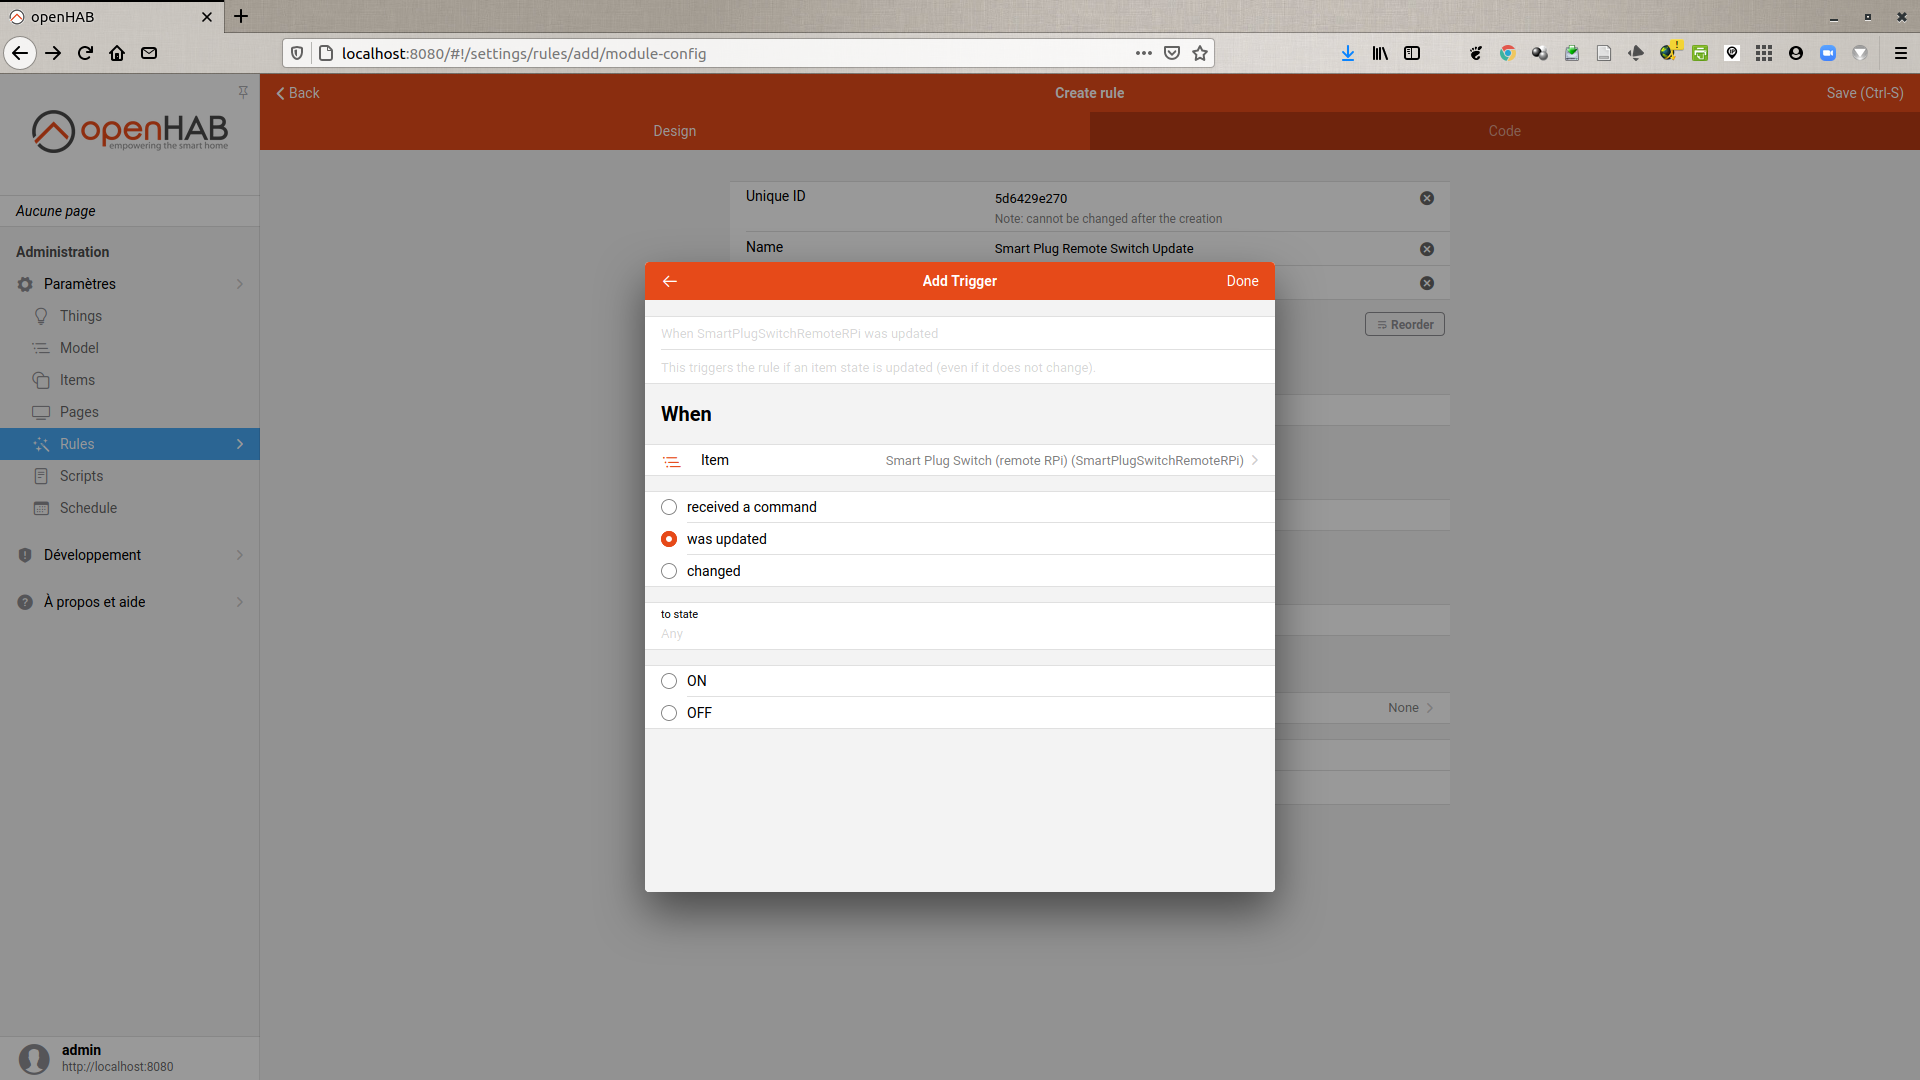
When → Add Trigger → Item Event → Show non-semantic →
Smart Plug Switch (remote RPi)→ Pick → was updated → Done -
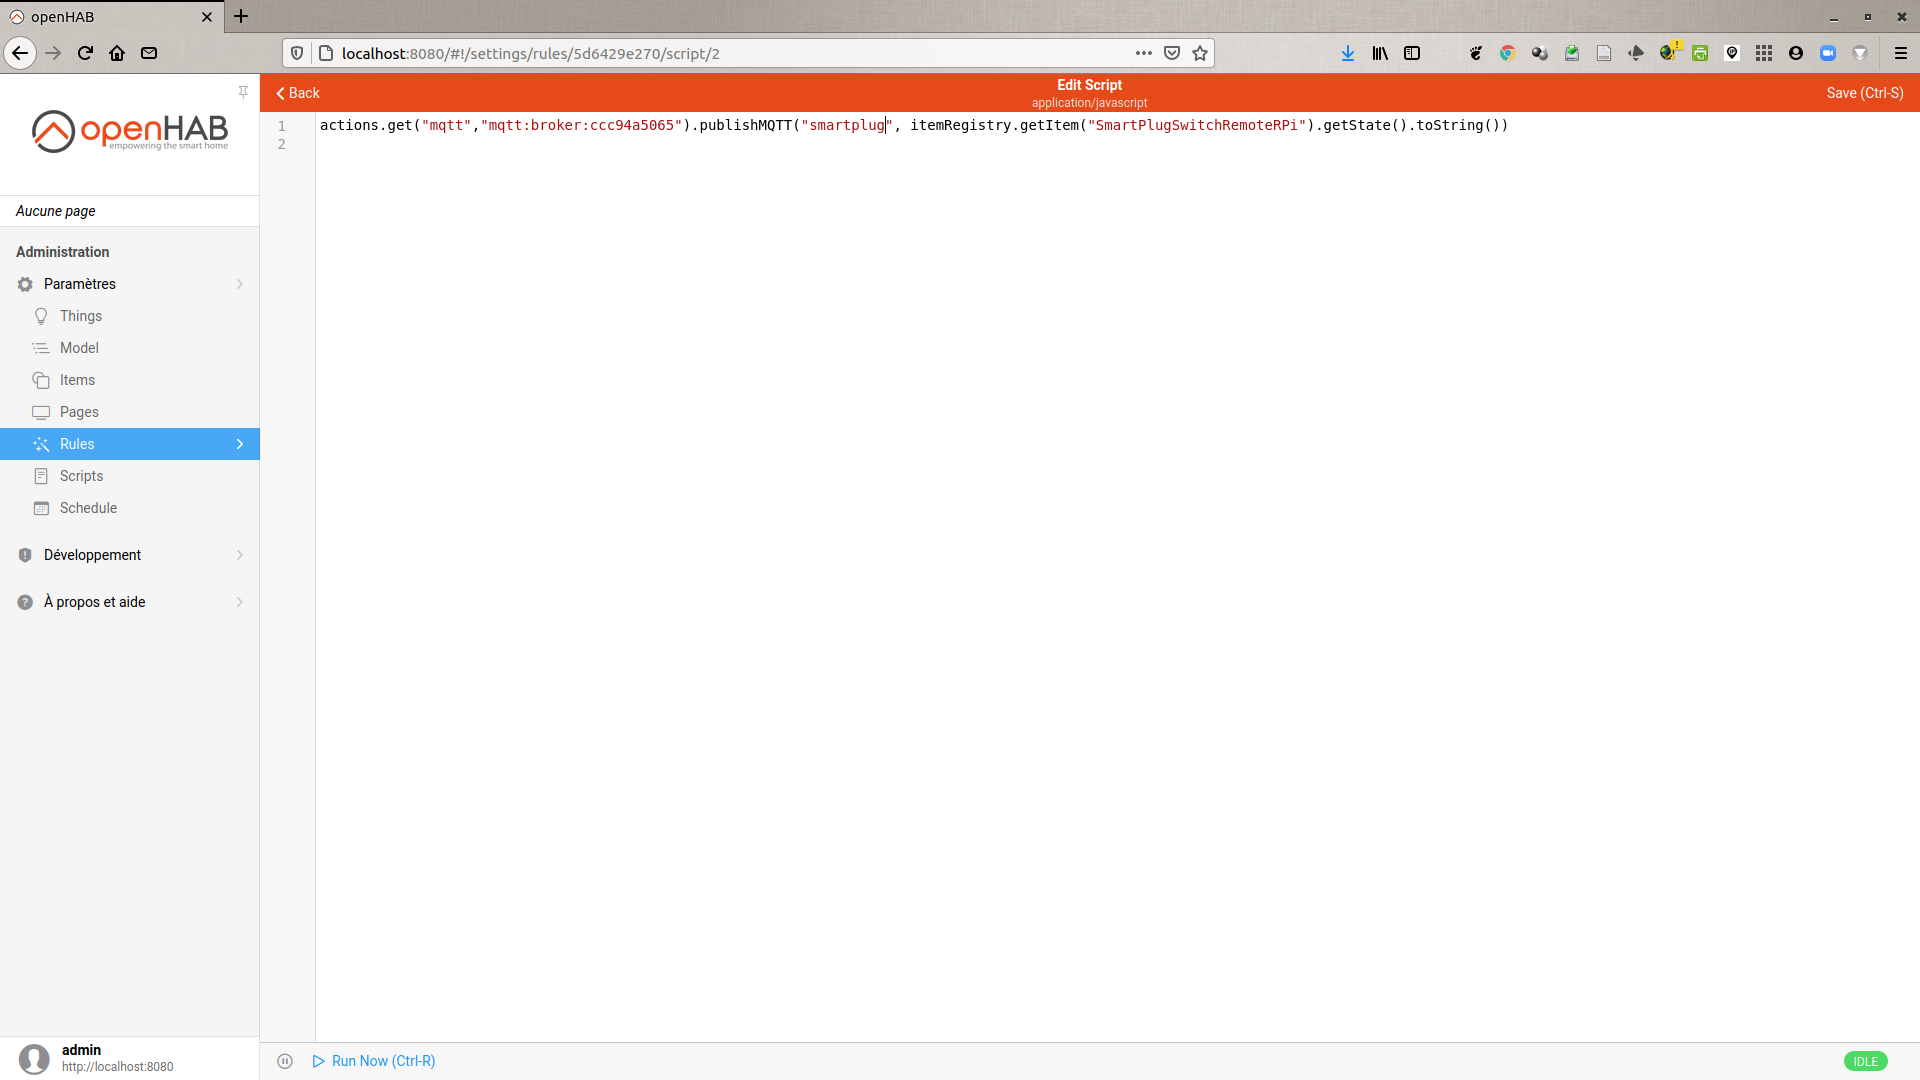
Then → Add Action → Run Script →
ECMAScriptactions.get("mqtt","mqtt:broker:ccc94a5065").publishMQTT("smartplug", itemRegistry.getItem("SmartPlugSwitchRemoteRPi").getState().toString()) -
Save…
We can then activate this switch Smart Plug Switch (remote RPi) on the OH3 of machine A (Ubuntu), which triggers the rule Smart Plug Remote Switch Update which publishes the state of this switch (ONor OFF) on the smartplug topic of the MQTT broker. On the OH3 of machine B (Raspberry Pi), the switch Smart Plug Switch (ZWaveNode...) receives the MQTT message and updates its status. If this is changed, the Smart Plug Changed rule is triggered to control the physical plug.
Note
These different experiments took place as part of a more global project where it was necessary to have a local MQTT broker on each machine. In order to be able to redirect the MQTT messages arriving on the smartplug topic of the broker of machine A to the (same topic smartplug of the) broker of machine B I wrote a Python script called mqtt_bridge.py which does the bridge between the 2 brokers. It is made up of 2 MQTT clients: 1 client who subscribes (MQTT subscribe) to the topic on the 1st broker, and 1 client who republishes (MQTT publish) the same message on the same topic of the 2nd broker.
NB: Using this script it is therefore quite possible to go through several MQTT brokers to route messages… ;-)
Conclusion
After multiple tests with openHAB, Z-Wave, MQTT, etc. here is the long awaited result: to have a Switch (on an instance of OH3) which sends MQTT messages containing ON / OFF on a given topic in order to remotely control a connected Z-Wave smart plug (on a second instance of OH3) configured to modify its state upon receipt of these MQTT messages. All with MQTT messages that can pass through several MQTT brokers before reaching their destination.
For any comments or suggestions, do not hesitate to contact me on manuel.munier@univ-pau.fr.