openHAB 3.0 - how to access to item state from JavaScript
In a previous tutorial (openHAB 3.0 - how to create a switch that publishes its state via MQTT messages) I showed you how it was possible to publish an MQTT message each time a switch item is activated under openHAB. For this, I had defined 2 rules: one on the received a command ON event, the other on the received a command OFF event. When they were triggered, these rules each executed a script written in JavaScript (ECMAScript type), which sent an MQTT message whose content was hard coded: ON or OFF. The goal of today’s totorial is to (re)do the same thing… but with one rule.
As for my previous tutorials, the different steps were carried out via the openHAB3 graphical interface. The use of text-based configuration files… will be studied later…
How to get item state in openHAB
We are therefore going to create a single rule that will be triggered at each change of state of our switch. As stated on this post How to Create Rules in OpenHAB 3 using JavaScript / ECMAScript, the JavaScript associated with this rule will use the itemRegistry.getItem(<ItemId>).getState() function to retrieve the state of the item.
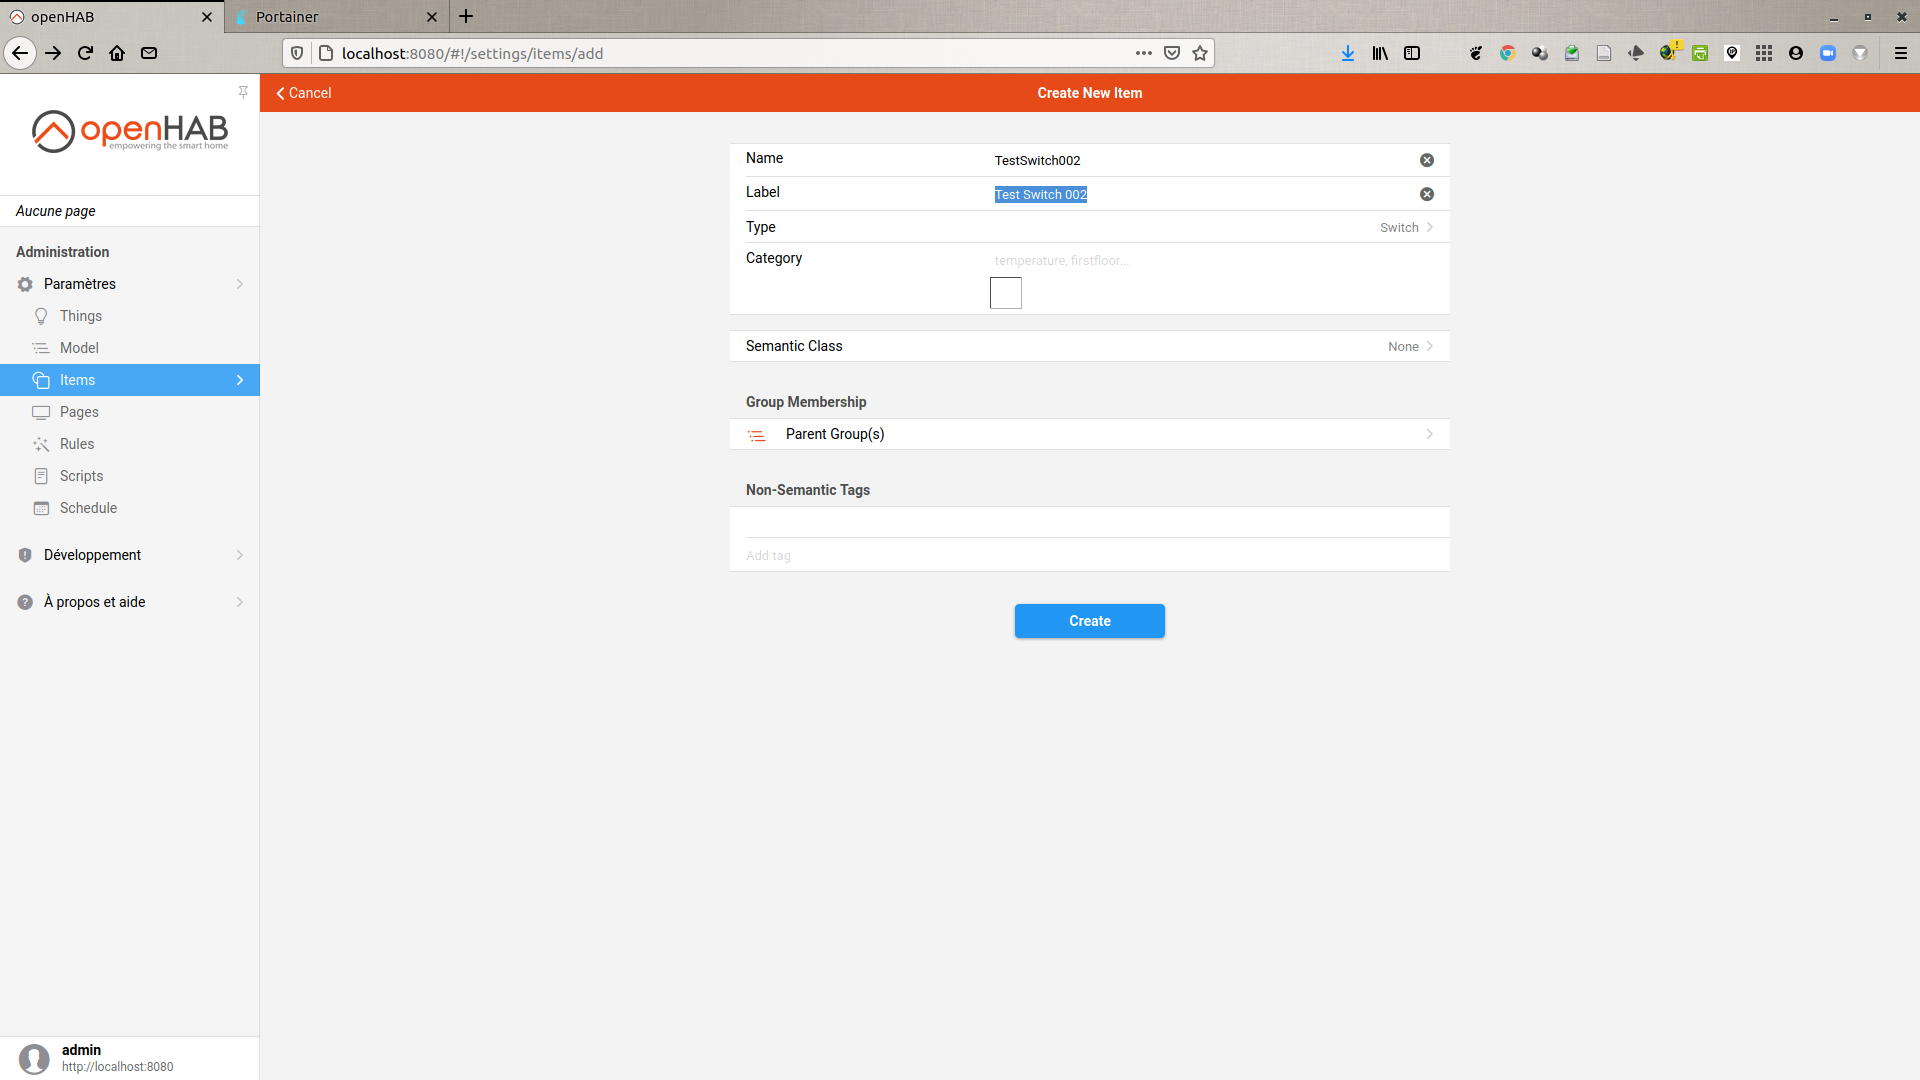
- create a switch named
TestSwitch002

-
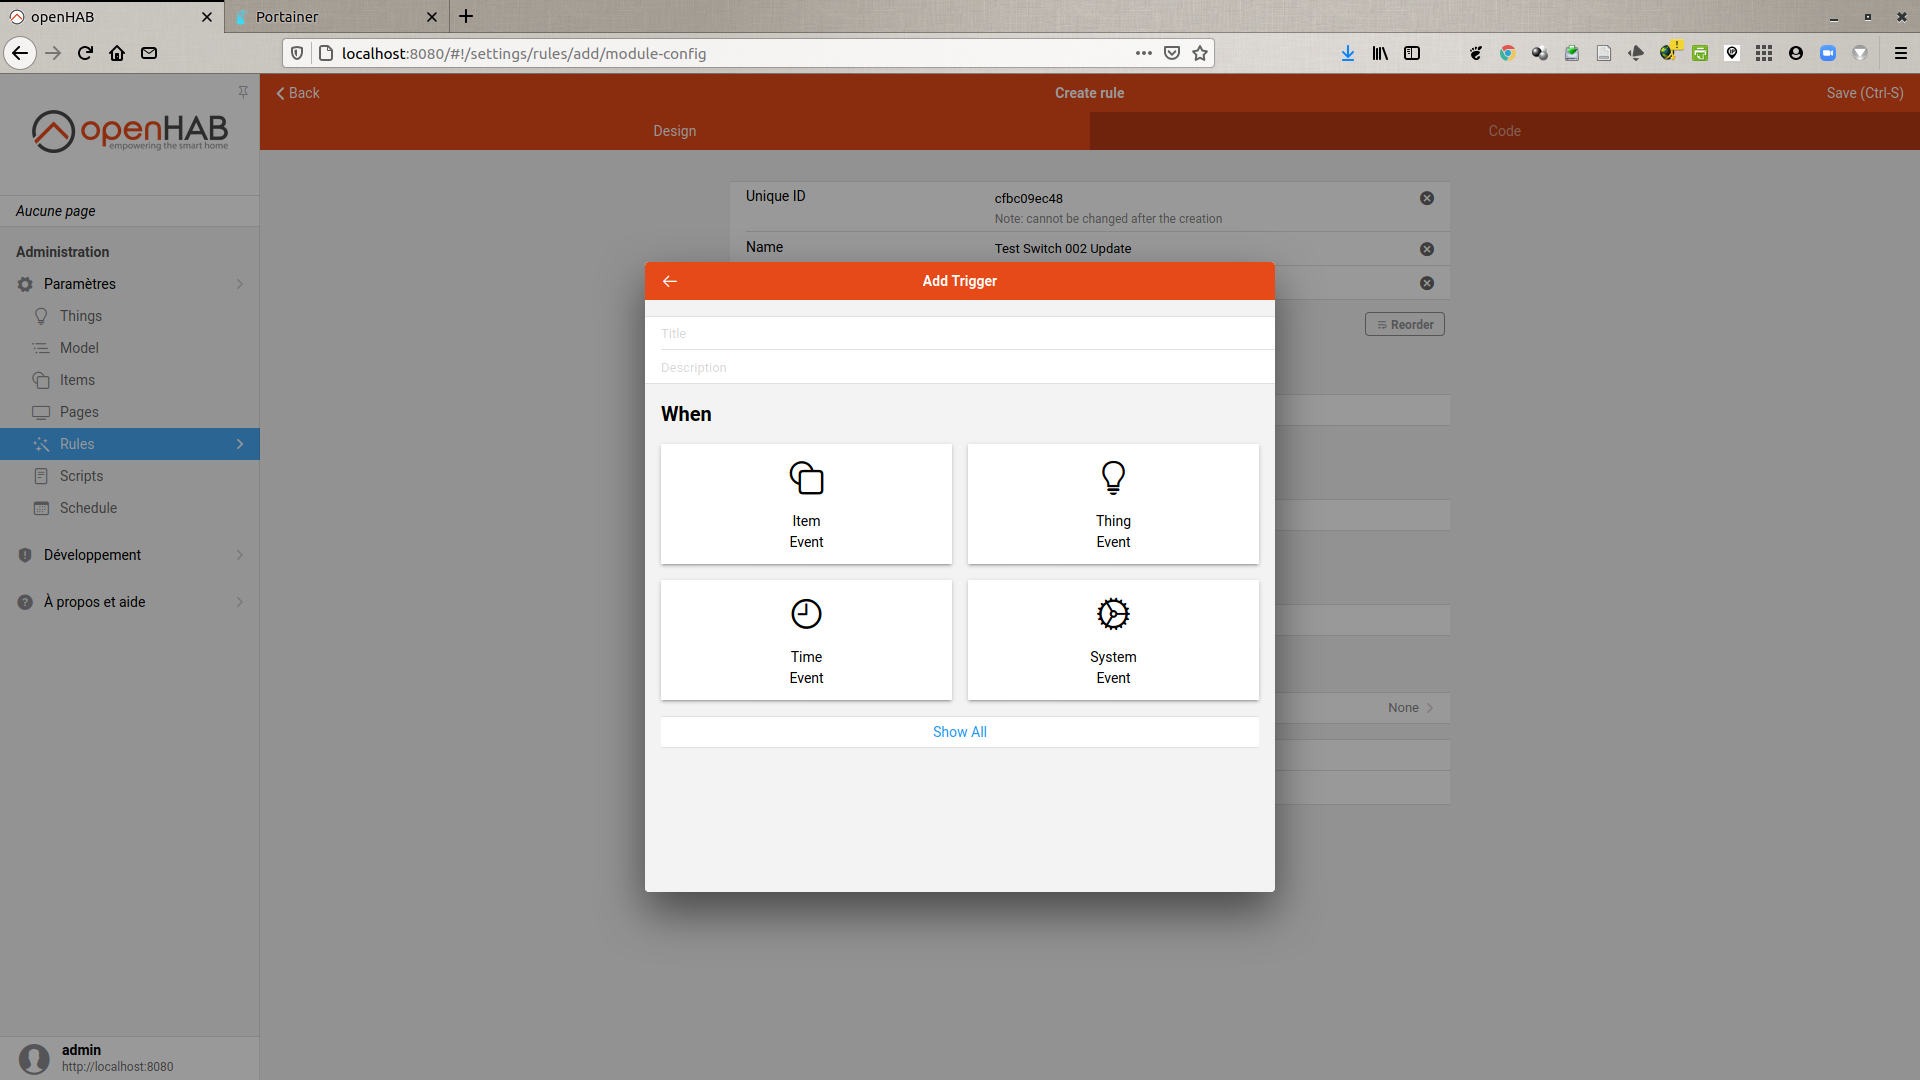
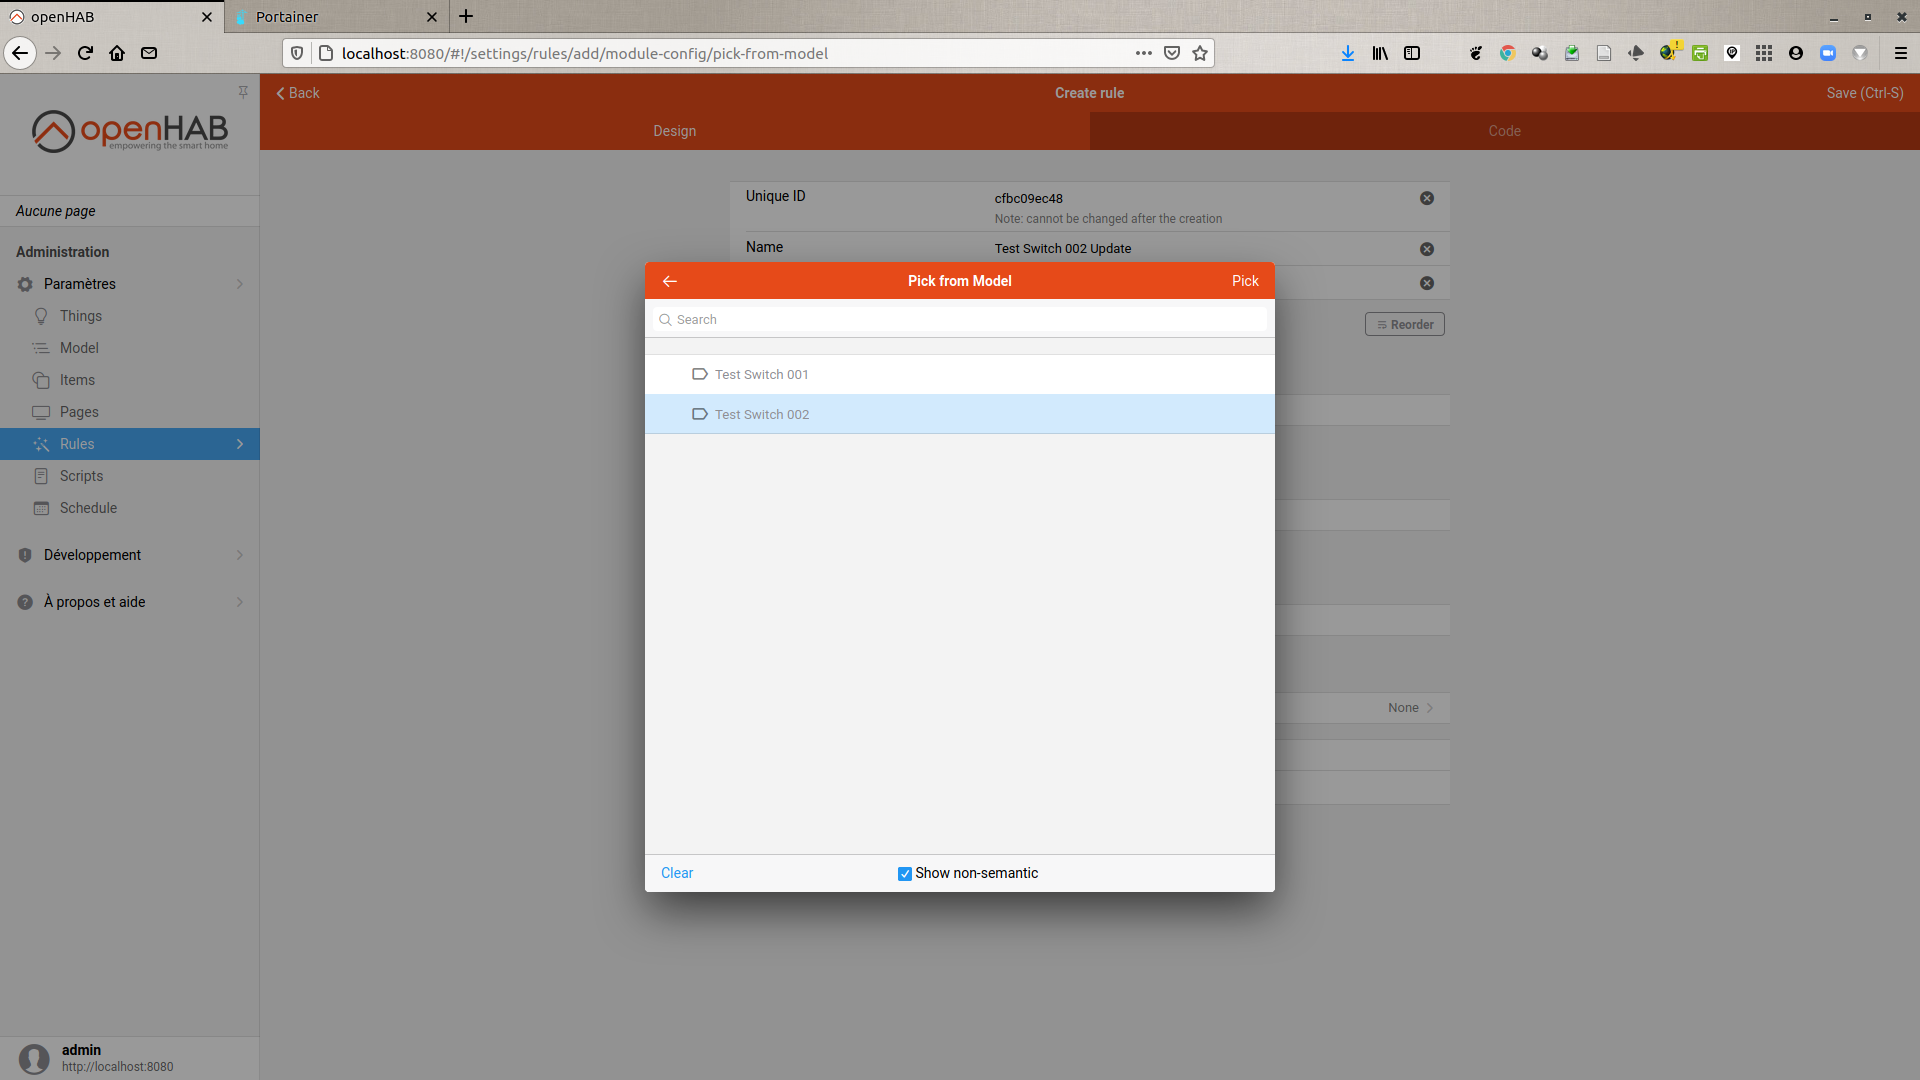
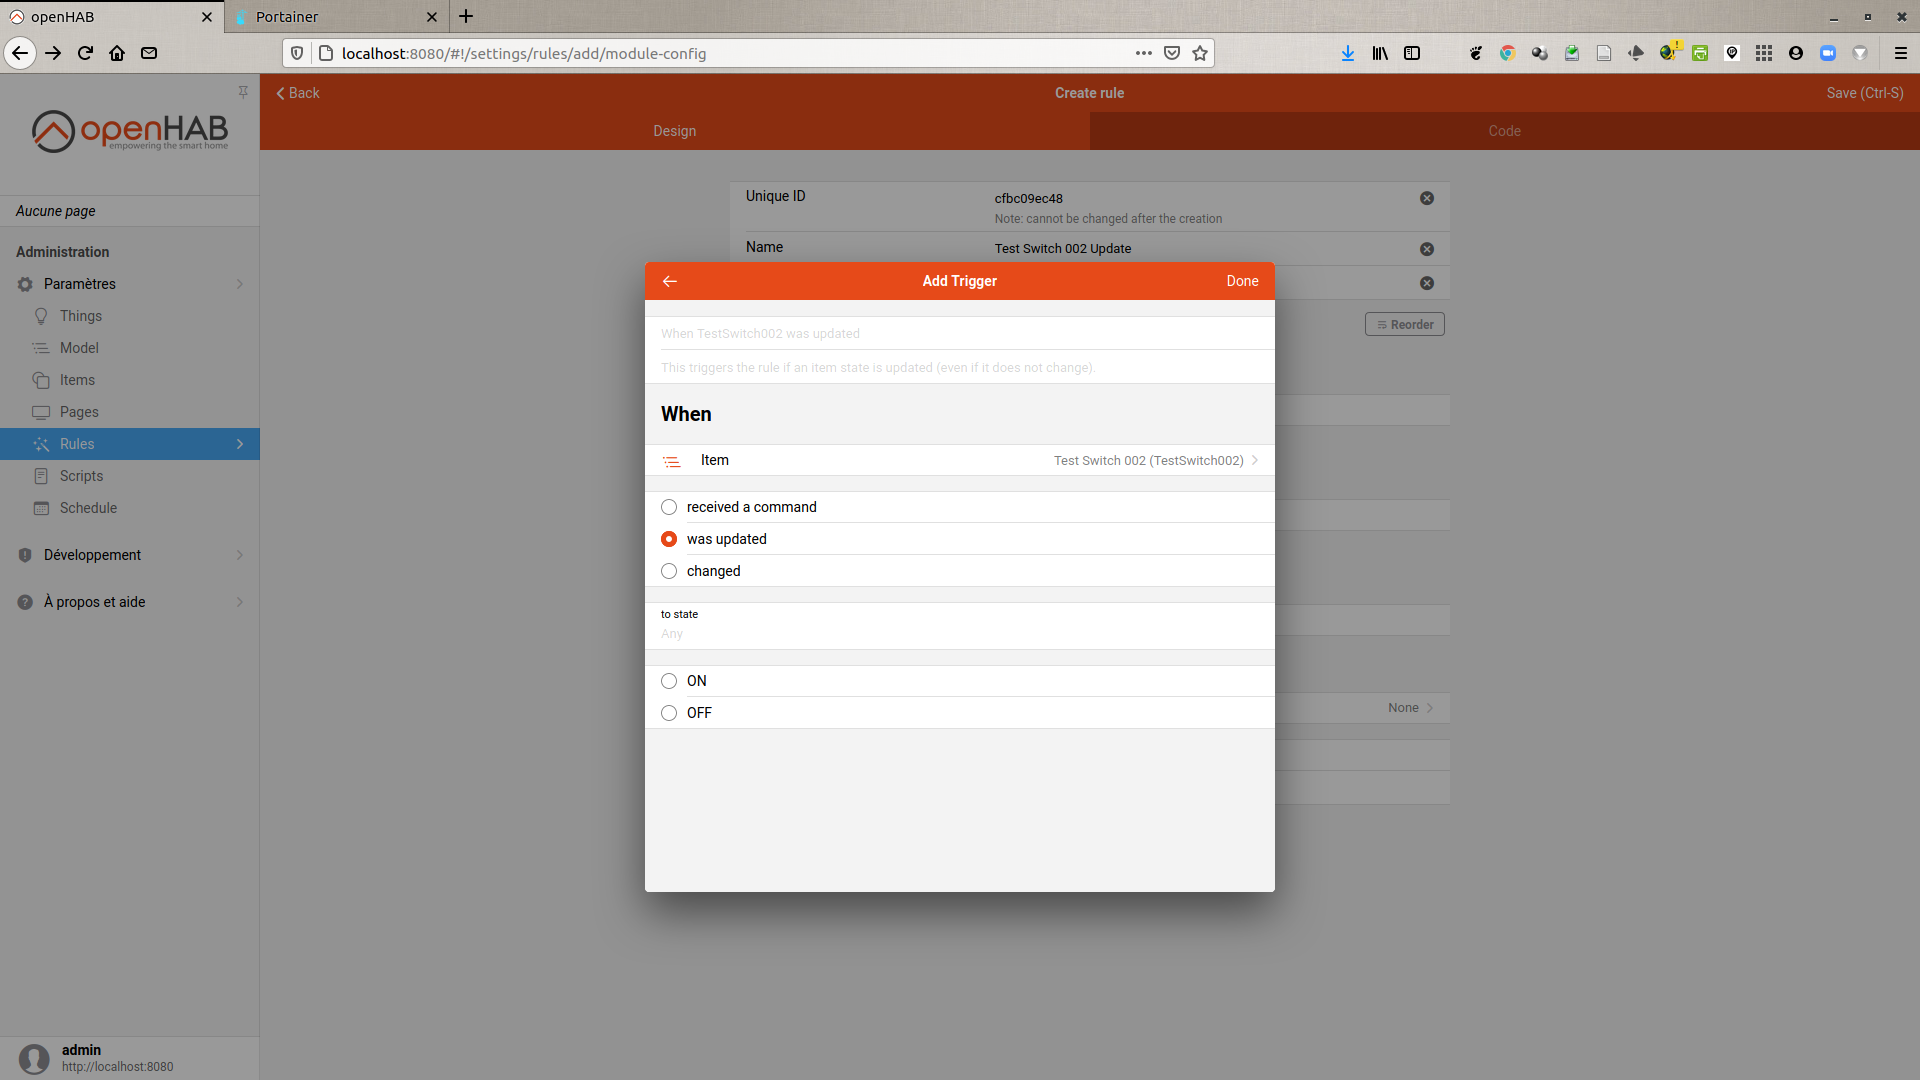
create a single rule on the
was updatedevent with the following JavaScript (ECMAScript):actions.get("mqtt","mqtt:broker:ccc94a5065").publishMQTT("testswitch002", itemRegistry.getItem("TestSwitch002").getState().toString())
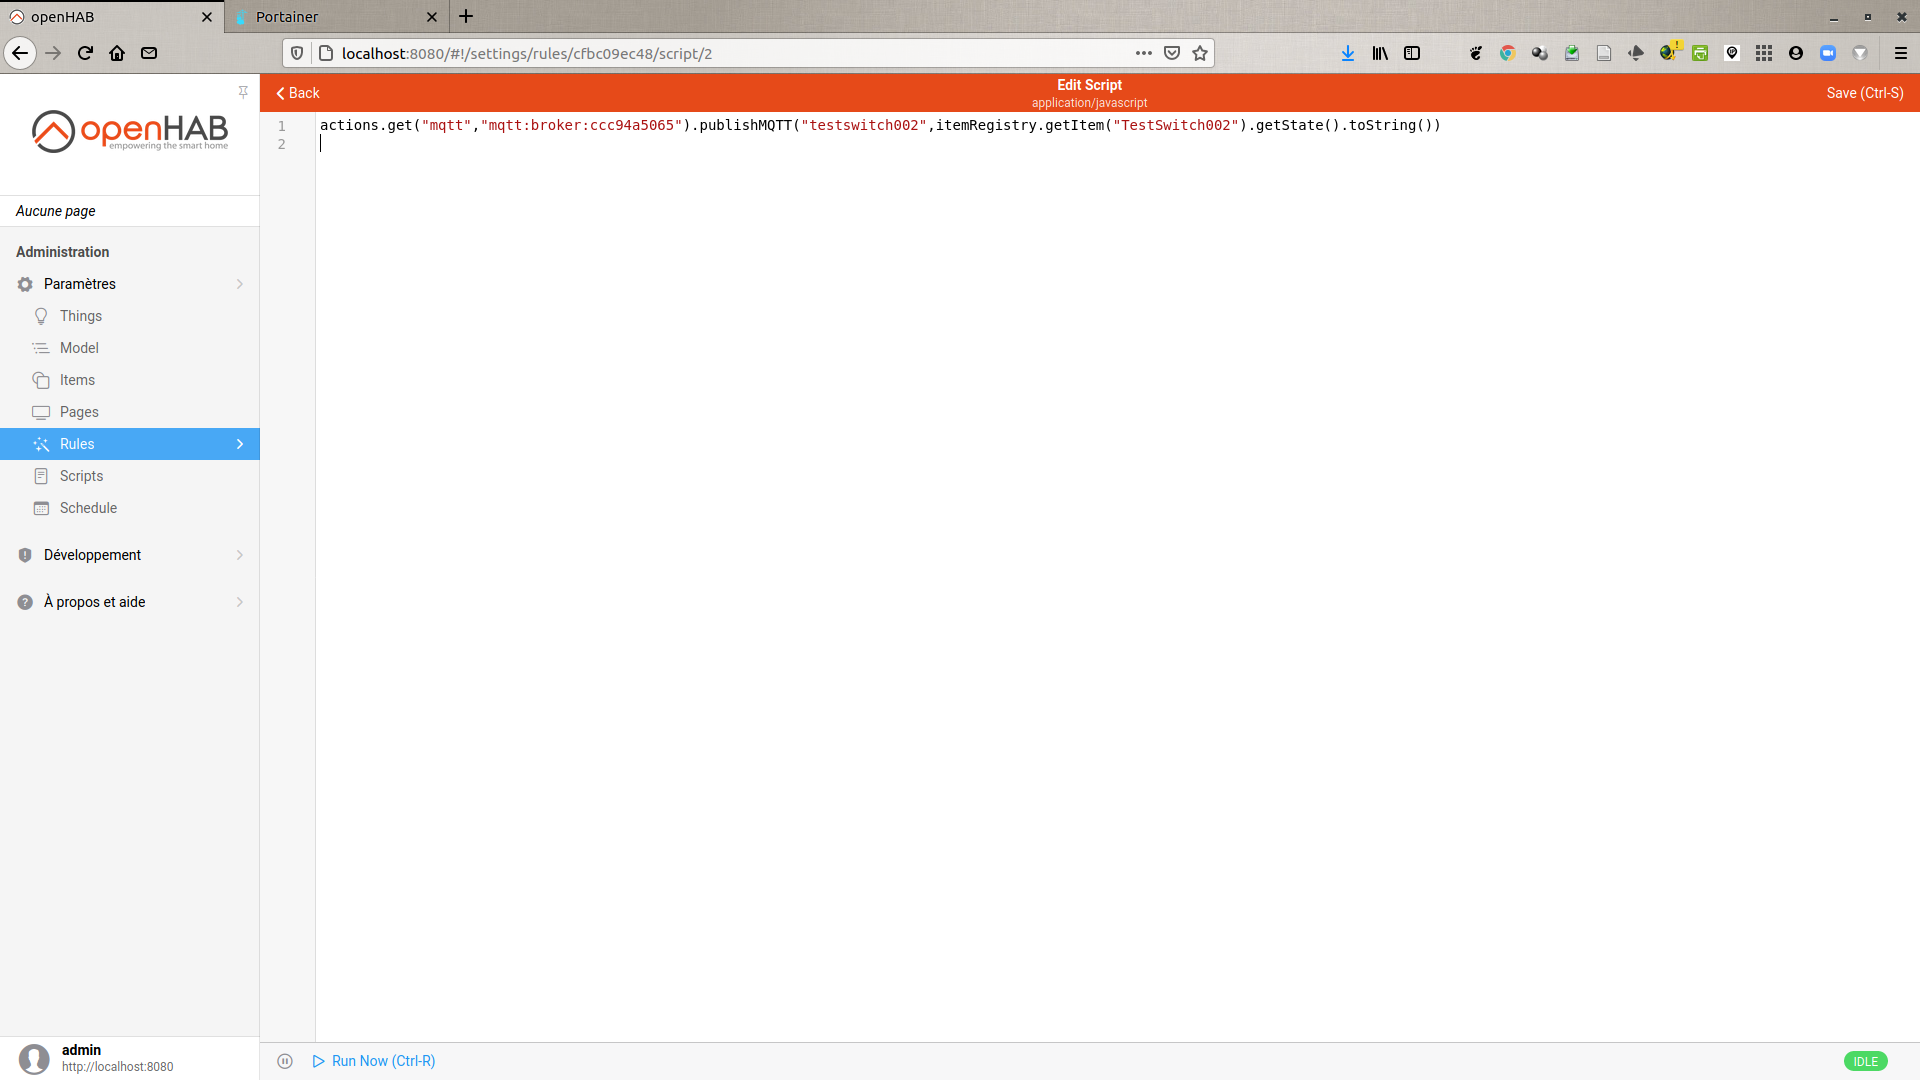
- we get the state of the item
TestSwitch002via the instructionitemRegistry.getItem("TestSwitch002").getState()then we convert it to String to build the MQTT message → it is no longer necessary to have a script for each state

We then use MQTT Explorer (for example) connected to our MQTT broker to see the messages. In Items → Test Switch 002 you can activate the switch which triggers the sending of MQTT messages !
Update the item state in openHAB
In the second part of this tutorial I show you how to modify the state of an item (here a switch) from a JavaScript (triggered by a rule). I use the events.sendCommand(<ItemId>,<NewState>) function for this.
-
create a switch named
TestSwitch003 -
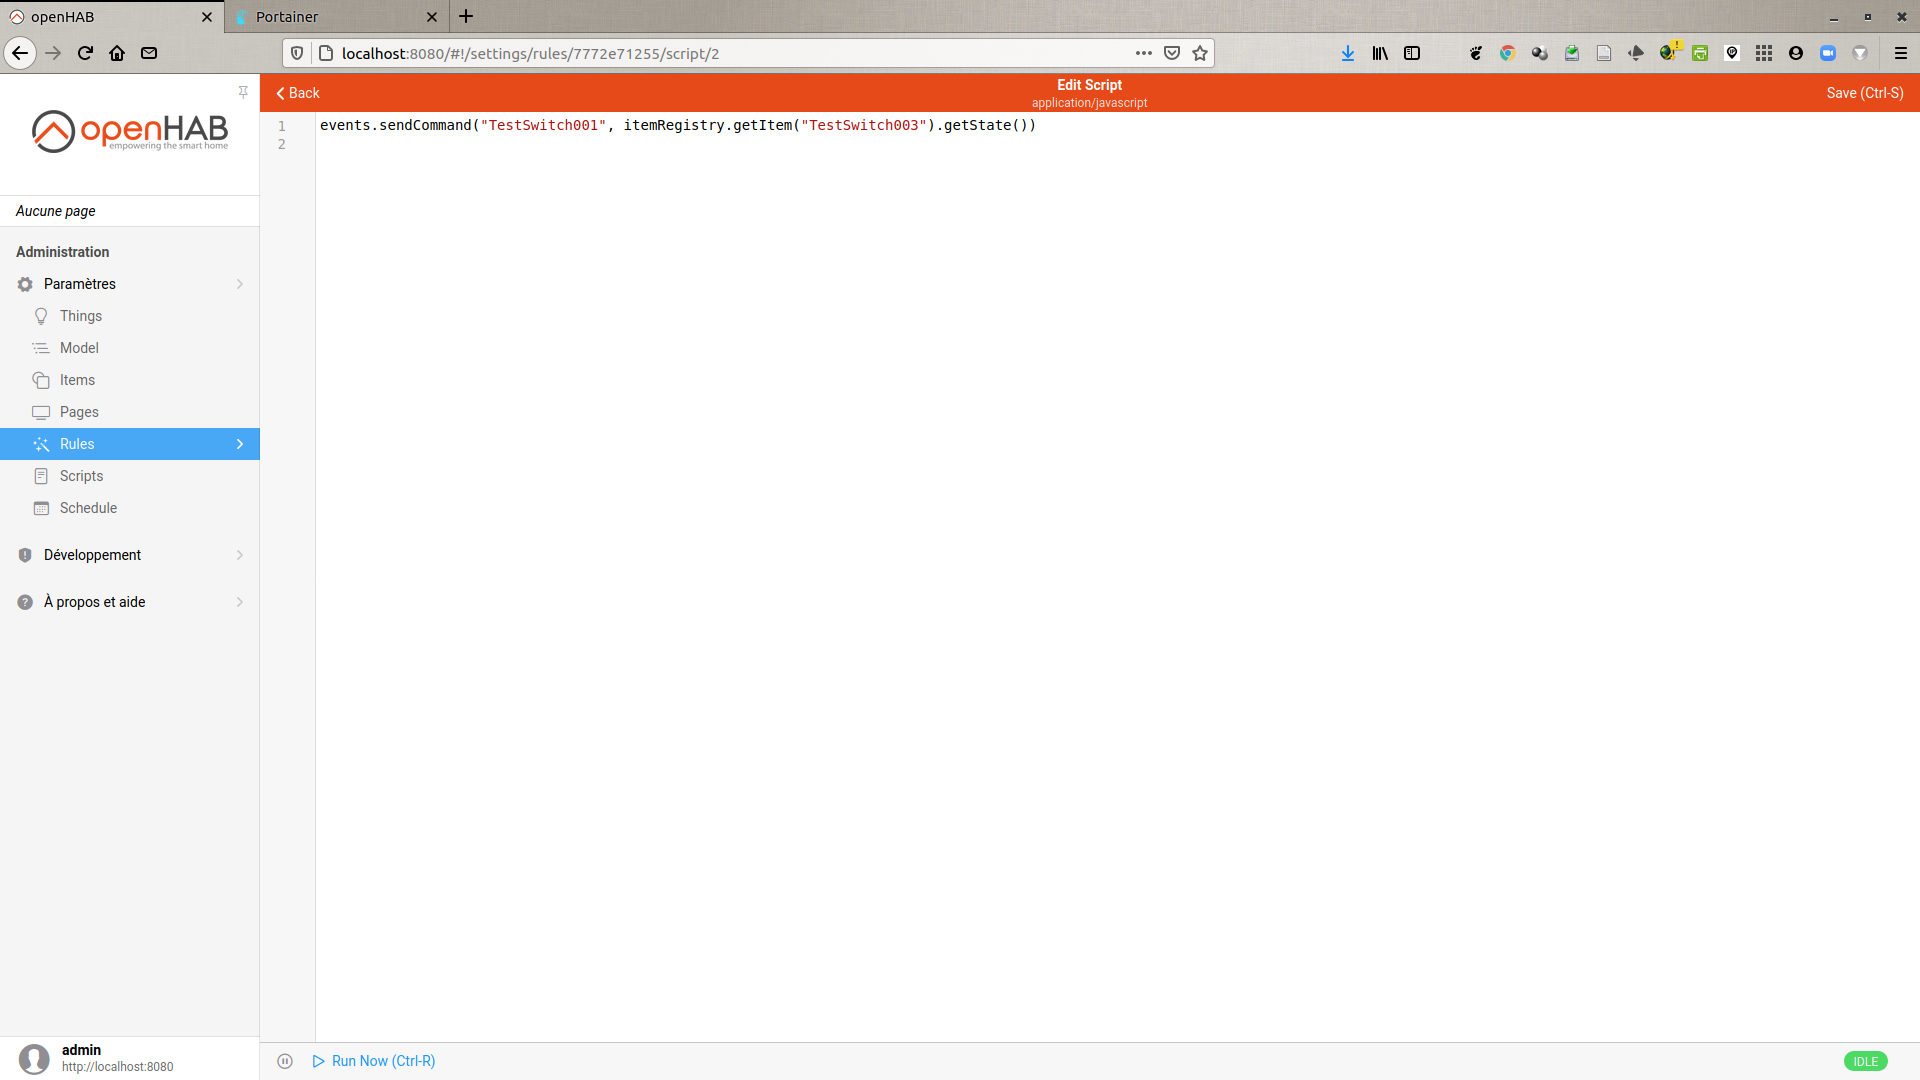
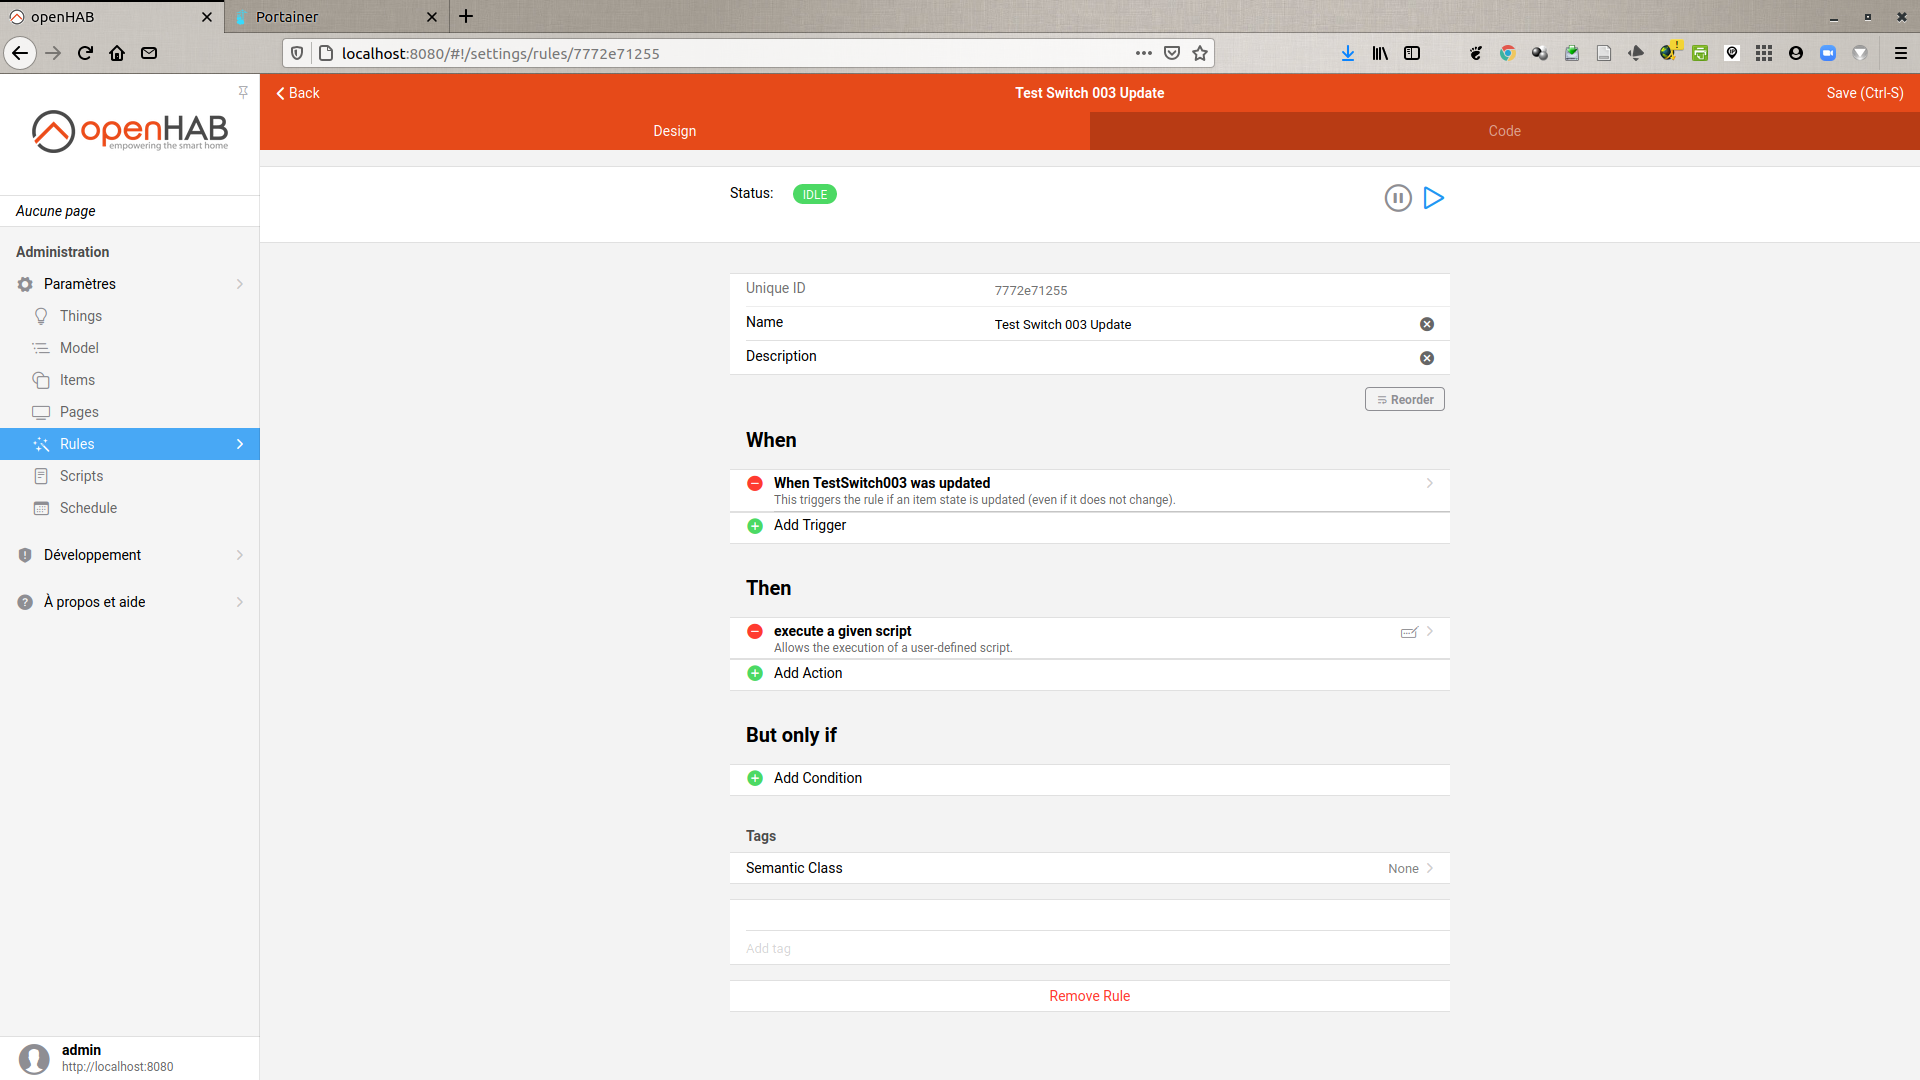
create a single rule on the
was updatedevent with the following JavaScript (ECMAScript) to “copy” the state of theTestSwitch003item to theTestSwitch001item:events.sendCommand("TestSwitch001", itemRegistry.getItem("TestSwitch003").getState())
- thus, by activating
TestSwitch003, it changes the state ofTestSwitch001, which sends an MQTT message each time it receives a command (see tutorial openHAB 3.0 - how to create a switch that publishes its state via MQTT messages for example)
Conclusion
Another feedback on openHAB 3.0, this time with JavaScript instructions to get and modify the status of an item. If it can be of use to other people, it will be with pleasure. If you have any comments or suggestions, don’t hesitate to contact me on manuel.munier@univ-pau.fr.
Next step:
- on an openHAB instance have a switch that sends MQTT messages, which will be received on another openHAB instance to modify the state of an item…